

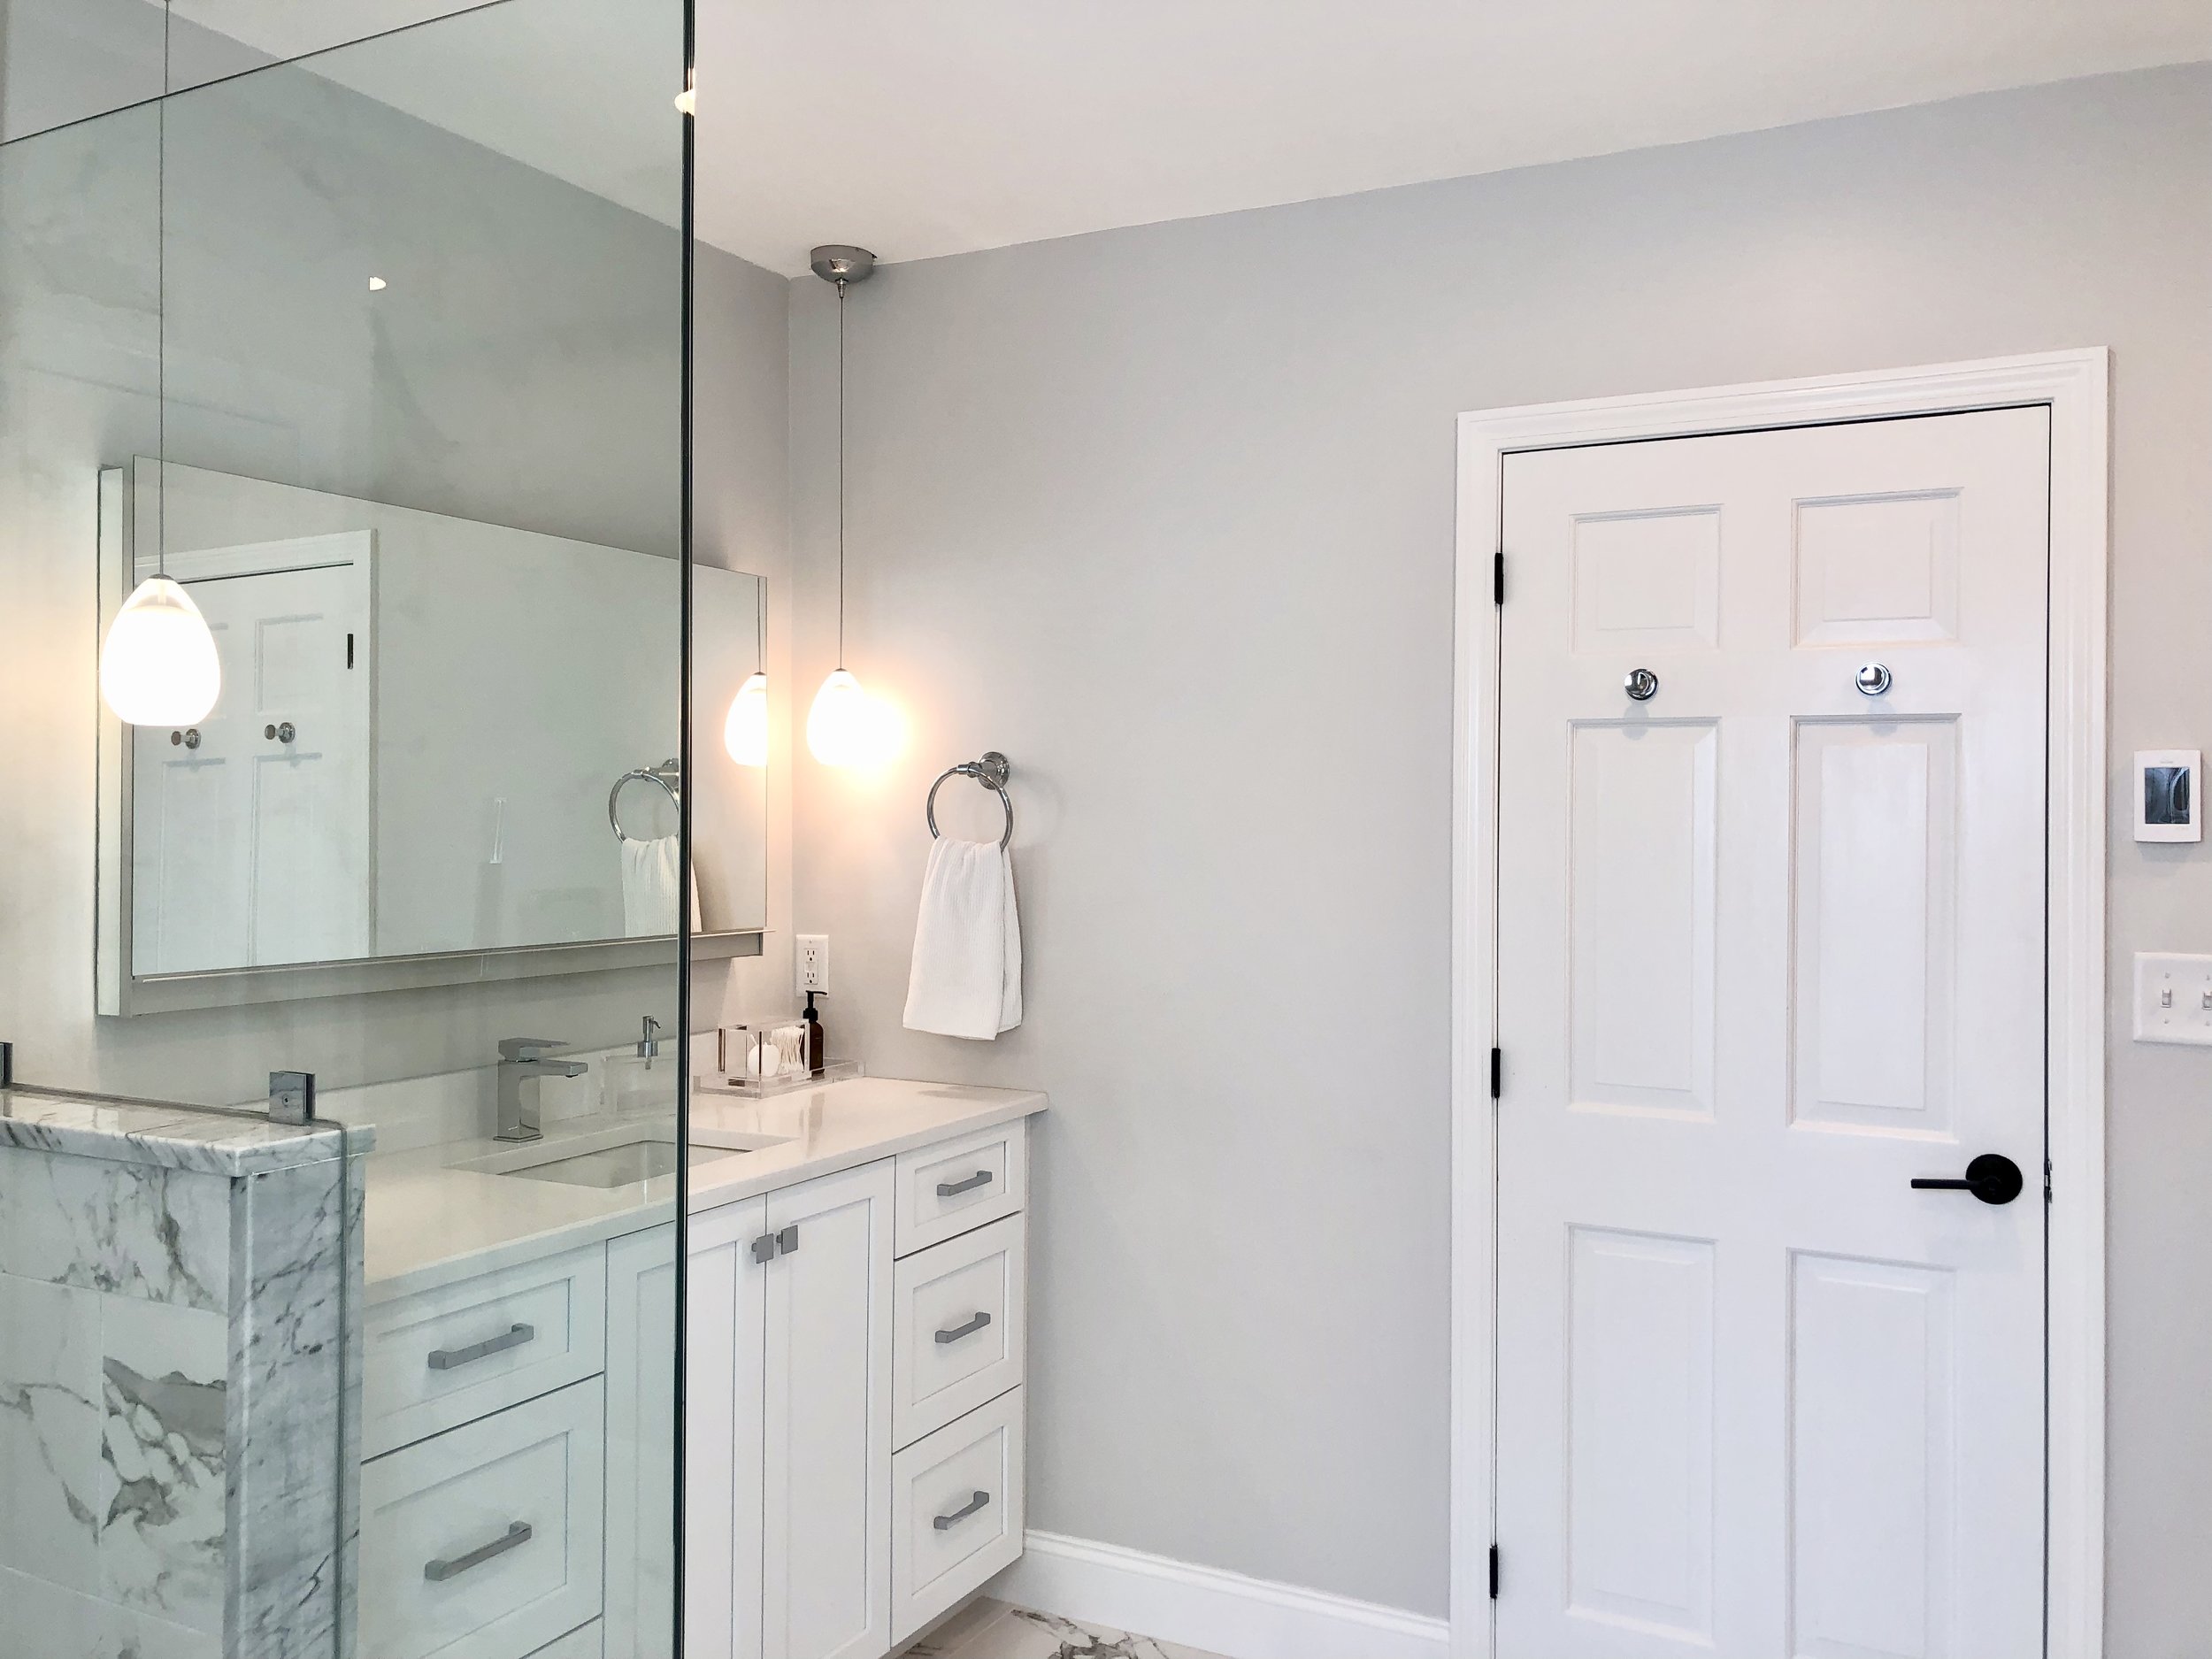
Master Bathroom Renovation
I envisioned this dream bathroom of mine from the very moment I walked into the house with our realtor. The unique combination of the bathroom's large footprint and its outdated design sparked my imagination, making it easy for me to visualize the incredible potential hidden within its walls. The possibilities seemed endless, and the prospect of transforming this space into my dream sanctuary fueled my passion for the entire home renovation project.
Below are the phases of my design as well as before and after pictures…enjoy!
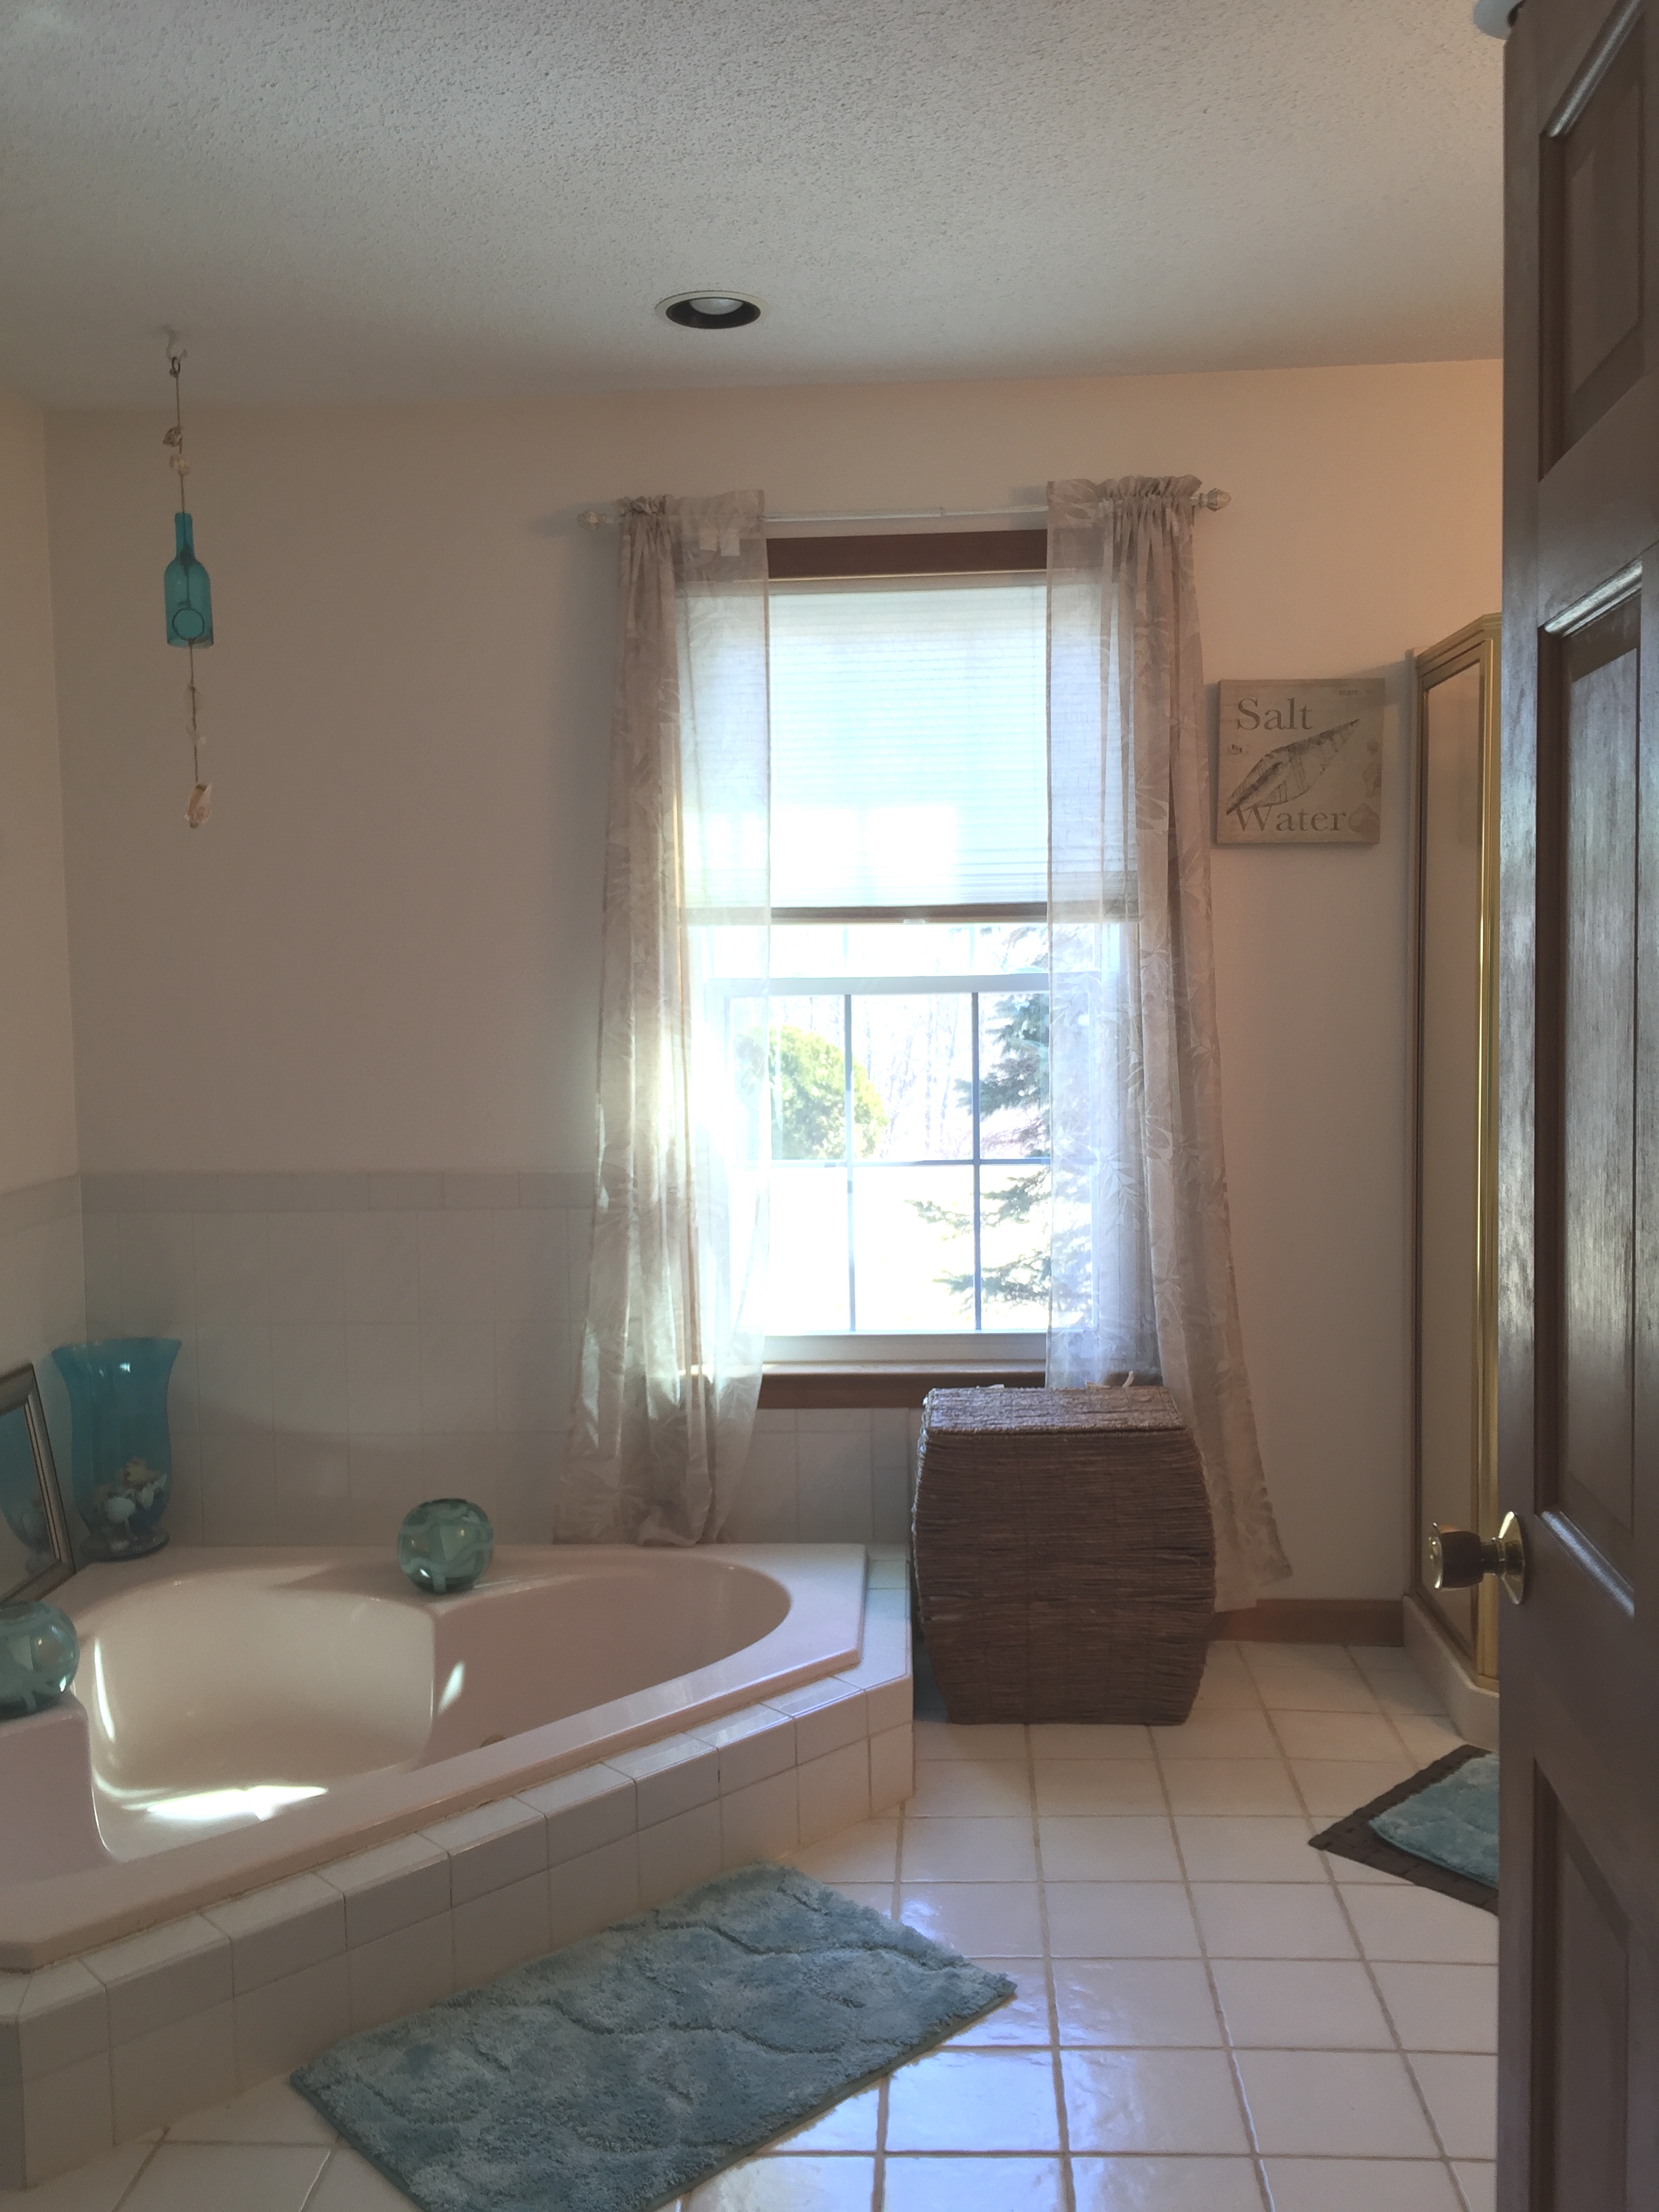
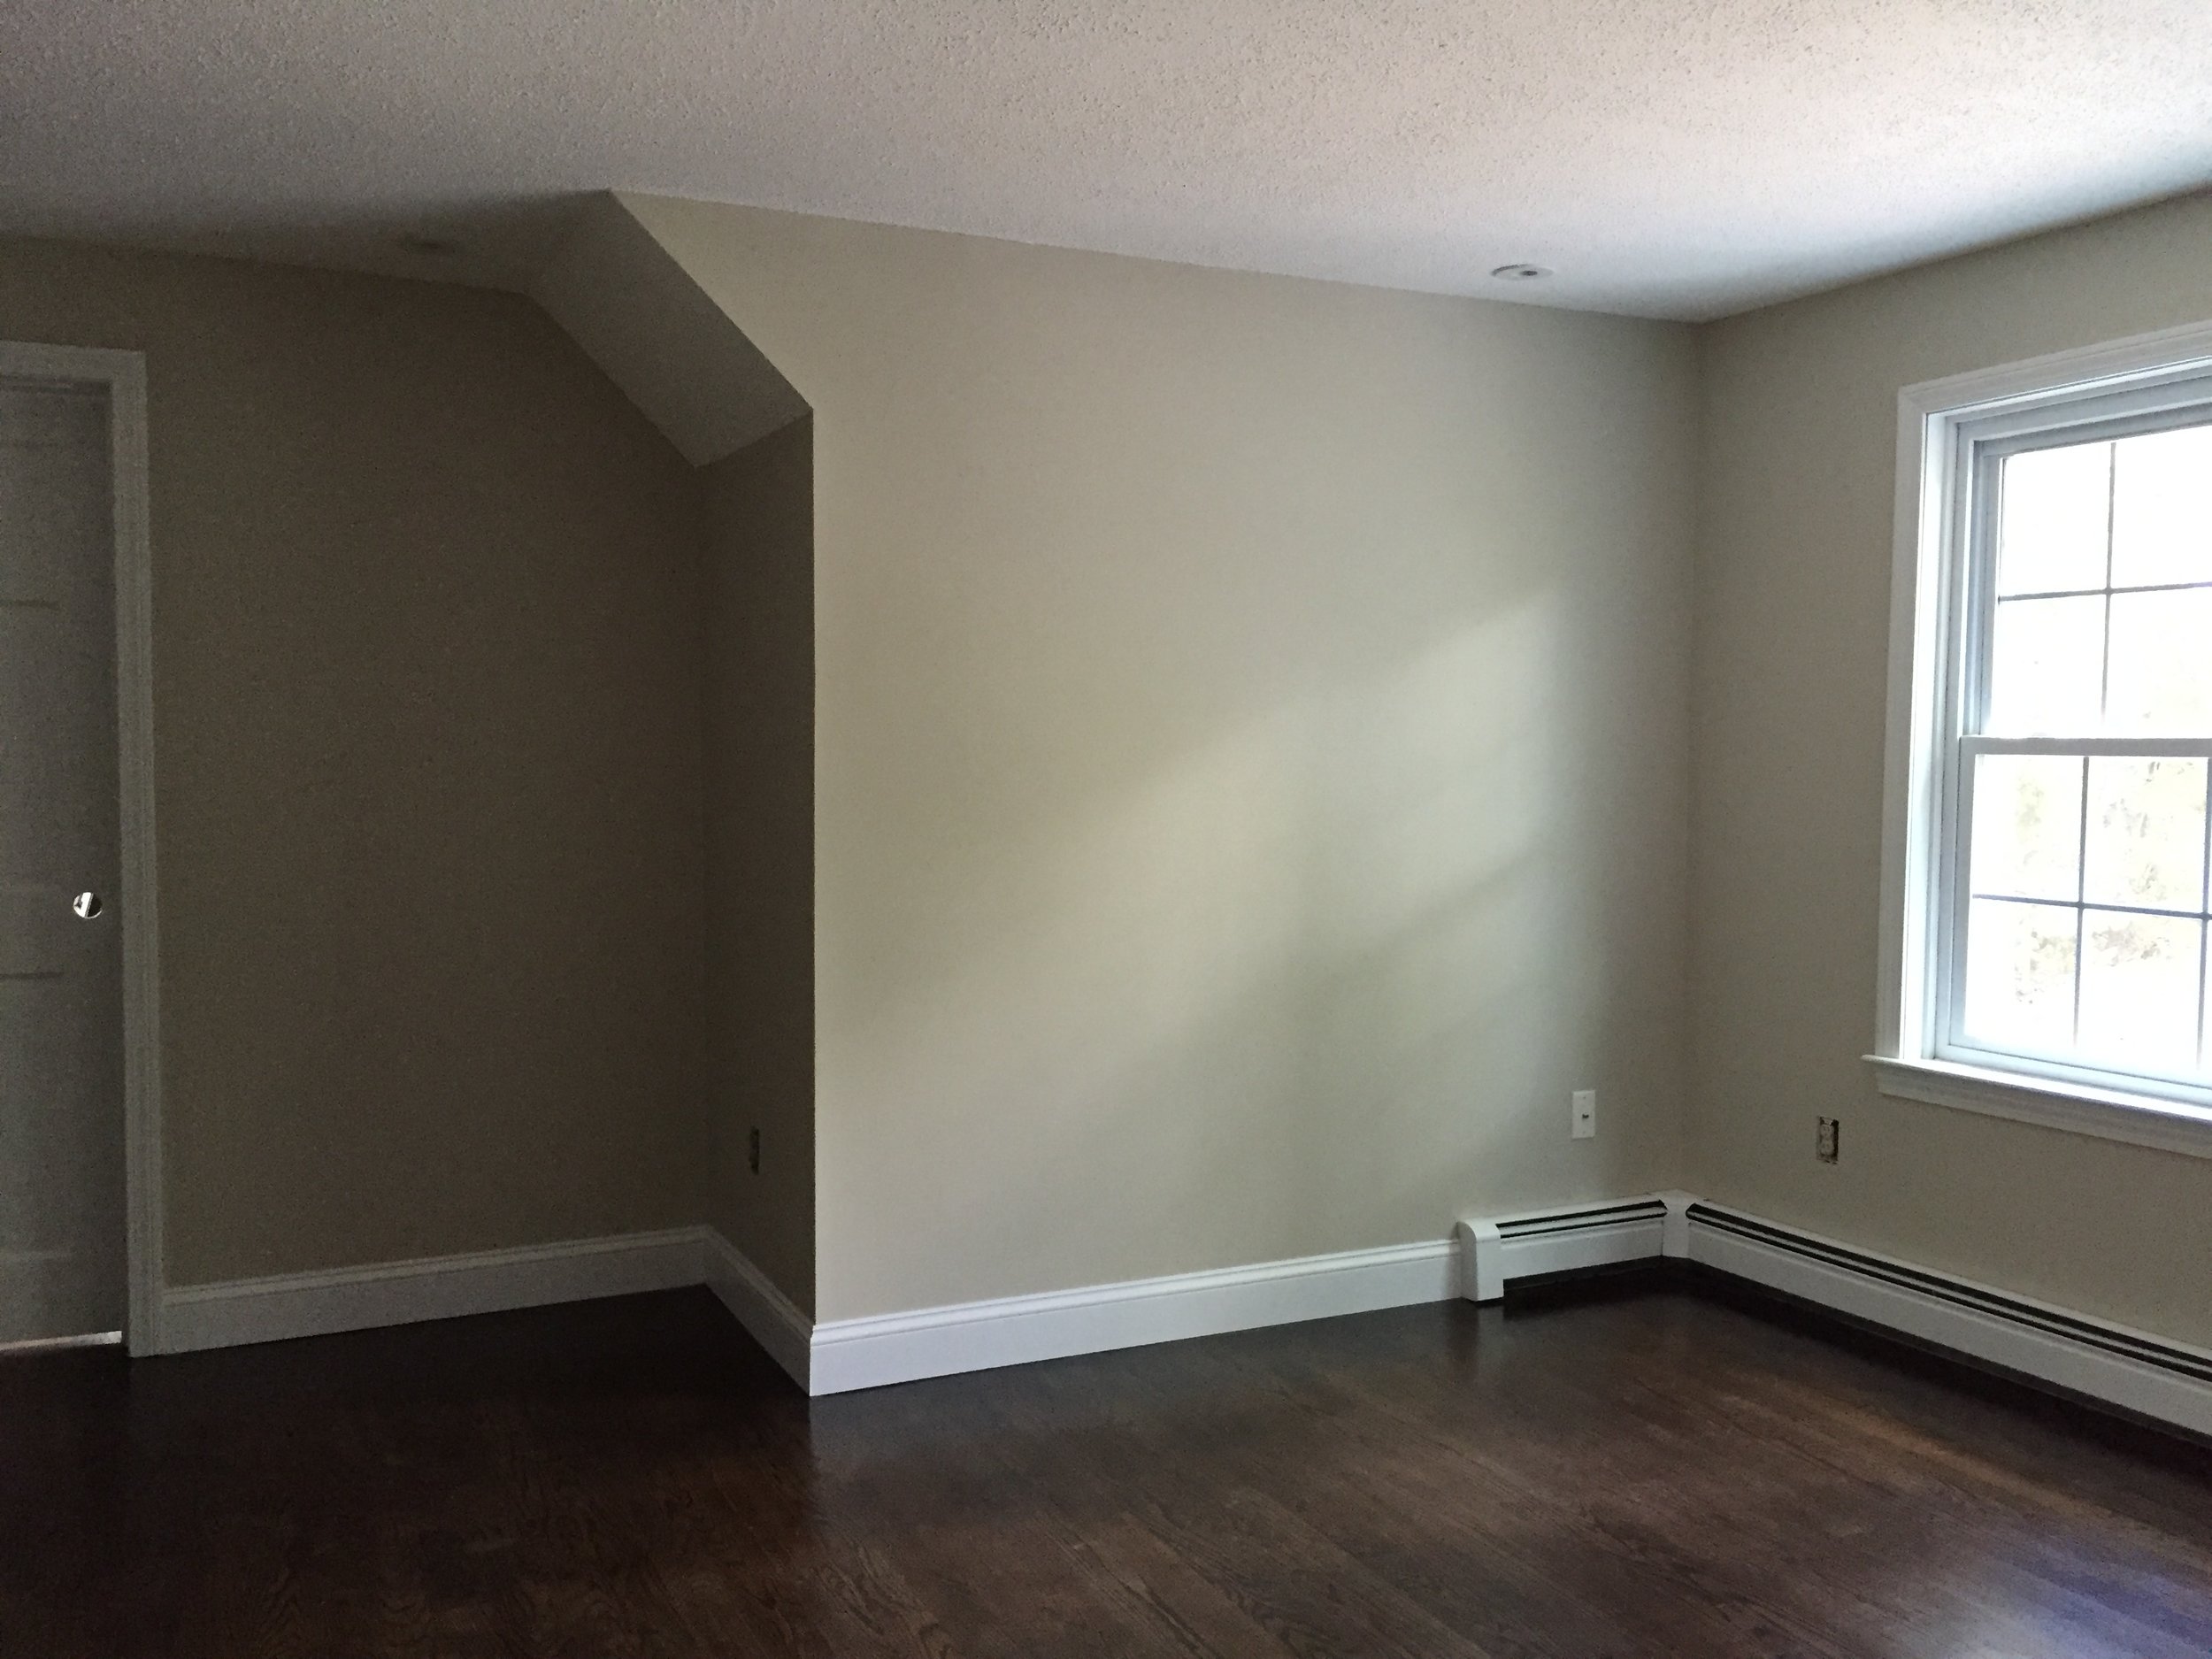
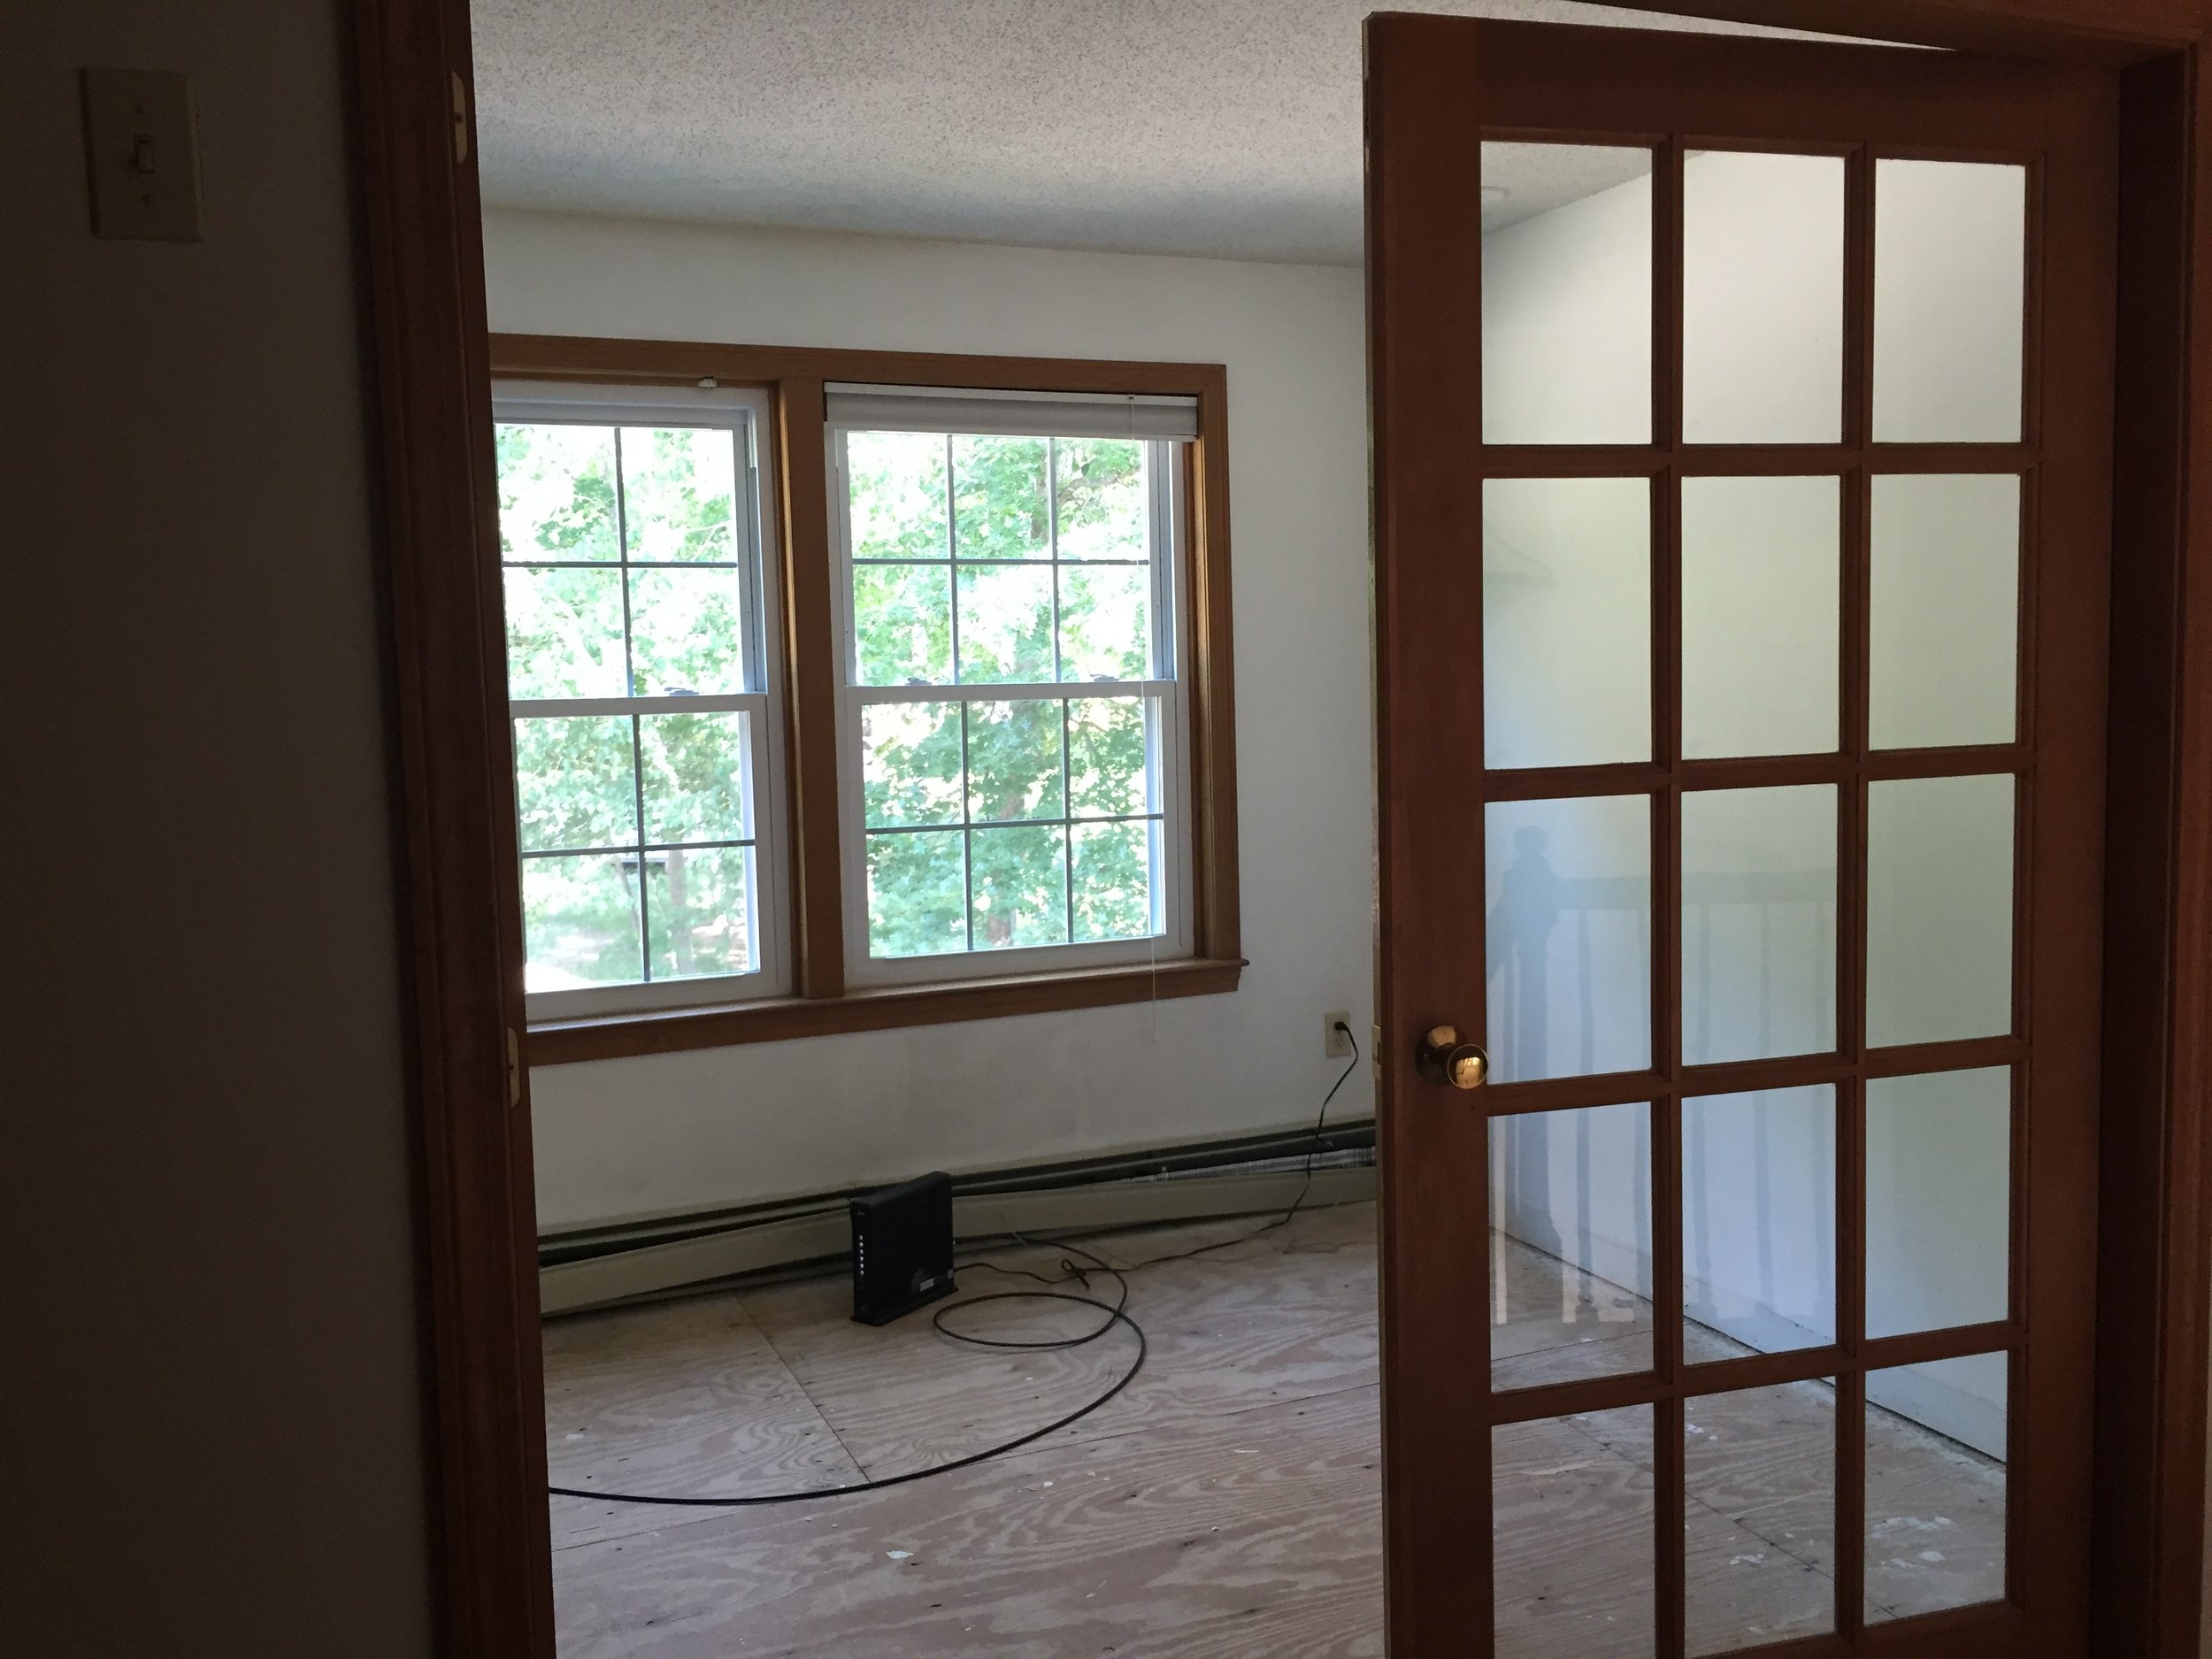
Previous Owner - Before

Previous Owner - Before

Previous Owner - Before
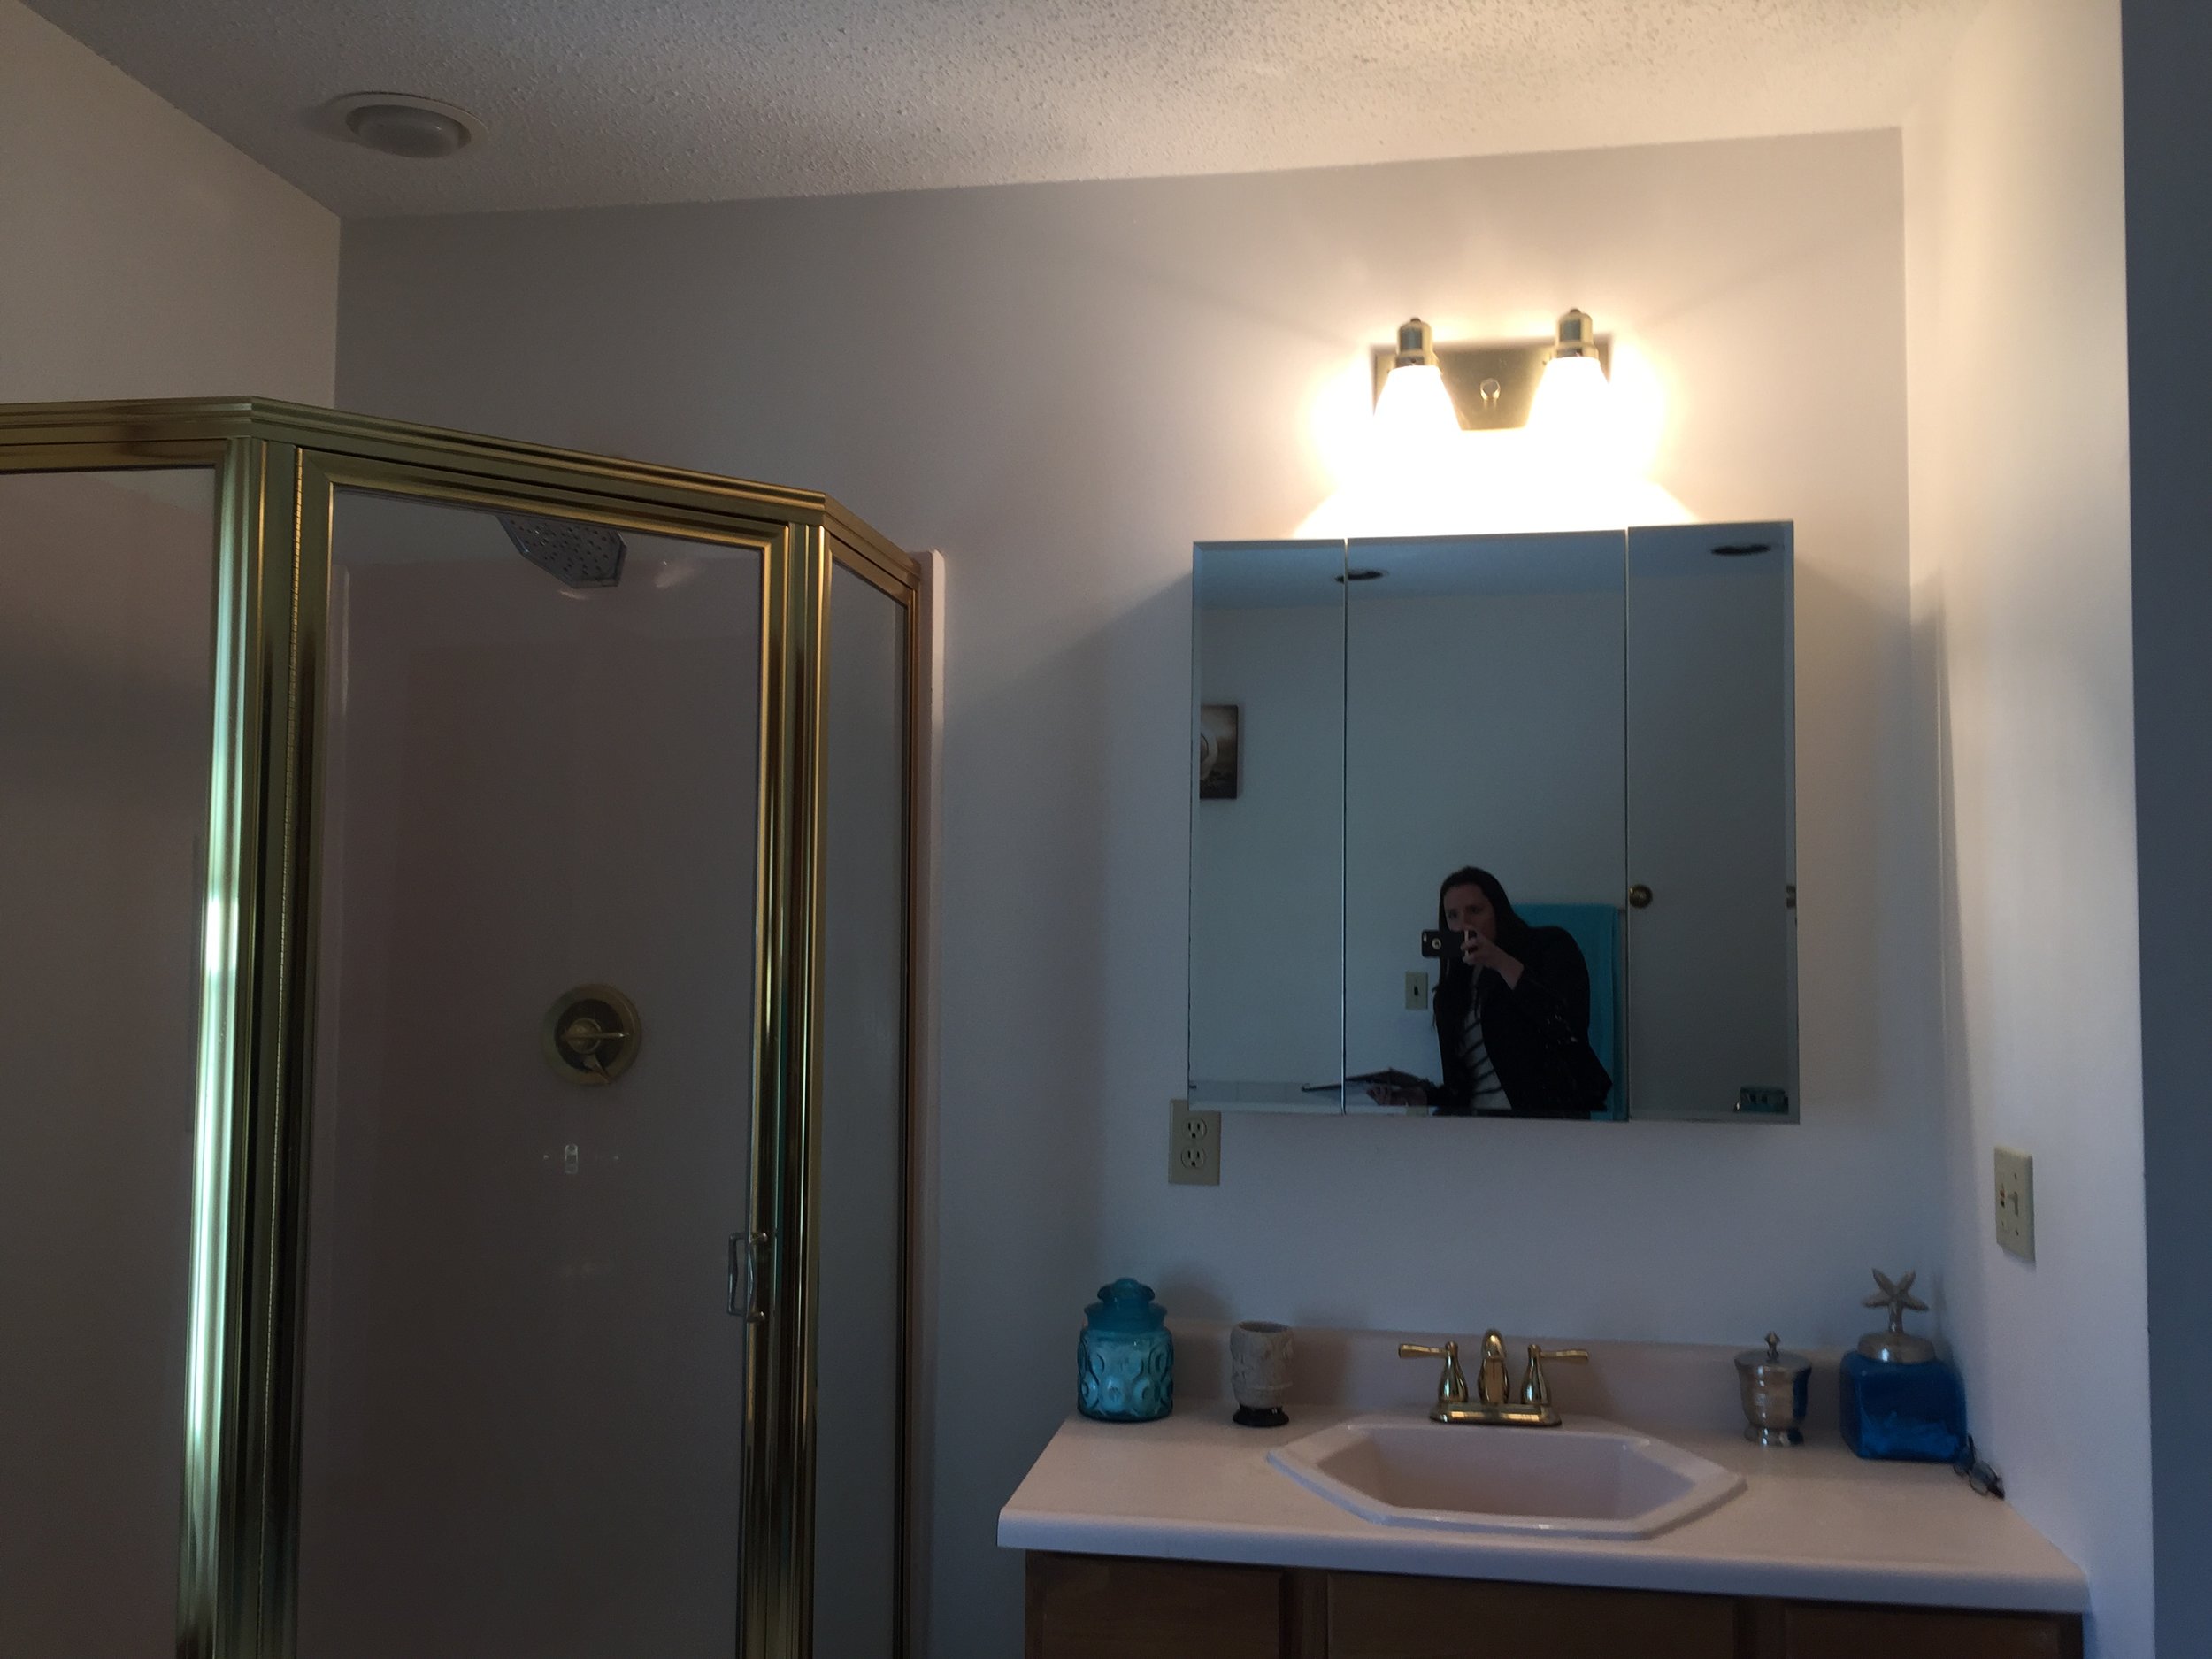
Previous Owner - Before
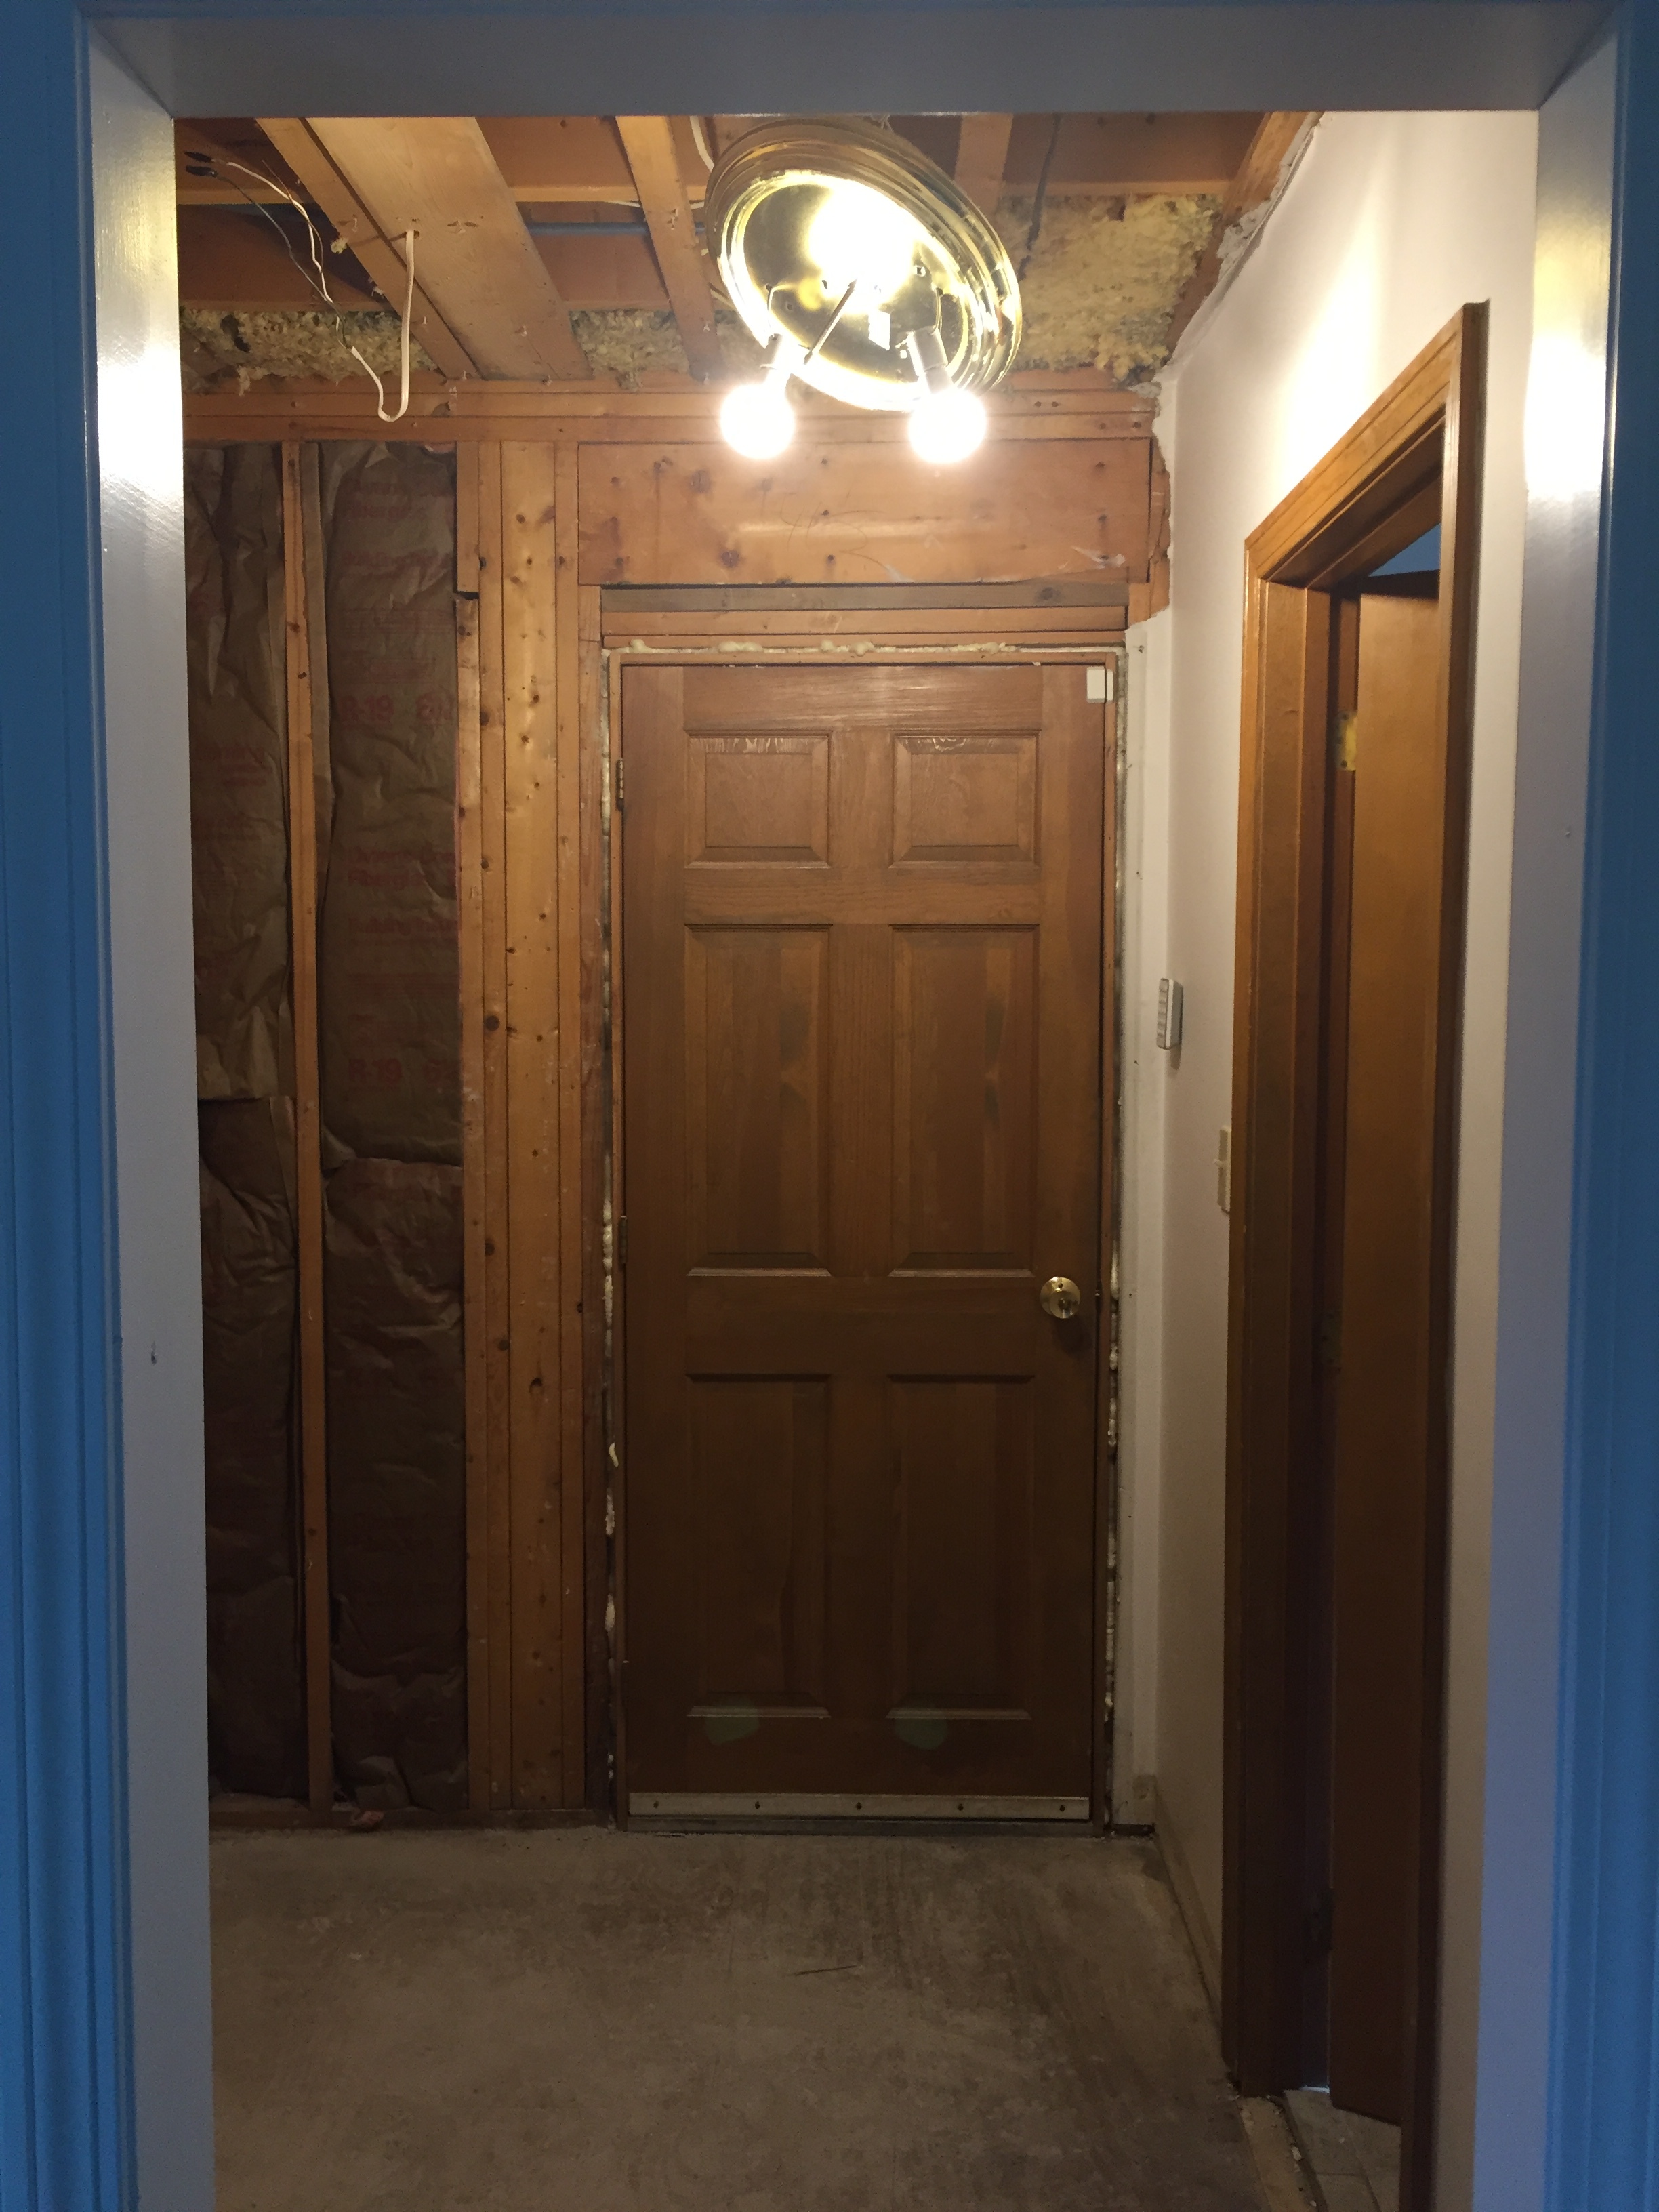
Phase 1: Relocating the Washer/Dryer
When we moved in, the washer/dryer was located in our powder room off the kitchen. This location was not practical since it required walking through the dining room and kitchen in order to get to it, and it was located in a tight space where the door had to be completely shut in order to open the washer/dryer doors.
Because of these main factors, I daydreamed of having the washer/dryer in my master bathroom and once I measured to see if a side-by-side washer/dryer would fit, my daydream became the start of the master bathroom design and floorplan.

Removal of the Bathtub

Plywood Subflooring Installed with new floor joists below

Installing Plumbing for Washer/Dryer
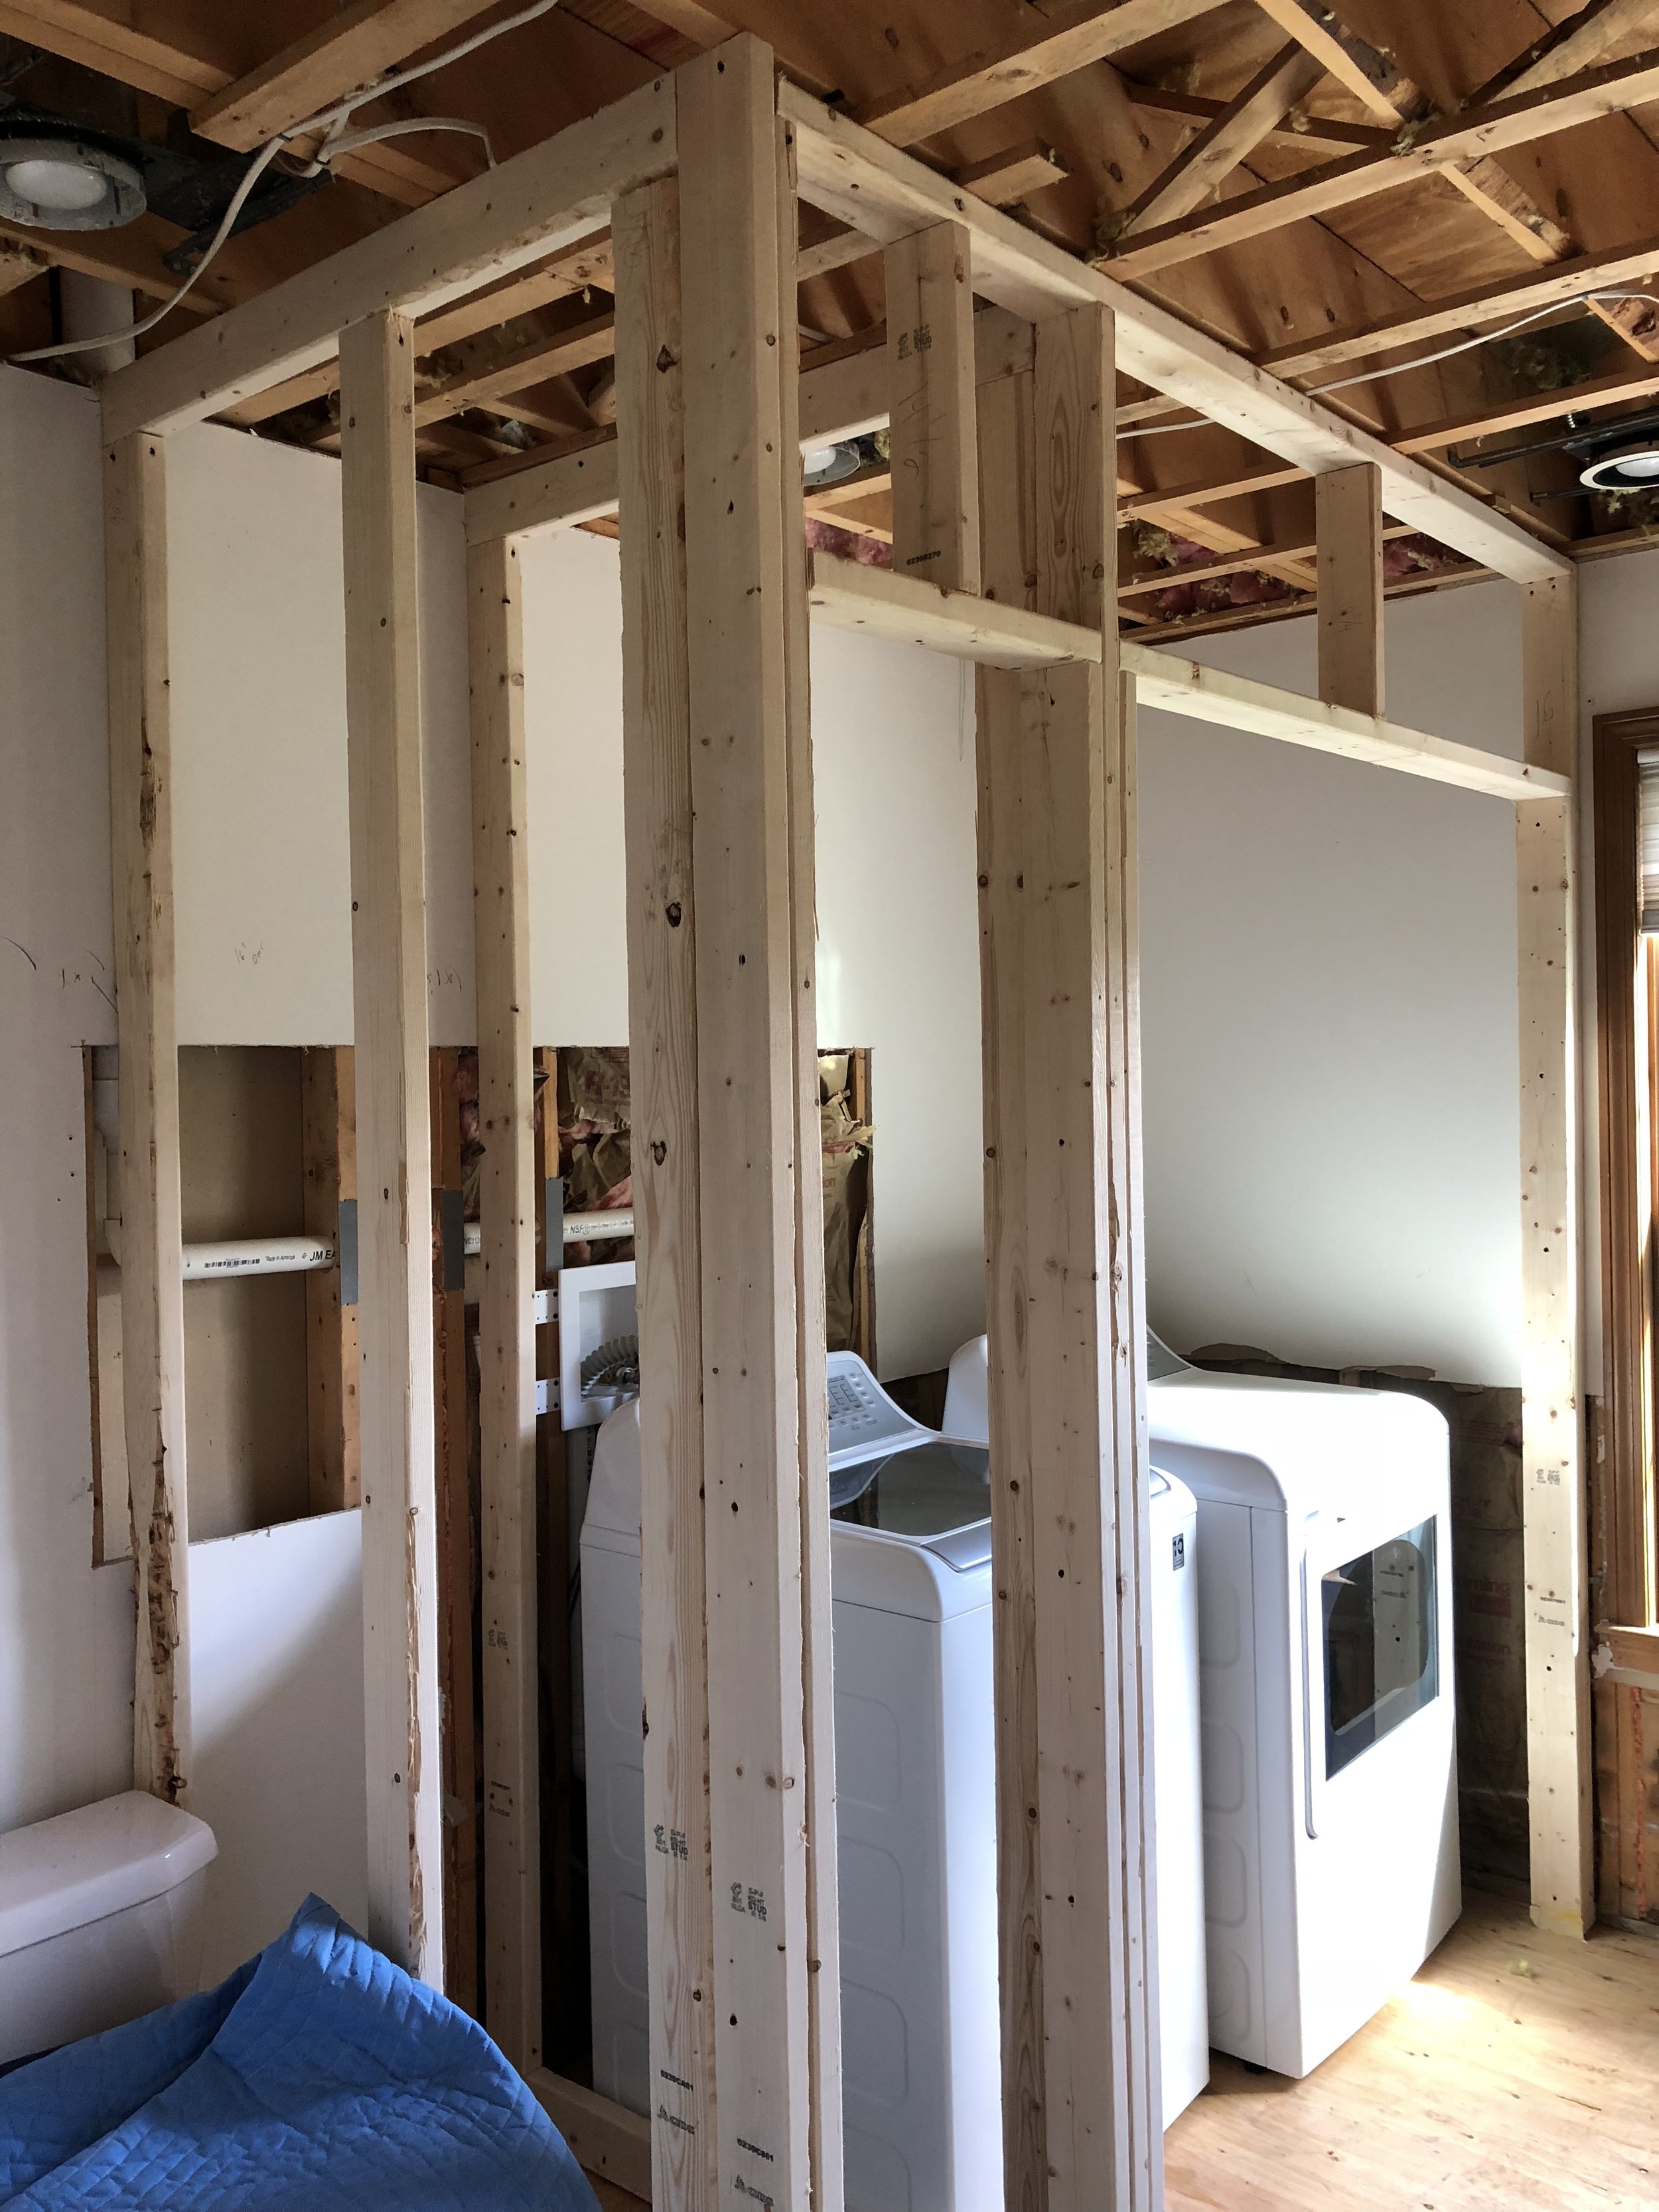
New Framing for Washer/Dryer closet

Insulation and Lighting Installed
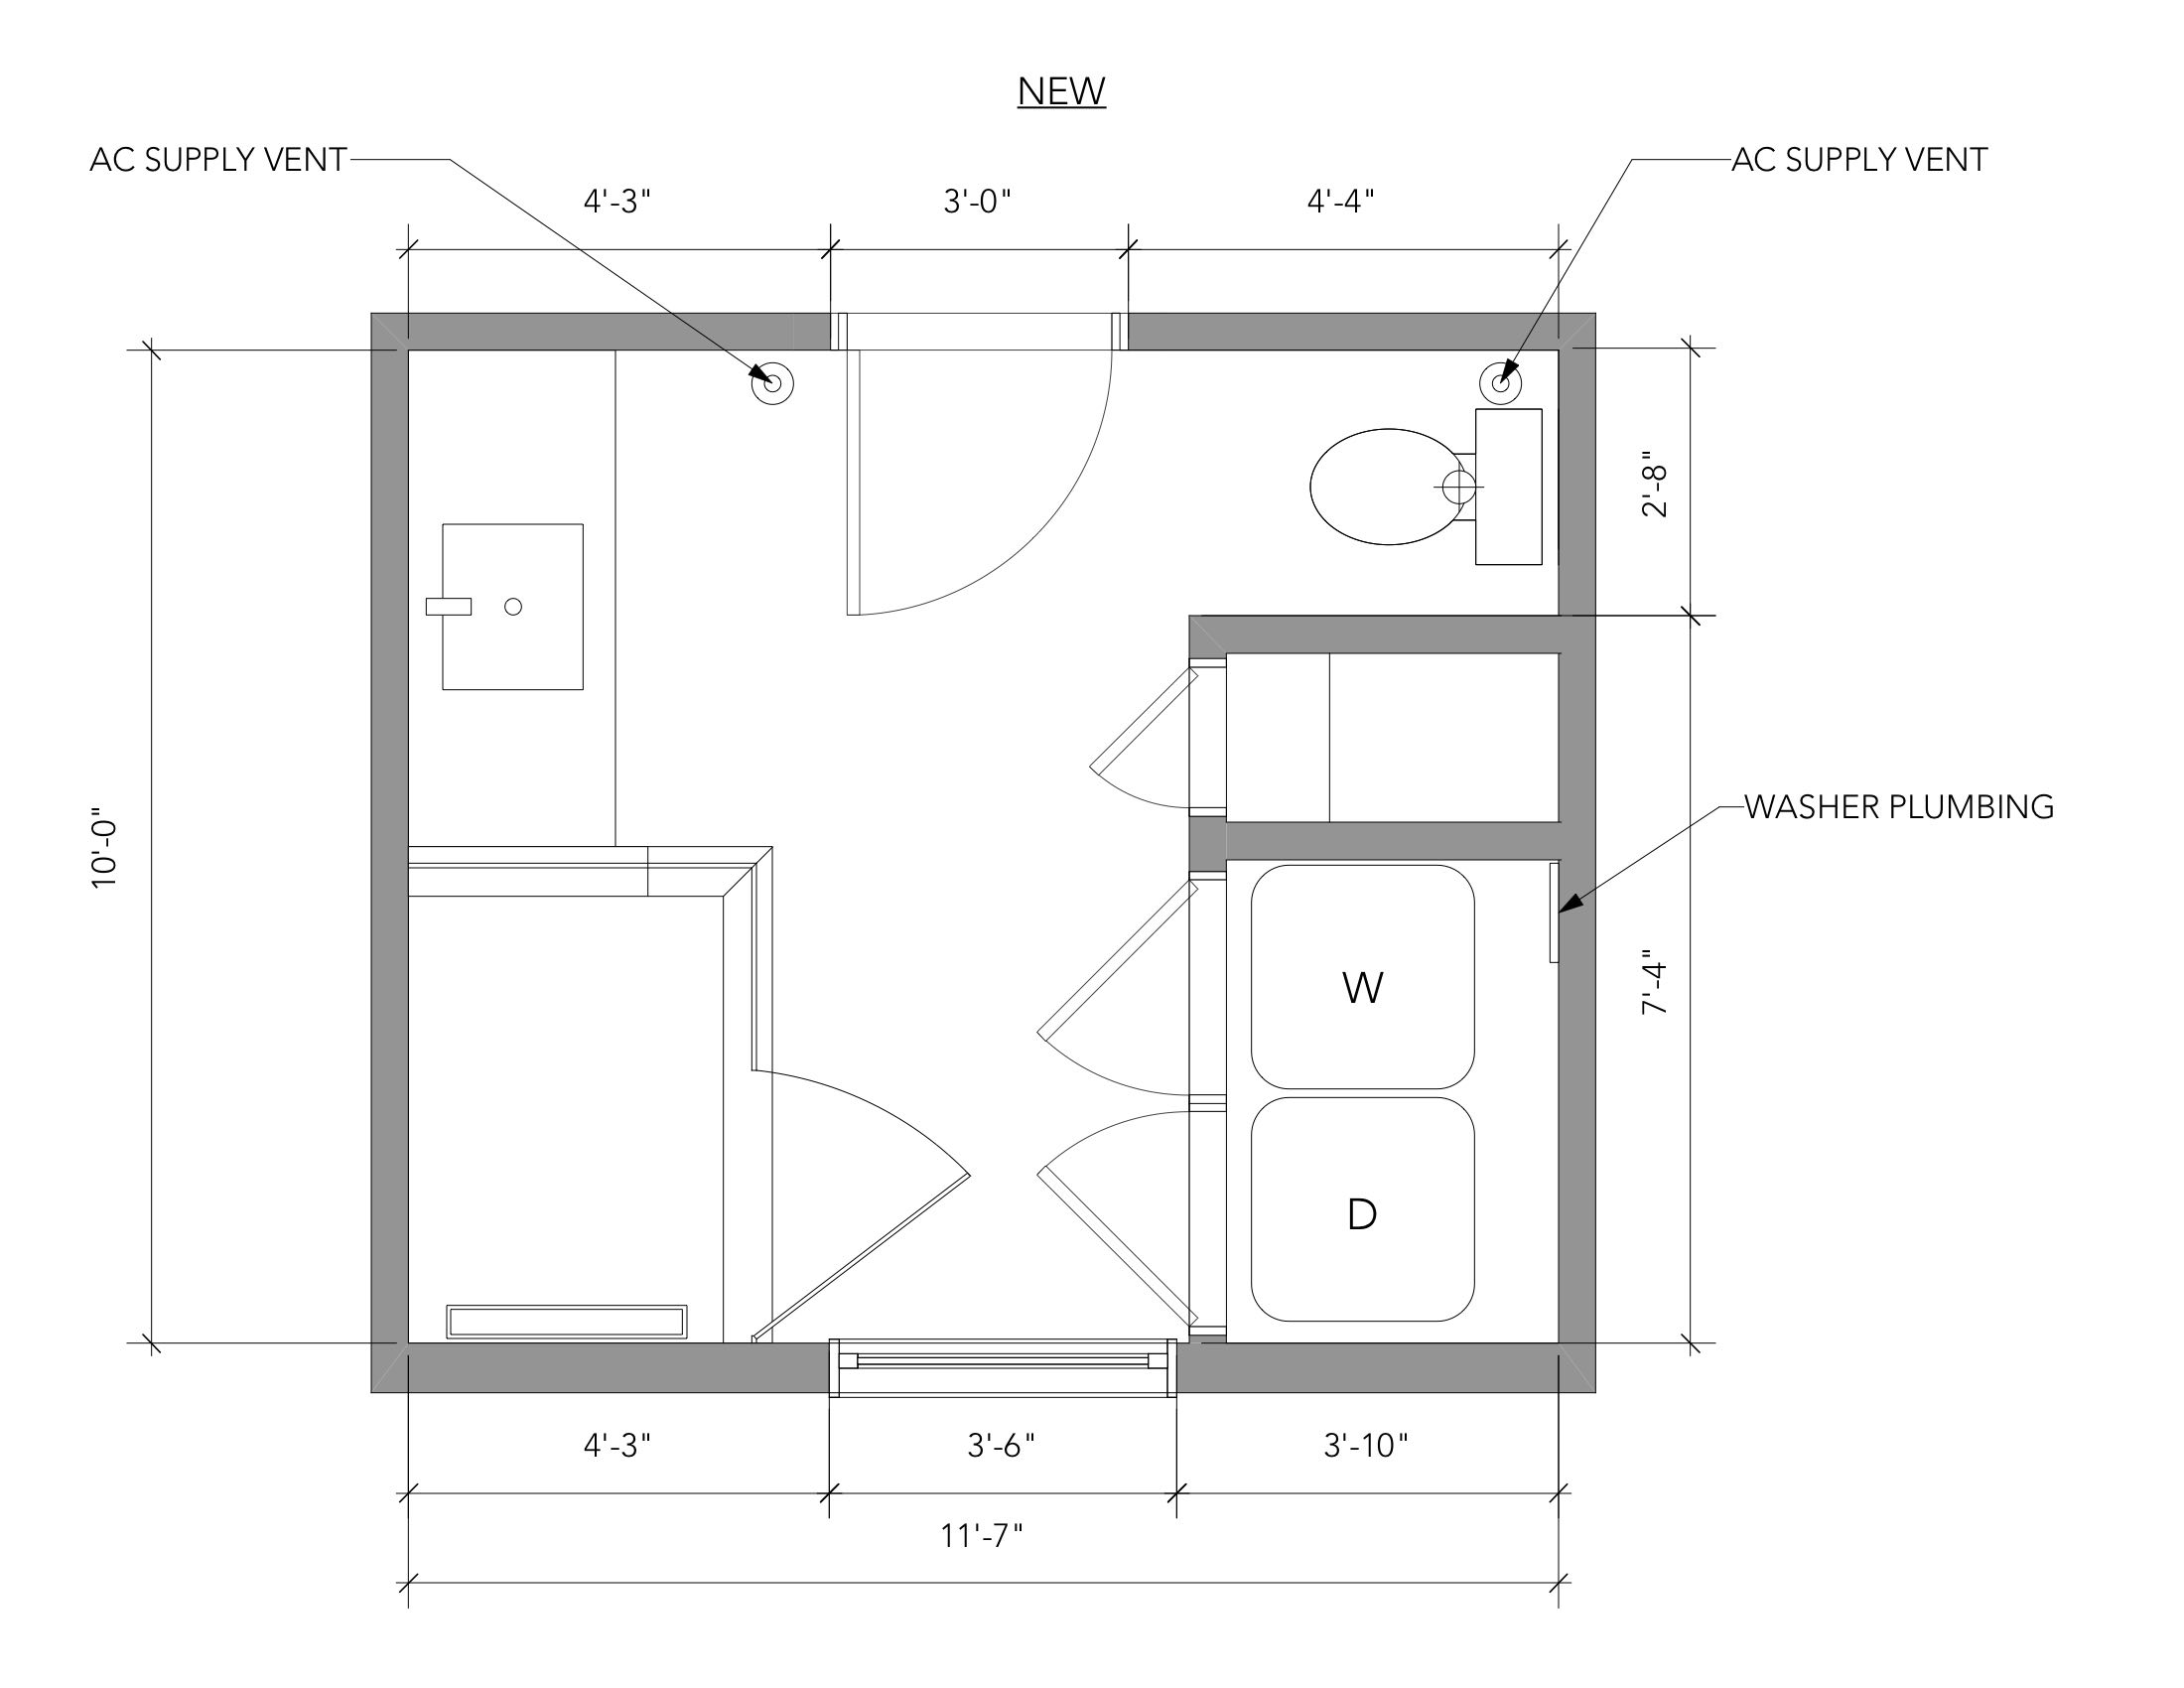
Phase 2: The Layout
Another main priority for my master bathroom was to have plenty of storage. To incorporate this, we took out the existing 20” closet that was in the corner and then added a small storage closet to the left of the (future) washer/dryer closet wall, so that it’s using the space most efficiently. By eliminating the old closet, this would allow for a larger vanity base, and by shifting the vanity in this corner and coming off 60” from the wall, the remaining balance gave me the new size for the shower.
Luckily, I was able to design the layout based the window being positioned in a place where it worked with all of the new additions. If the window was placed 1-2" more to the left, this vision would have been very difficult to implement due to minimum size requirements.
We left our toilet in the same location because it simply worked there, while also being blocked off by the closet wall, creating it’s own privacy area. We only had to move the toilet 6” towards the left wall so that it was centered between the walls and allowed for more room. Luckily this wasn’t a huge deal since our bedroom is on the 1st floor, and they could easily move the plumbing with our exposed basement ceiling underneath.
Phase 3: Adding some heat
Who wouldn't want to walk on 75-80 degree tile in the colder months? My dream master bathroom always included a heated floor. To do this, an electric radiant heated floor under the tile needed to be installed since there wasn’t a heat source in the room. There was a very old toe kick heating vent in the original vanity, which was super loud and inefficient, so it had to be replaced.


Phase 4: Tile | Stone | Storage
For the tile design, I personally prefer a cohesive tile look, for a simple and modern look. Even in the shower niche, I wanted consistency, so I made the niche the same size as a 12x24 tile to have this seamless look. The shower floor is where I wanted to add some boldness and pattern, so I did so with a mosaic accent. The modern basketweave marble mosaic I used was one that I had discovered a while ago, and knew it would be one day be used in my own master bathroom.

Selected Finishes

Tile Prep with Durock Cement Board


For the countertops, I chose the whitest of white quartz I could find! Quartz is antimicrobial (non-porous and does not absorb bacteria), so it’s perfect for bathrooms to give you some piece-of-mind when you’re cleaning them. It also has a minimal look, which is what I was going for.

The semi-recessed medicine cabinet is my favorite thing in the bathroom! Not only is it a beautiful item, it is also very practical, so it was love at first sight. I am a fan of having many beauty products, so I needed something to hold and organize them all. What I also love about this, is the front lifts up vs. having a door swing towards you, and there are outlets in side for a shaver or electronic toothbrush, so that there aren’t cords and items crowding up your counterspace. It also has a defogger and nightlight for additional features. If you’re limited on storage or need a lot of organization, this is the cabinet for you and it also comes in smaller sizes.


Phase 5: Adding some flare
I wanted to do something different and add another special feature to this bathroom, so I decided to have pendants installed from the ceiling and to hang in front of the mirror so that the light casts evenly over your face. These pendants are on their own switch, so that they also act as a relaxing accent light at night.
TIP: For bathroom lighting, the most flattering source of light is from the side, not from above. Lighting above creates unflattering shadows and uneven light across your face.
So knowing that I was going to do side lighting of some sort, I had to think this through since with my medicine cabinet (being recessed off the wall), a simple mounted sconce wouldn’t work because the side profile of the mirror would hide all of the light.

Phase 6: Accessorize!
One thing that surprises (in a good way!) most of my clients, is that I like to add artwork and accessories to a bathroom. By incorporating these design elements, you can add a pop of color, a little boldness and expression, and more! For my bathroom, I added a long and narrow art piece over the toilet to add a little drama to this lackluster part of a bathroom. I work with an art company where I customize the height and crop the width to any size, while adding a frame or changing the media it’s printed on. I chose a plexiglass so that I didn’t have to worry about moisture affecting the art. This art piece has a silver metallic finish under the plexiglass, which compliments the chrome accents throughout the bathroom.


All of the bathroom plumbing fixtures are Kohler:
Toilet - Kohler K-6999-0, Memoirs Classic Comfort Height Two-piece
Toilet Seat - Kohler K-4008-0, Grip Tight Reveal™ Q3™, Eb Seat
Sink Faucet - Kohler K-99760-4-CP, Honesty™ Single Control
Sink - Kohler K-2882-0, Verticyl® Rectangle Under-mount
Handshower Holder - Kohler K-14791-CP, Loure® Wall-mount
Handshower Spray - Kohler K-14788-GR-CP, Shift™ Square Multifunction 2.5 Gpm Handshower With Grey
Shower Hose - Kohler K-9514-CP Mastershower® 60" Metal Shower Hose
Shower Arm - Kohler K-7394-CP Shower Arm
Rain Showerhead - Kohler K-13696-CP Contemporary Square Rain Showerhead
Valve Trim with Diverter - K-T98757-4A-CP Rite-Temp® pressure-balancing valve trim with diverter and plain lever handle
Towel Ring - Kohler K-11057-CP Archer® Towel Ring
Robe Towel Hook - Kohler K-14443-CP, Purist® Robe Hook
Toilet Tissue Paper Holder - Kohler K-14377-CP, Purist® Toilet Paper Holder
Medicine Cabinet - Robern Uplift UC4827FPL 48" x 27" x 6"
Drain Grate - Schluter Kerdi-Line Brushed Stainless Steel 28 in. Metal Closed Drain Grate Assembly
Drain Flange - Schluter Kerdi-Line 28 in. Stainless Steel Bonding Flange
Door Hardware -Schlage Latitude Lever with Addison Trim Hall and Closet Lock
Mudroom & Powder Room Remodel
It brings me much joy to have my mudroom and powder room remodel completed! I have been working on this project for awhile now and here is an outline of the phases that took place along with some helpful tips, and of course before and after pictures!
Phase One - consisted of re-locating the washer/dryer from the powder room to first floor master bathroom, on the other end of the house (master bath remodel coming Fall 2018). The washer/dryer in the powder room took up the majority of the room creating a crowded and unwelcoming feeling and moving it to the master bathroom was a more practical move.

Before - Coat Closet and Hall to Garage, Powder Room on Right

Before - Coat Closet

Before - Pantry Closet and Coat Closet

Before - Powder Room, showing washer/dryer behind the door

Before - Washer/Dryer
Phase Two - demolition, demolition, demolition! Walls came down in order to really open up and create more space in the mudroom and powder room. The drywall was also removed from the ceilings and outside walls so that we could re-insulate this space for improved energy efficiency.
Demolition

Demolition
Phase Three was to have spray foam insulation installed by professionals to create a more stabilized climate.
Phase Four was having the drywall installed by our contractor.

Drywall

Drywall
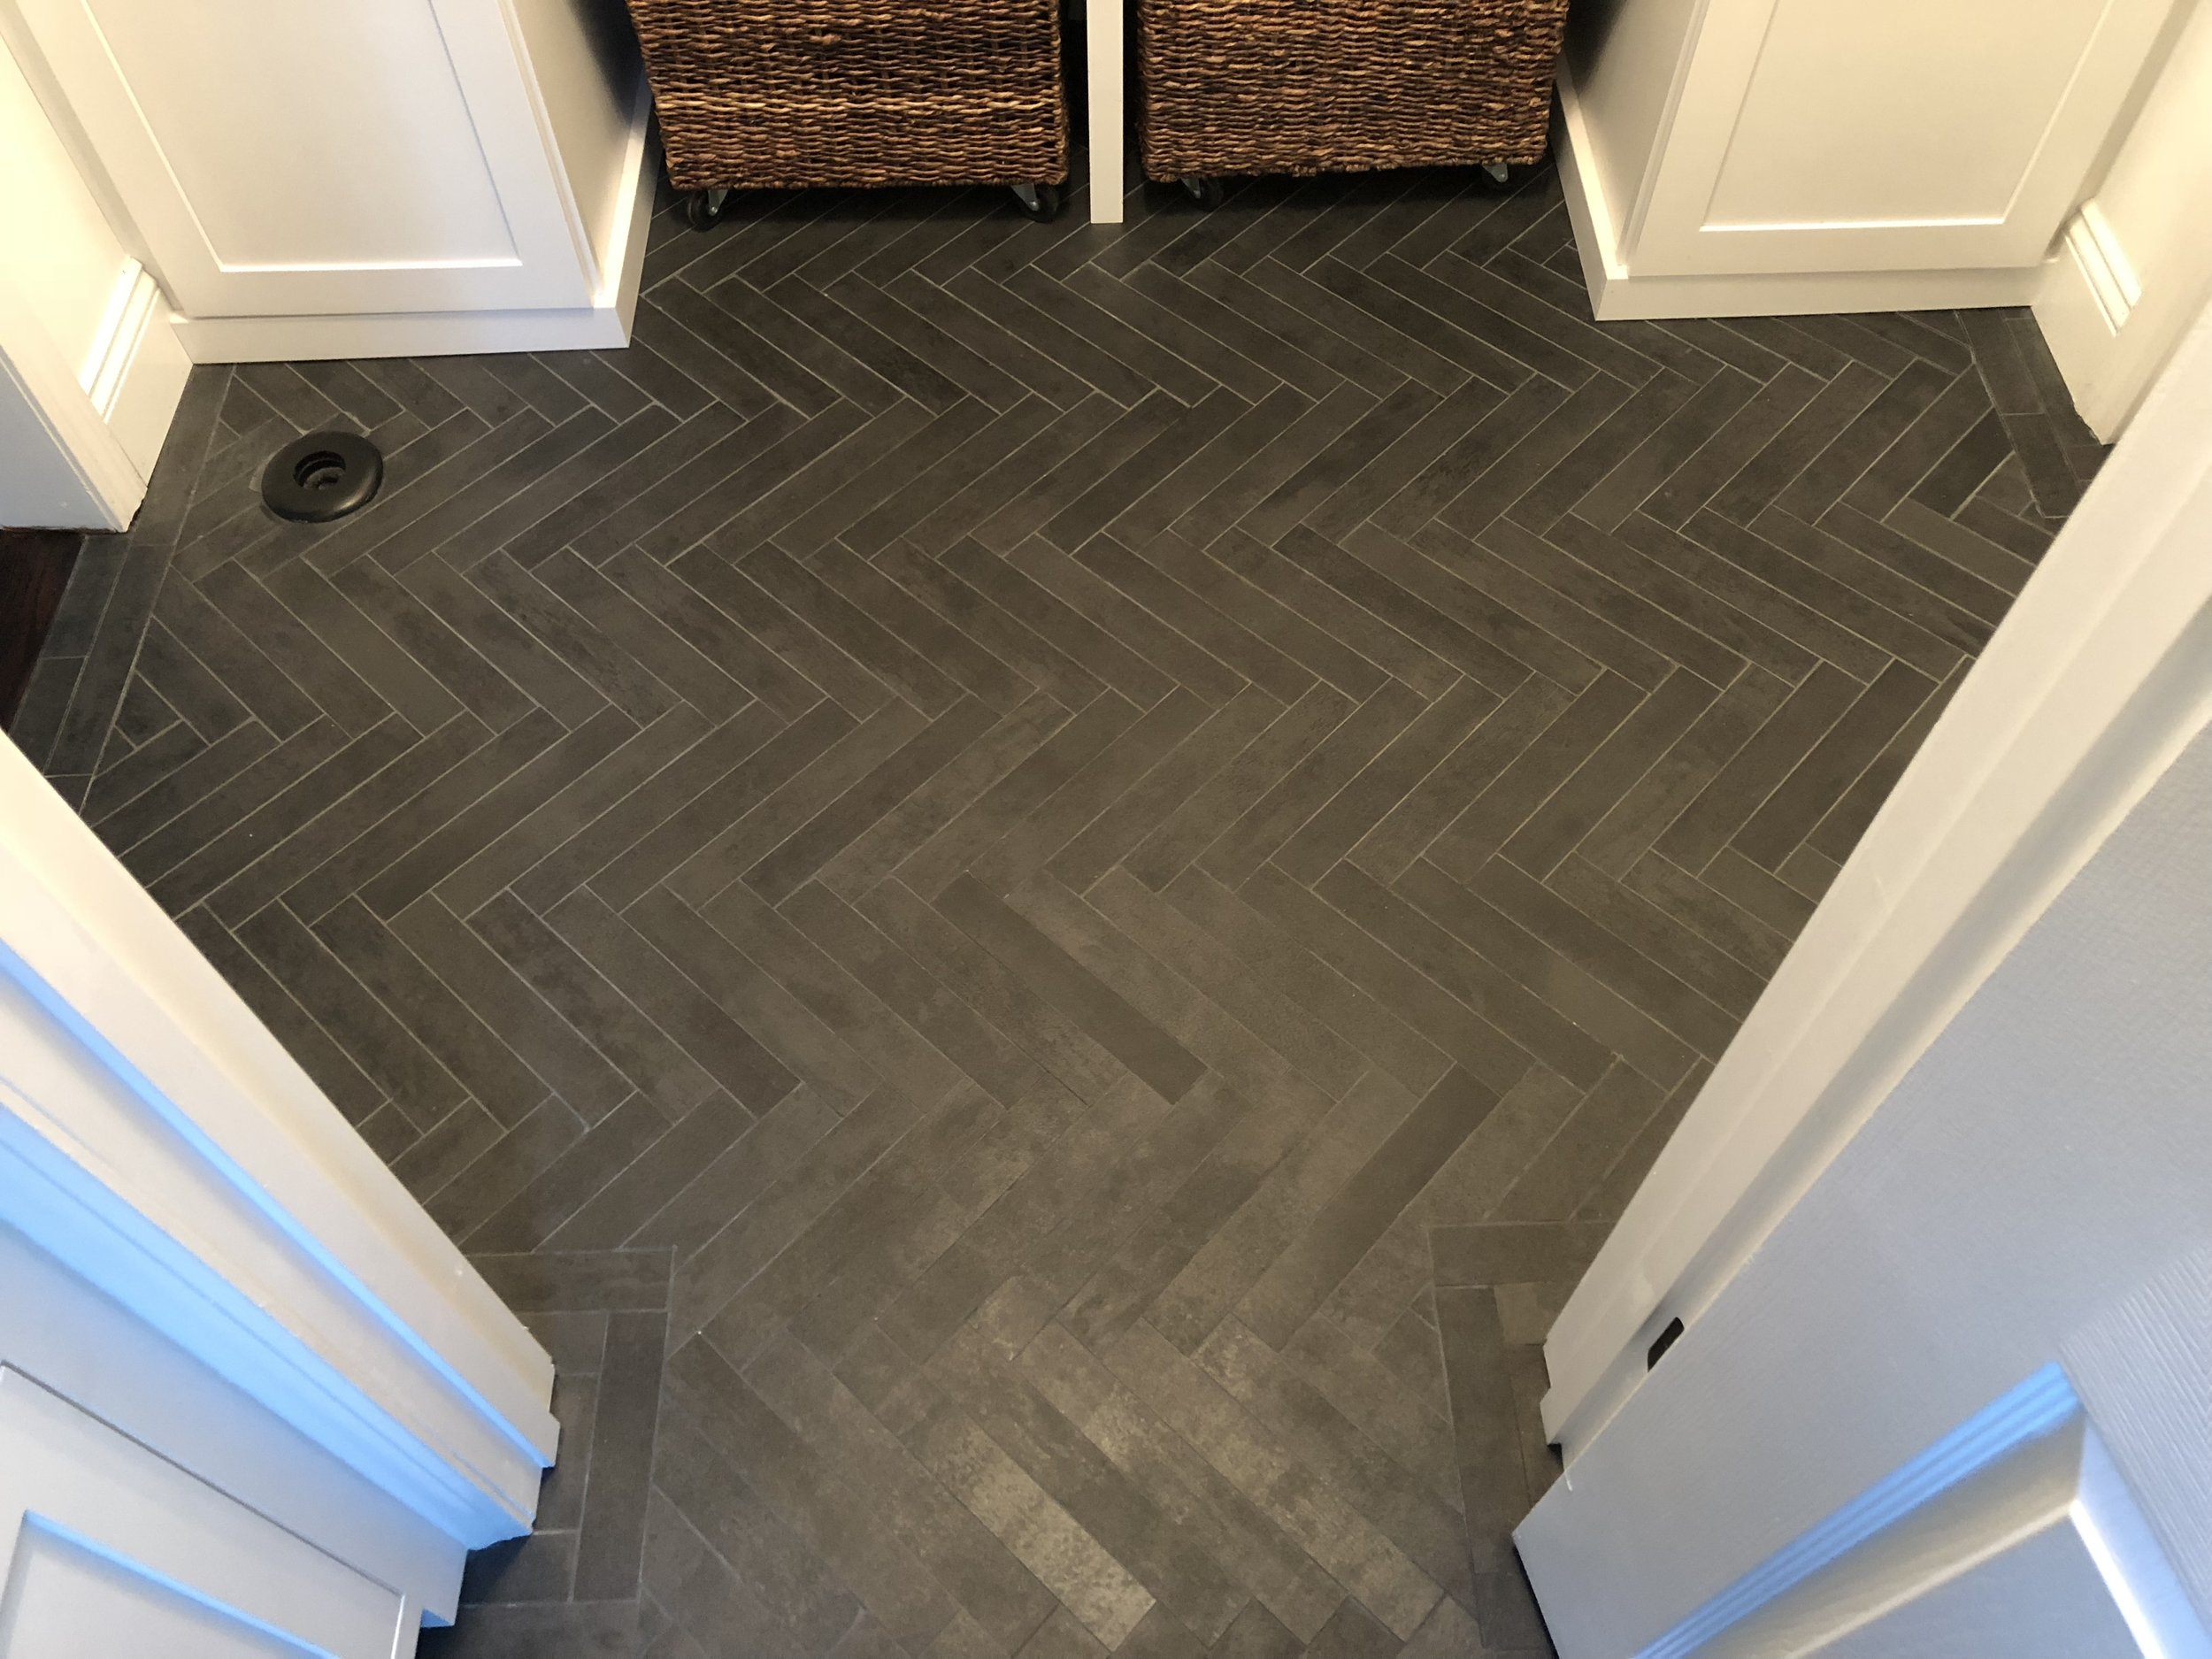
Phase Five was installing the new flooring. I chose tile for a couple of reasons:
- Tile is the most durable material (in my opinion) to use in a mudroom where it's going to have a lot of foot-traffic along with water, dirt, mud, etc. tracked in throughout the year
- Since the mudroom and powder room are essentially in the same space, I wanted the flooring to be the same which allows for a seamless flow room-to-room
- Since this space is next to the kitchen, which is bright white with the dark brown floors, I wanted a tile that would transition nicely from a visual standpoint, which meant it had to be dark so that it blended in. For example, if I picked a lighter tile (light gray, beige, white, etc.) off of the dark wood floor there would be a visual interruption of the spaces. The dark tile allowed for a continuous flow and makes the space feel bigger and undivided
- Tile has a timeless and simple look however there are so many designs and looks which still allows for you to pick out a tile that still has a unique and personal look which fits your design aesthetic. Tip: Tile also comes in different patterns i.e. herringbone (which is what I did) to allow for an additional and different design element

Tile Install

Tile Install

Tile Install

Tile Complete with Plastered Walls, Paint and Baseboard

Tile Complete with Plastered Walls, Paint and Baseboard

Tile Complete with Plastered Walls, Paint and Baseboard
The final phase was adding white cabinetry and a bench that coordinates with the adjacent kitchen. This replaced the coat closet and pantry closet that we took out during demolition and allowed for much needed storage for household items and a coat rack. Below are pictures of the final look.
As always, please ask any questions and/or comment below!

After Mudroom Renovation - Pelham, NH

After Mudroom Renovation - Pelham, NH

After Mudroom Renovation - Pelham, NH

After Mudroom Renovation - Pelham, NH
After Mudroom Renovation - Pelham, NH

After Mudroom Renovation - Pelham, NH

After Mudroom Renovation - Pelham, NH
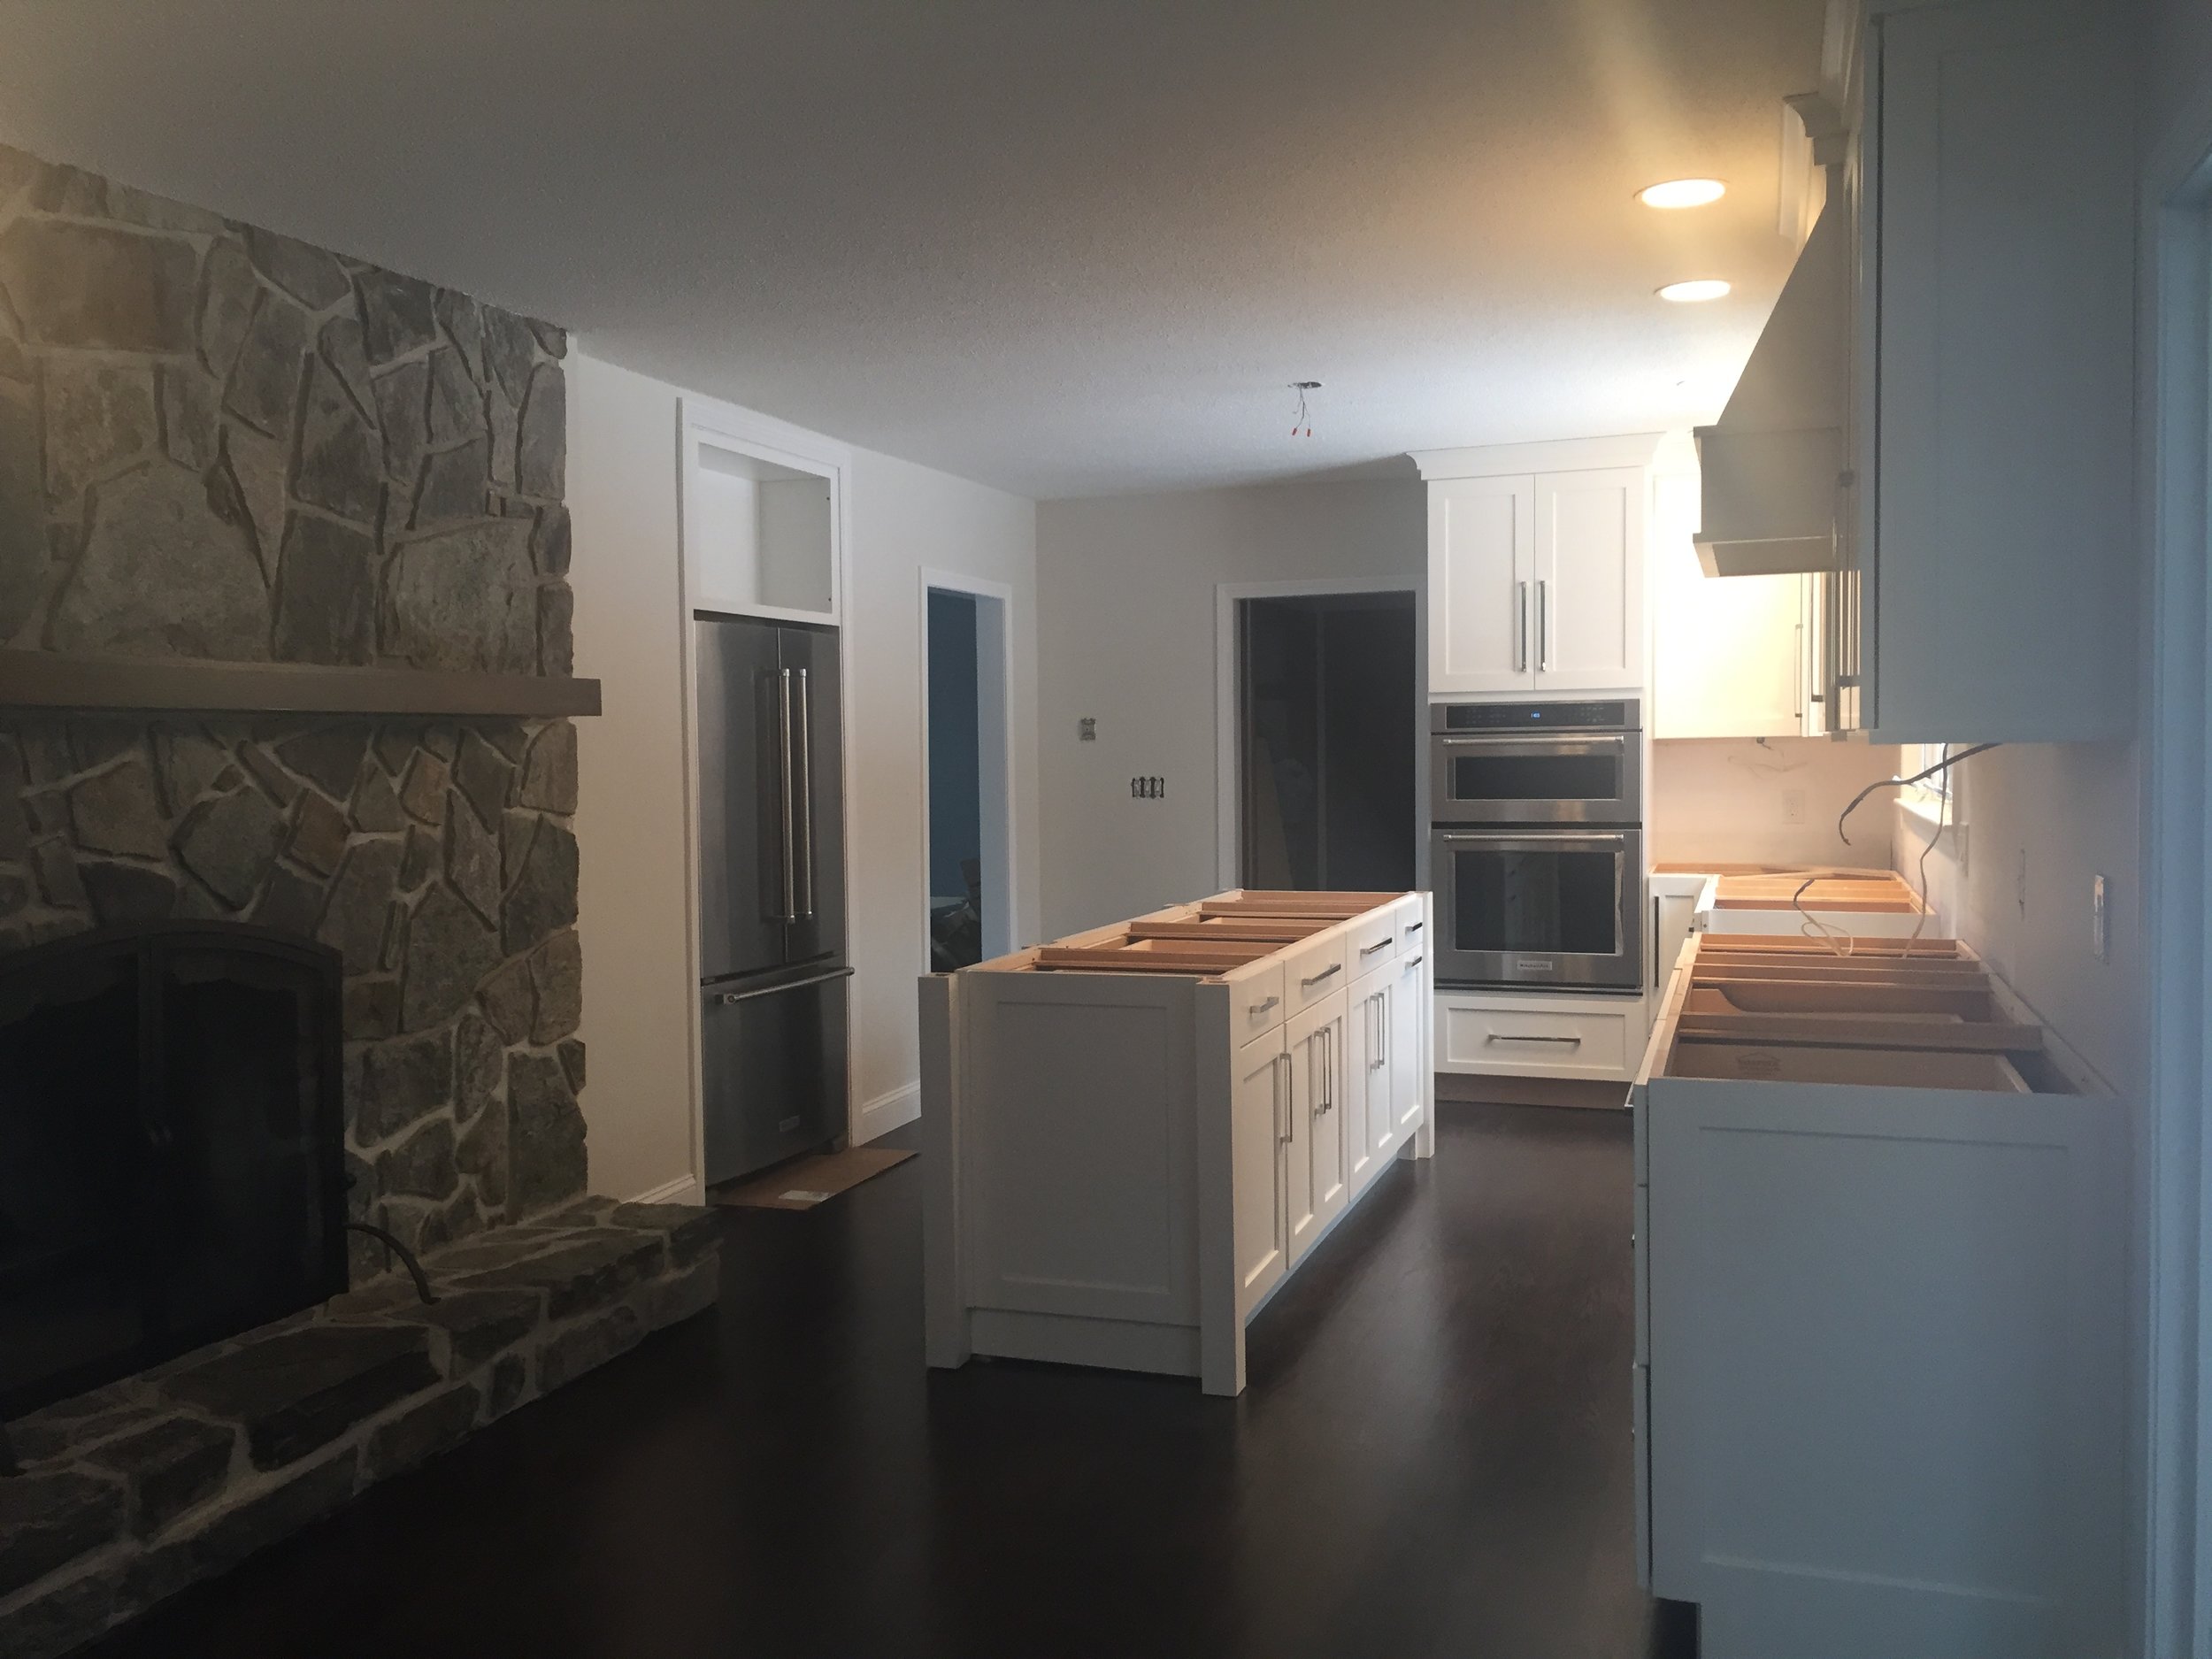
KITCHEN Before & After
Here are photos from the way beginning, to show the entire process of our kitchen renovation.
I ordered our cabinets from Norfolk Kitchen & Bath in Salem, NH. We used the Showplace Cabinets line for full customization, which is how I was able to design my island and have them create exactly what was envisioned.

Sketch I provided to my kitchen cabinet designer to determine a layout.

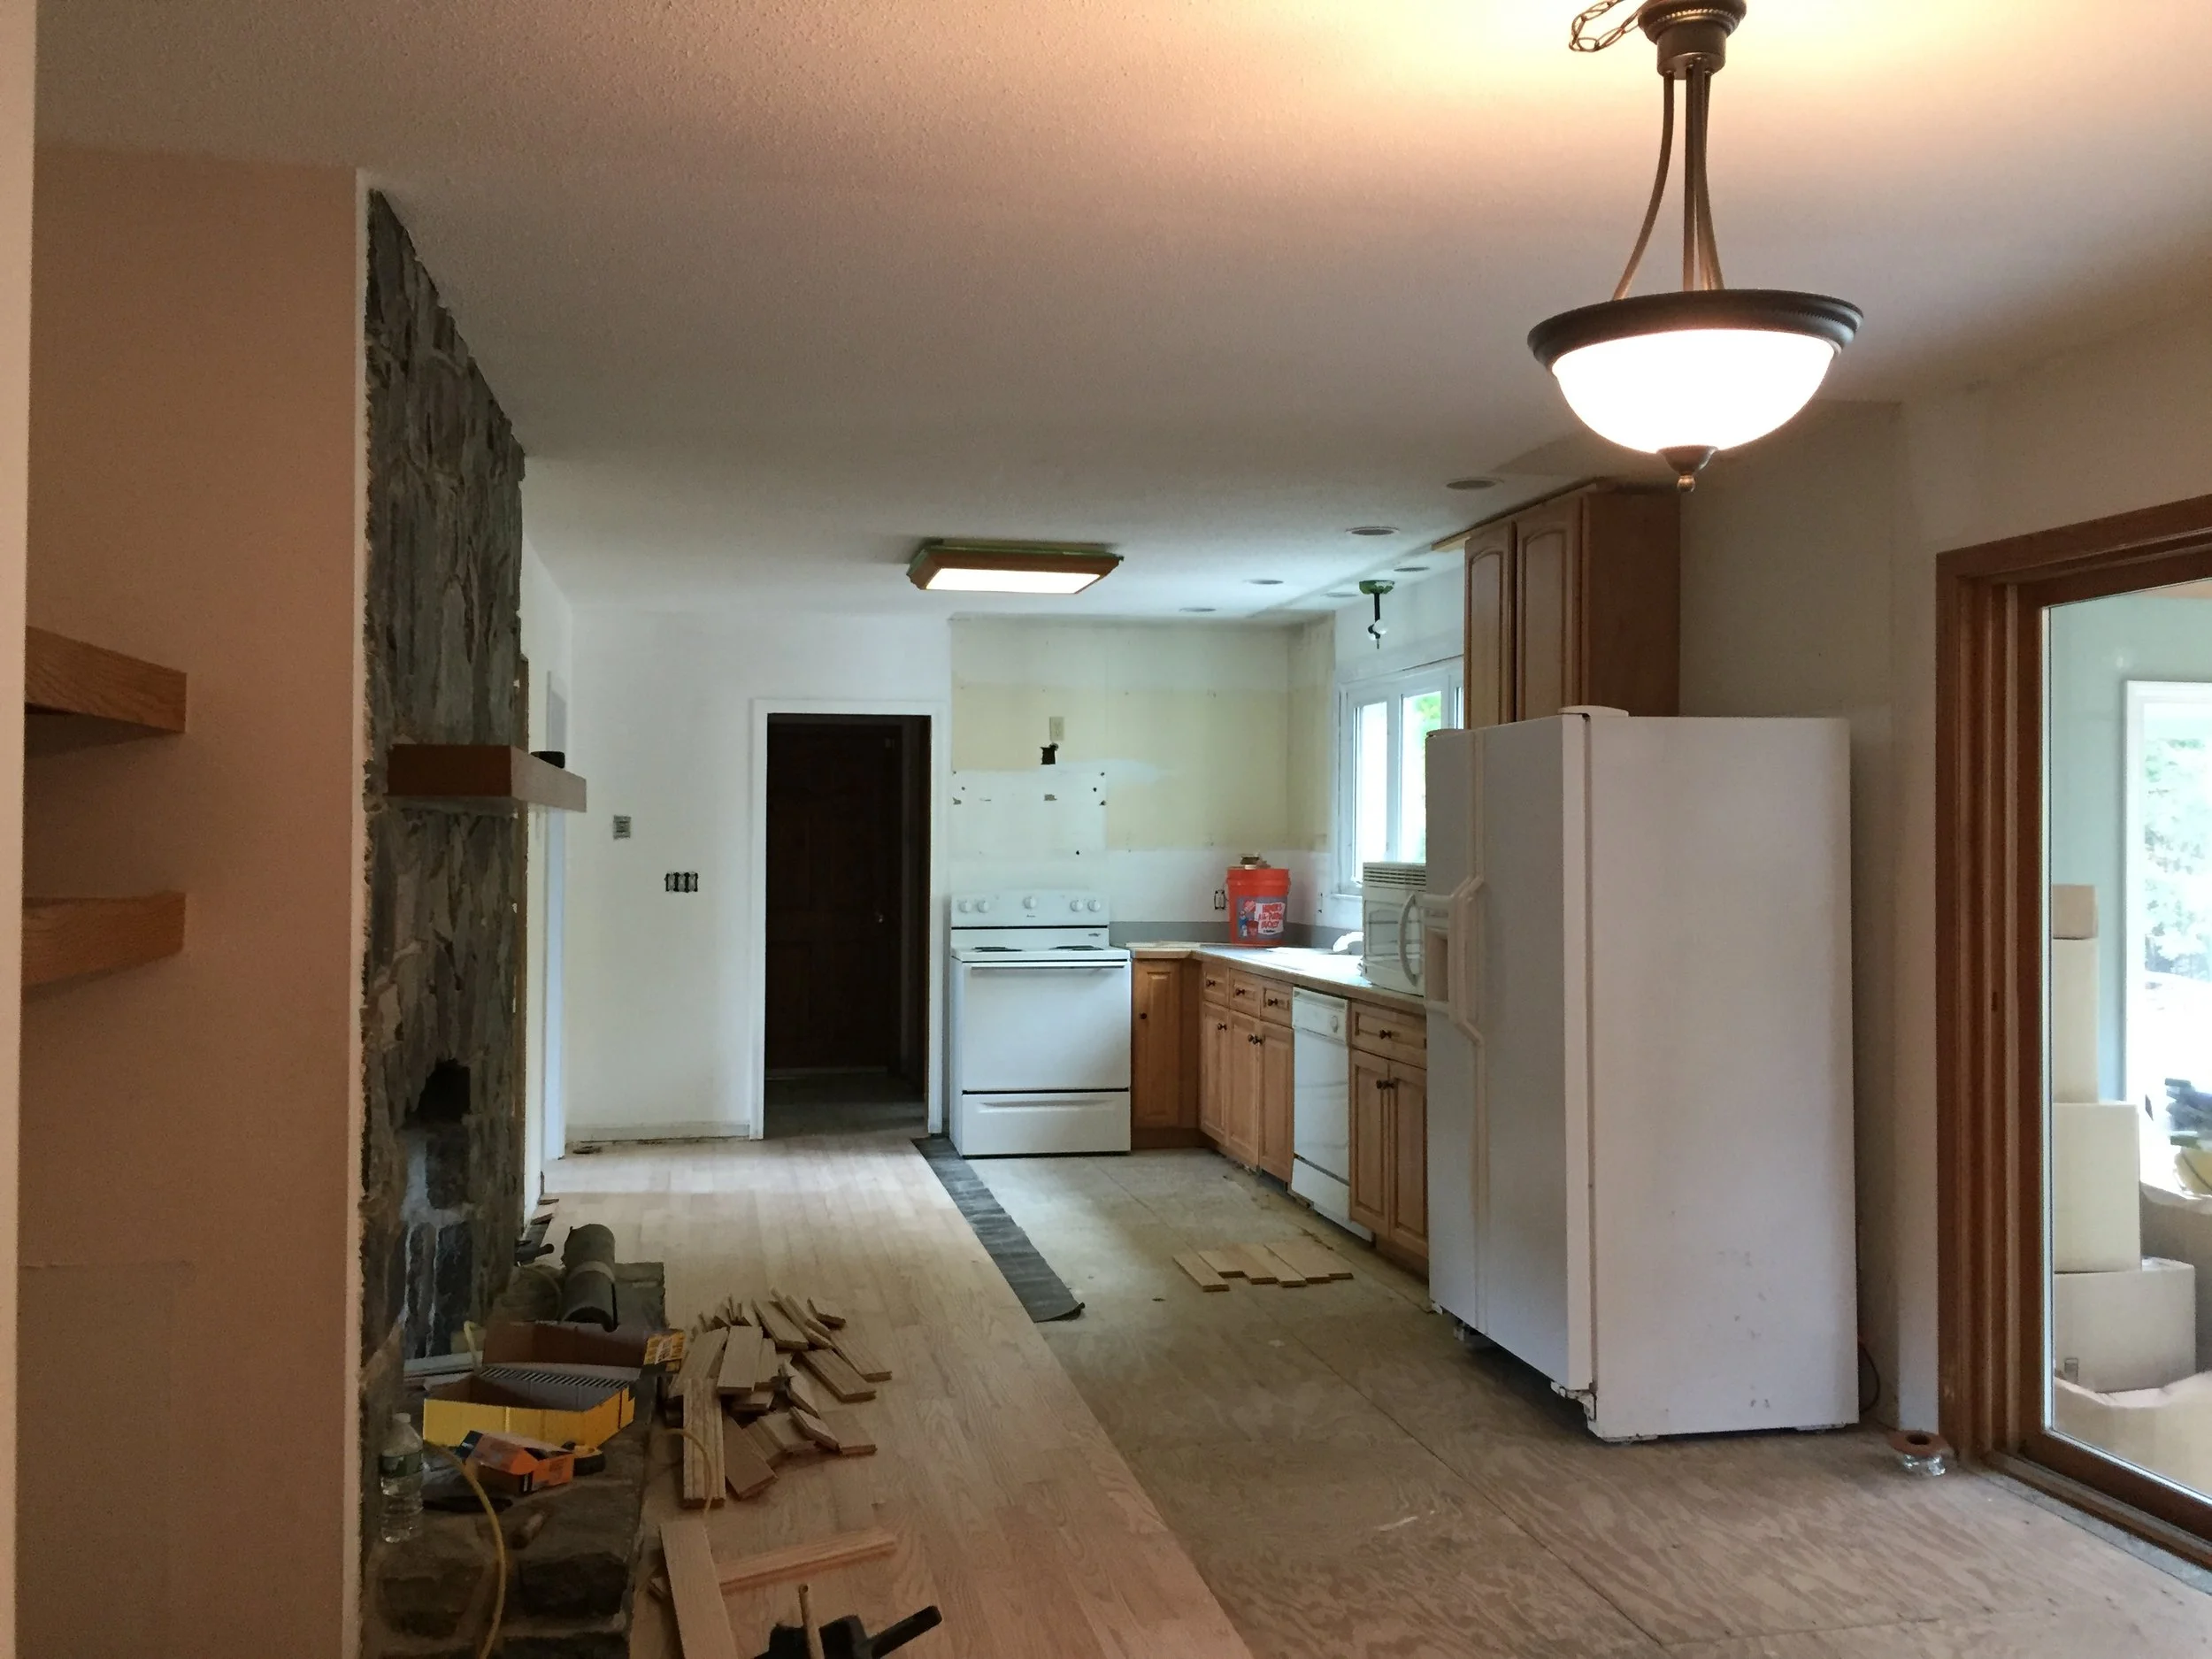
Before
Before
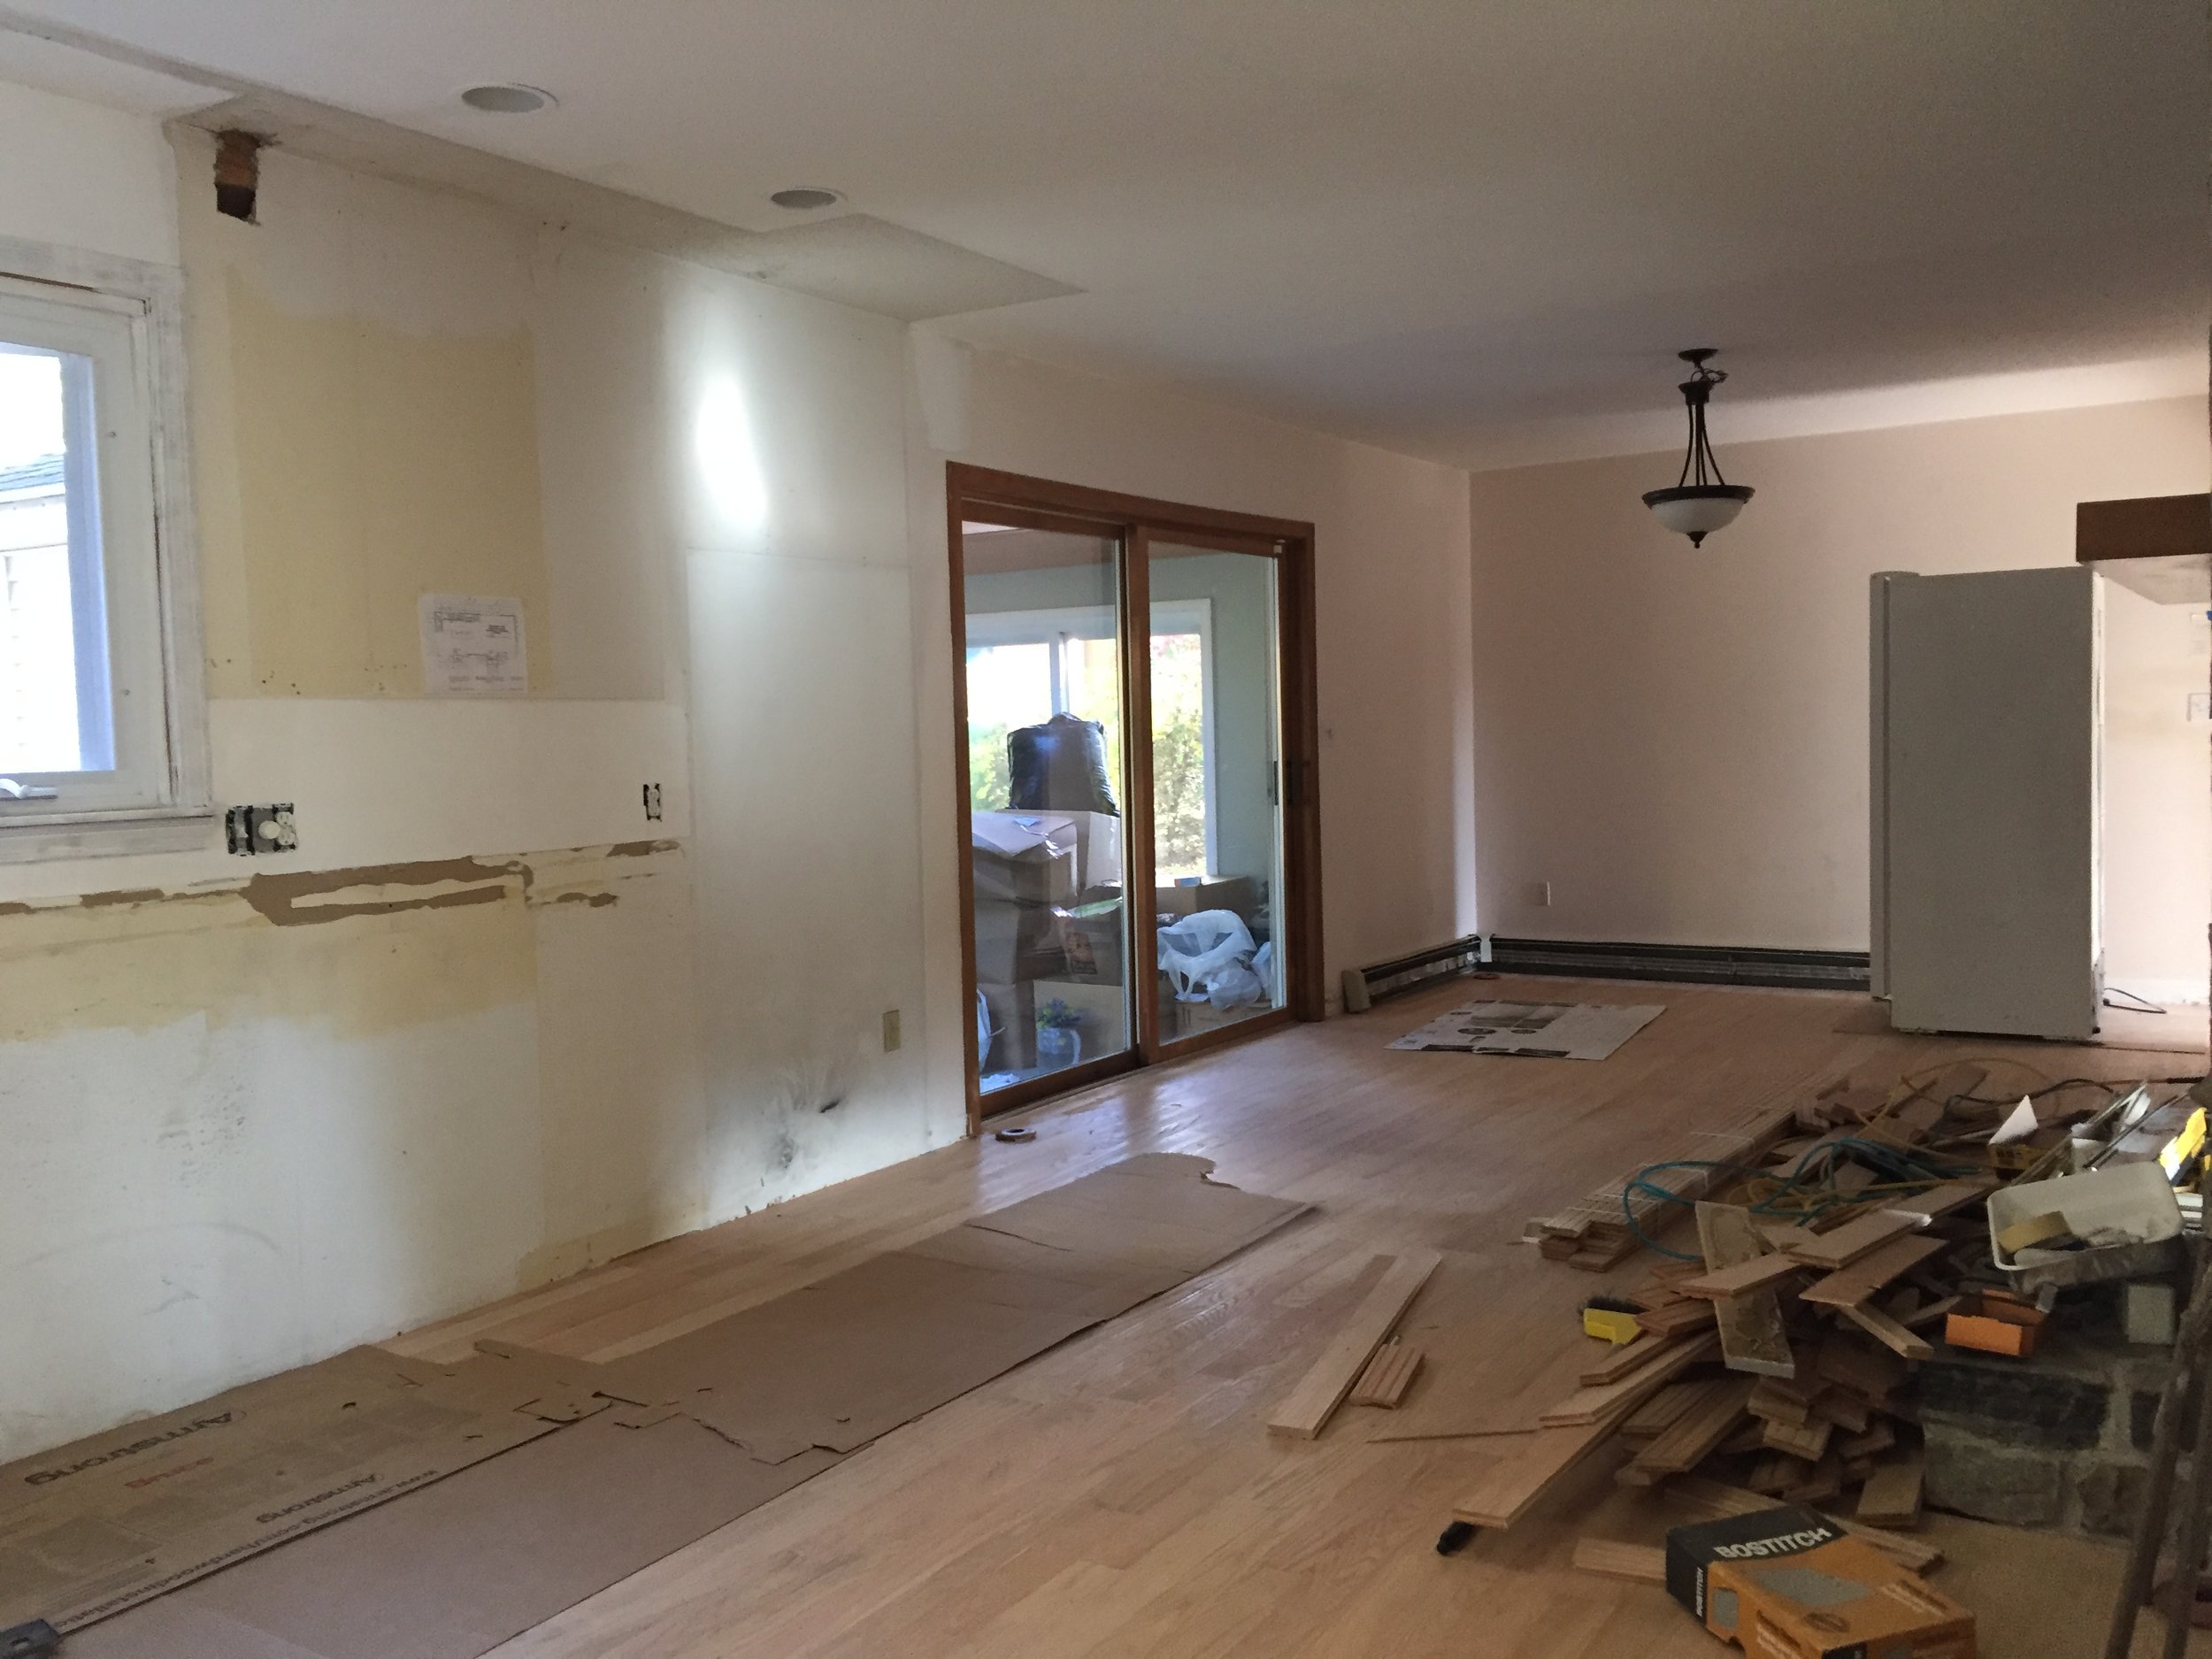
Progress - Upper cabinets removed and new flooring is being installed

Hardwood flooring being installed
Flooring complete and ready to be sanded

Framing out the new fridge location - previously a pantry closet

Our contractor John
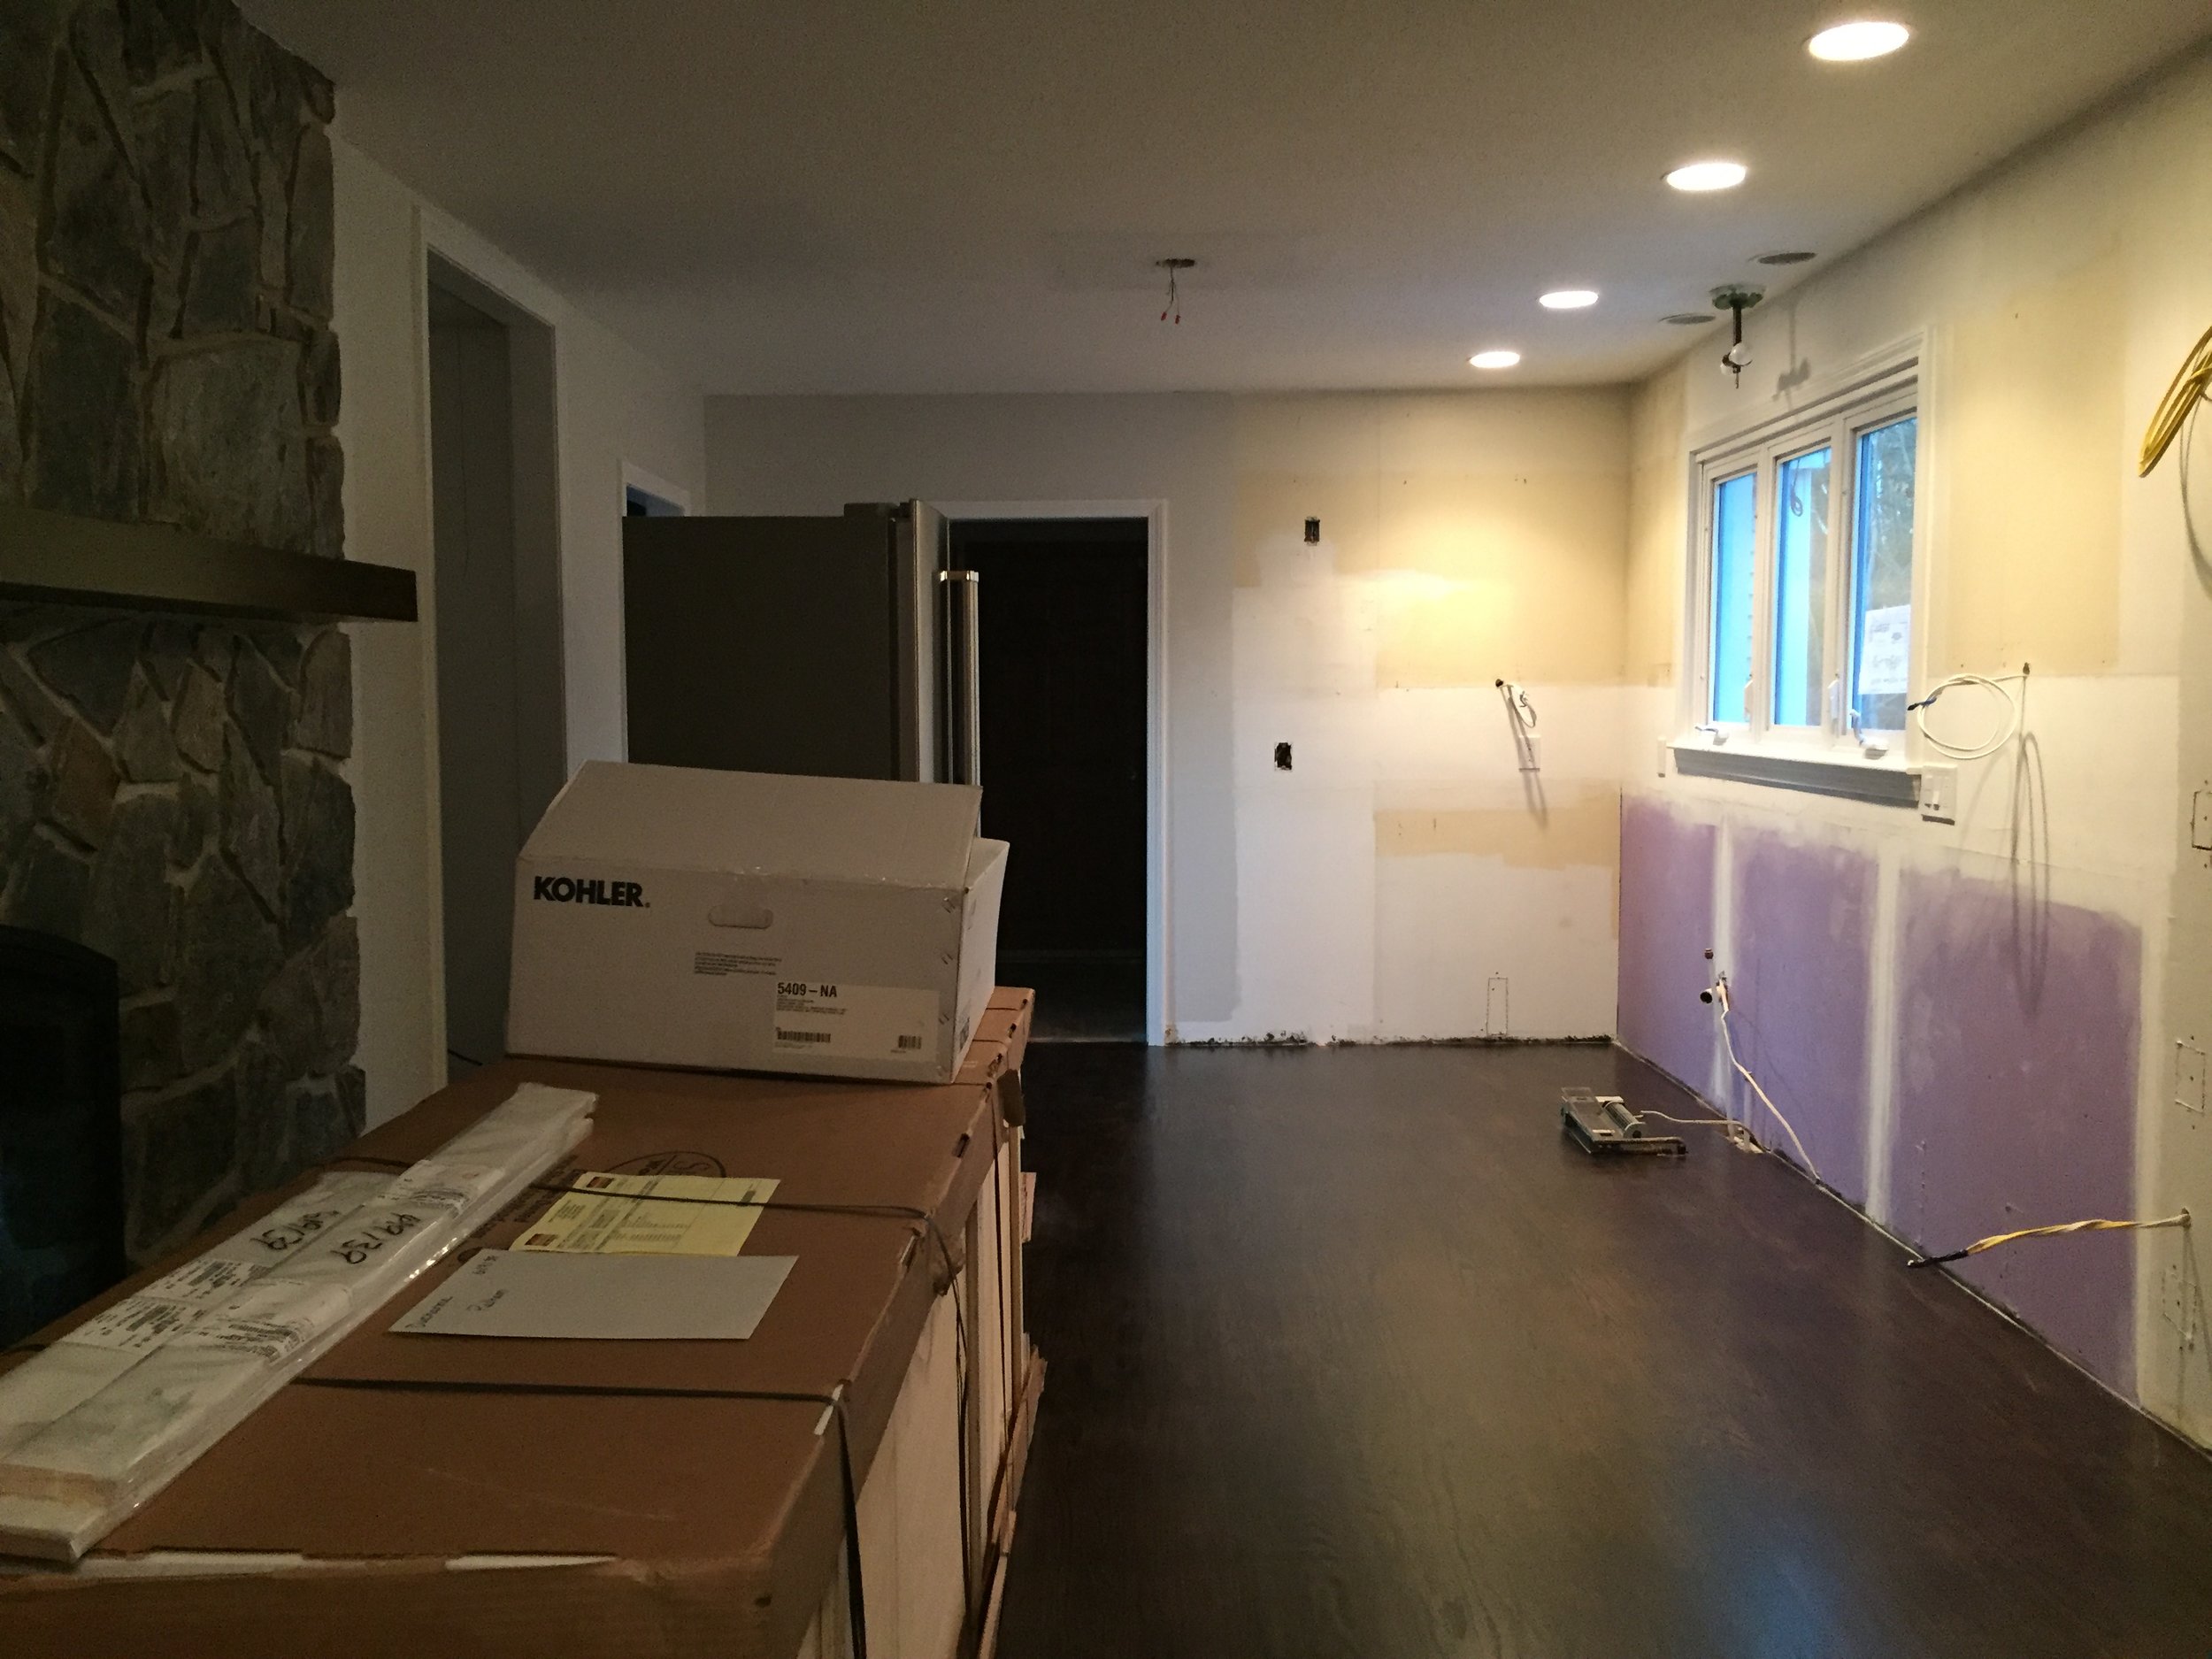
We had new moisture/mold/mildew resistant drywall put up since there was previous water damage. New electrical for the range hood, gas stove and under cabinet lighting was installed as well as new PEX pipe for the sink.

Sink and Stove Wall
Cabinet Delivery!

Kitchen Island in box
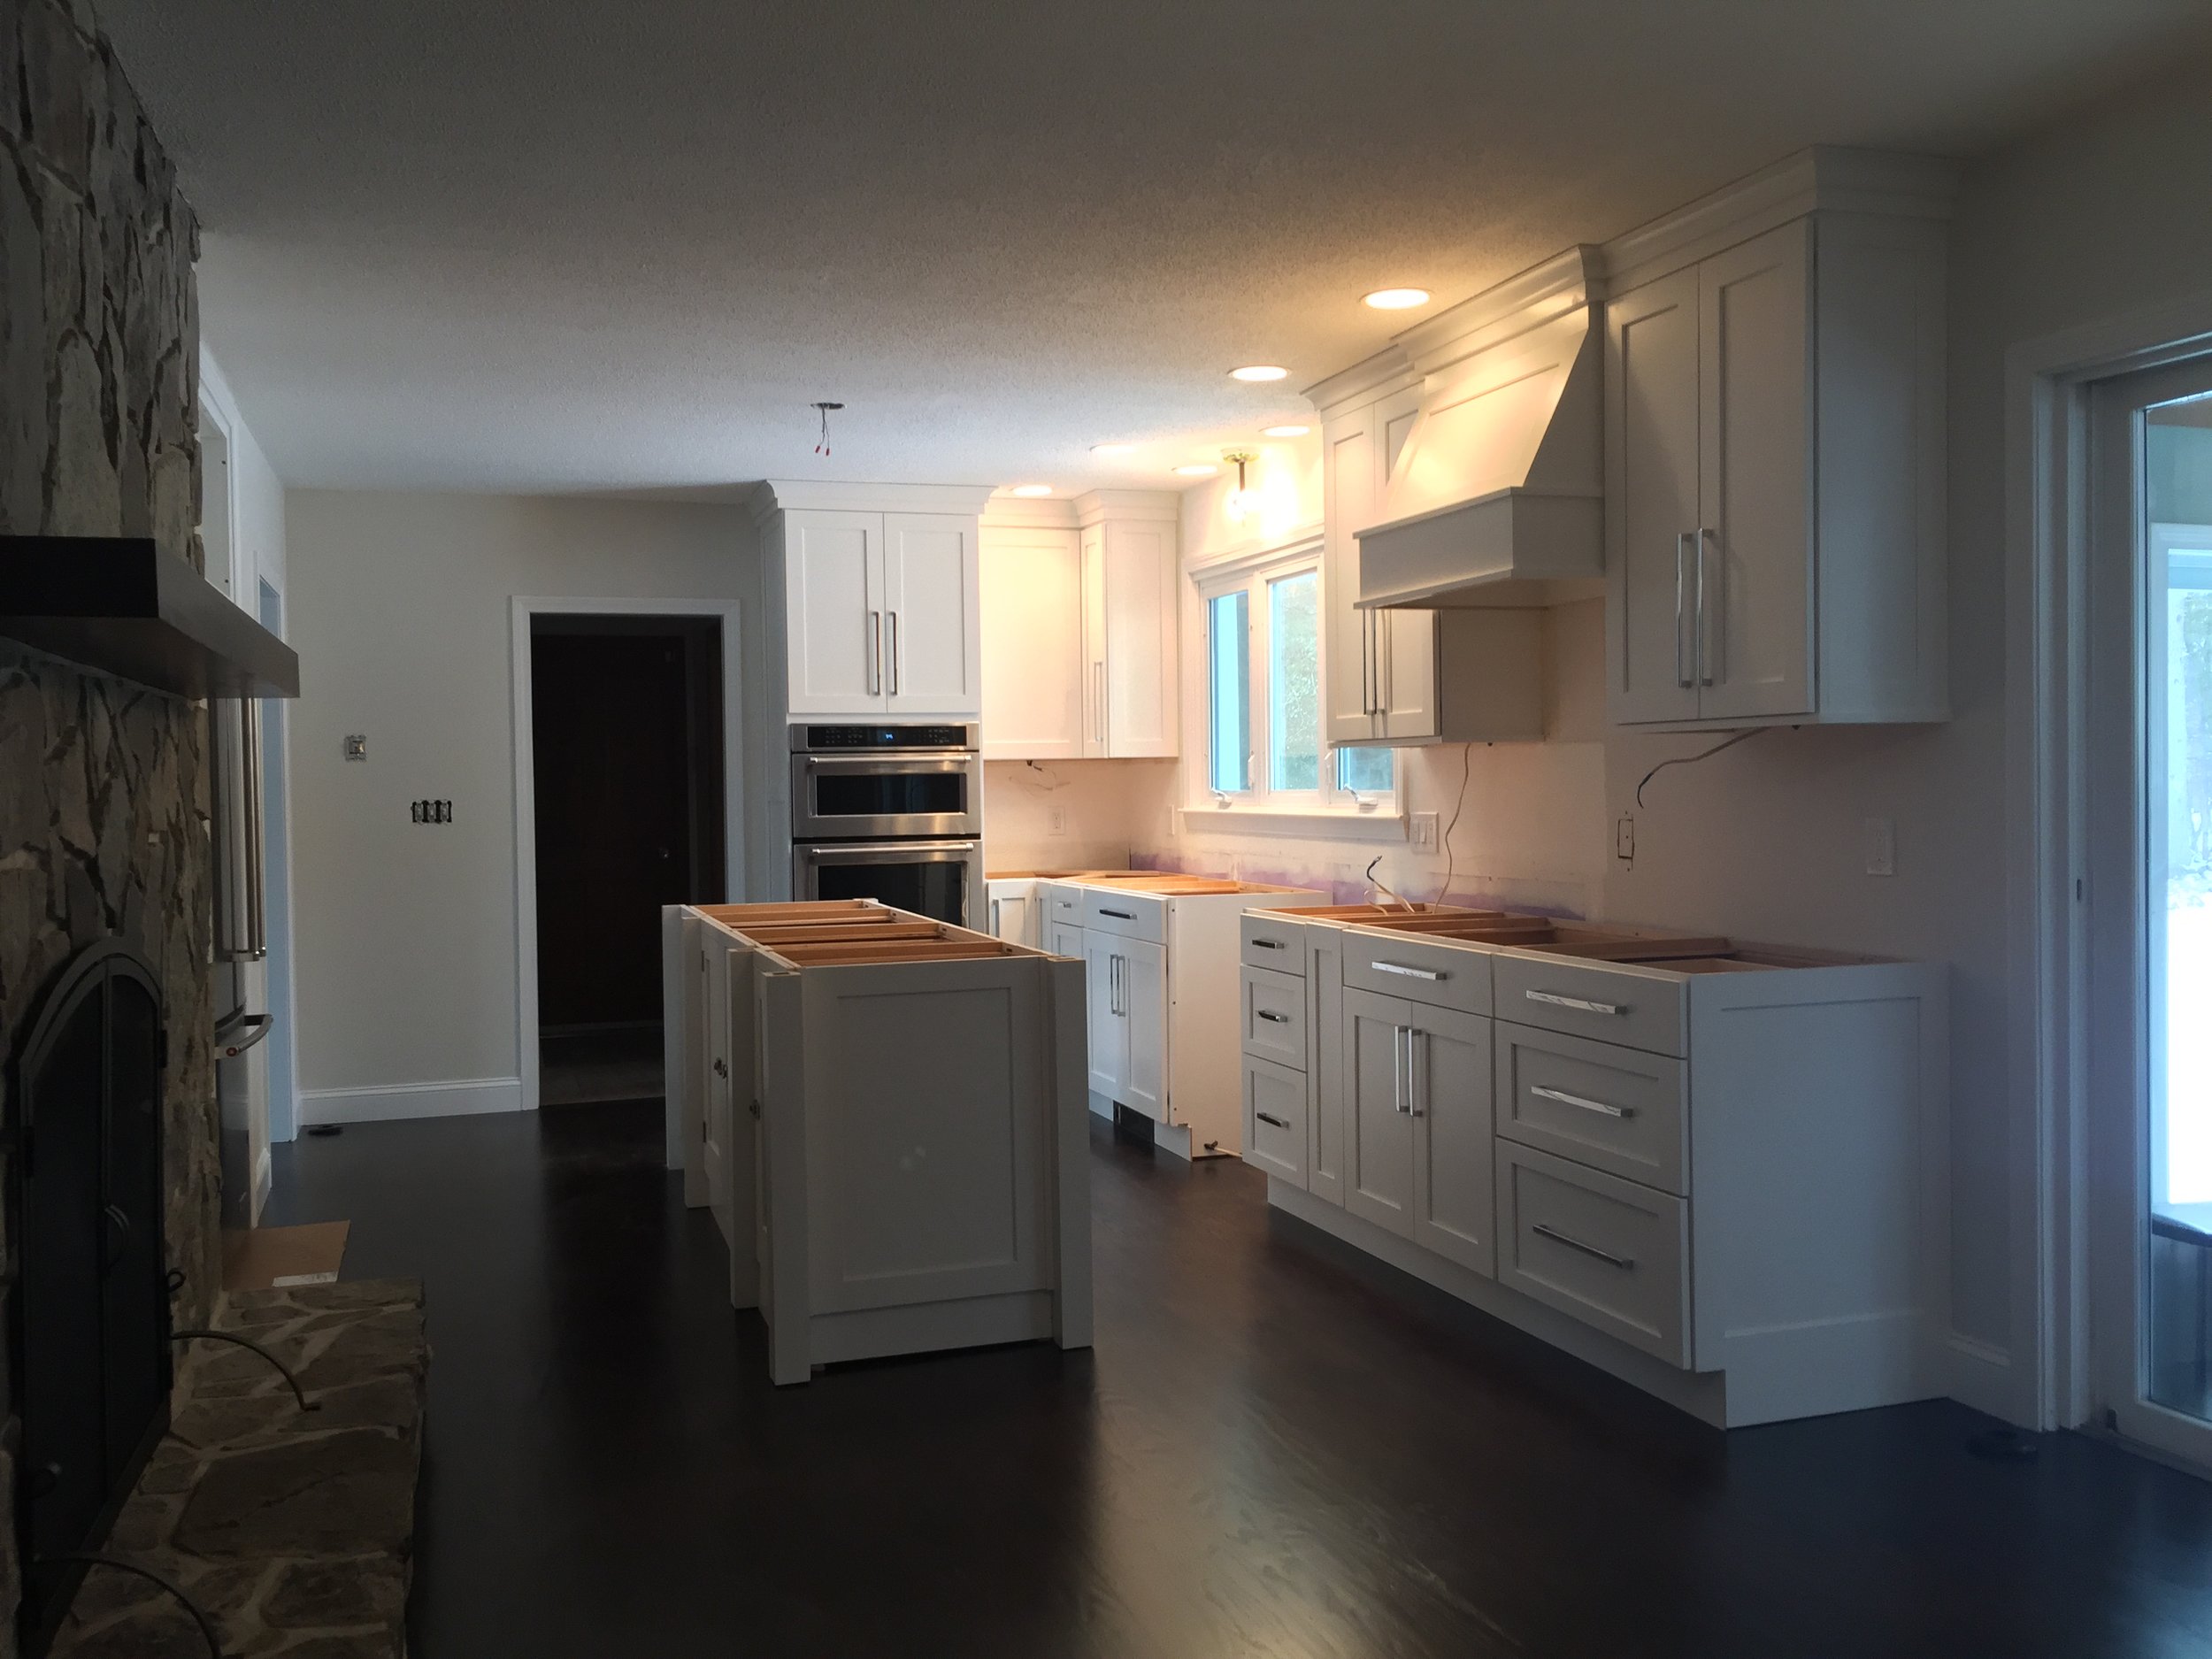
Cabinets are in and hardware is installed!
Cabinets are in and hardware is installed!

8' x 30" Kitchen Island - Custom Designed to look like a piece of furniture

Dry Bar

After Kitchen Renovation - Pelham, NH

After Kitchen Renovation - Pelham, NH

After Kitchen Renovation - Pelham, NH

After Kitchen Renovation - Pelham, NH

After Kitchen Renovation & Sunroom - Pelham, NH
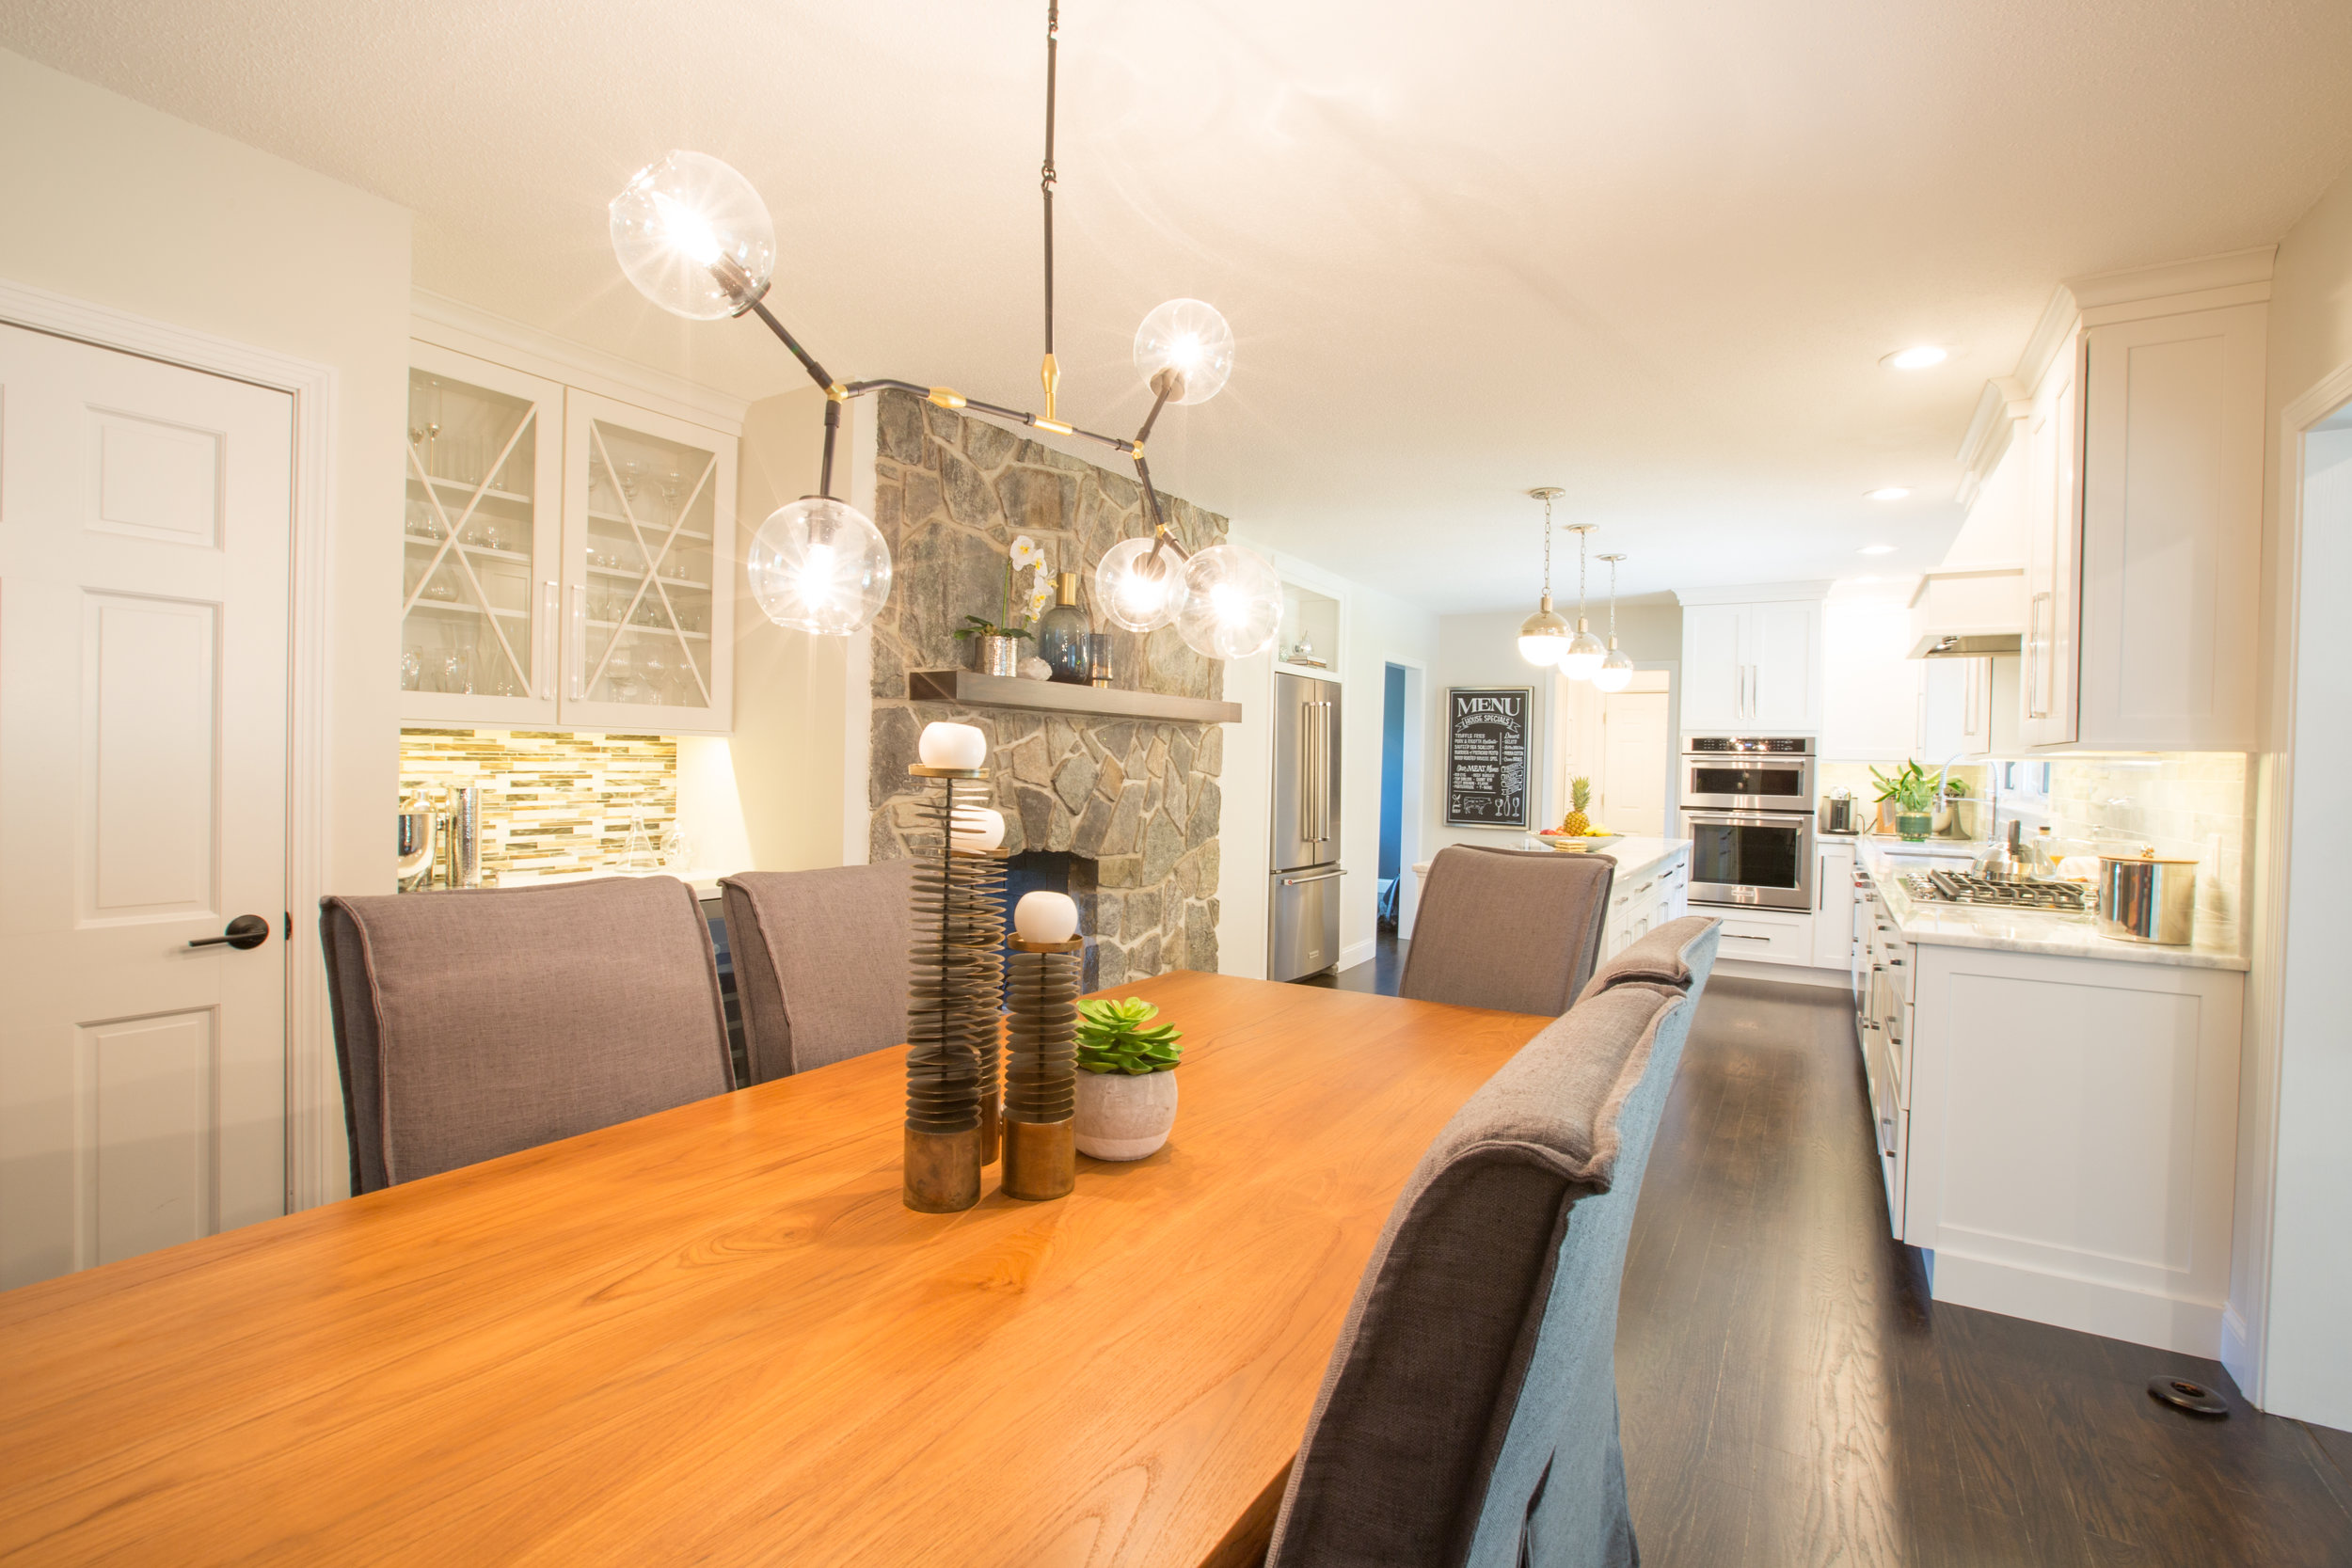
After Kitchen & Dining Space Renovation - Pelham, NH

After Kitchen & Dining Space Renovation - Pelham, NH

After Kitchen/Dining Space/Sunroom - Pelham, NH
Partial Kitchen Reveal
Here's the backsplash reveal!
Until it's 100% finished I will not reveal the whole kitchen - that's how I am! I do not want to present it, until it's to my high standards. I am waiting on a ventilation installer to install the hood and a piece of chalk art to complete the space.
I was able to lay out all of the tiles first to omit undesirable or chipped ones, which took me about 3 hours. I placed my favorites above the stove and under the sink window.
It took the installer about 5 hours to place the tiles yesterday and today he came back to grout. The tile is showing a little darker here because it's still wet from smoothing and cleaning up the grout.
I am in love with it! It was worth the wait to find the right batch. Carrara can be very gray or have yellow in it. I was able to order a box to approve the lot and was successful the first time.


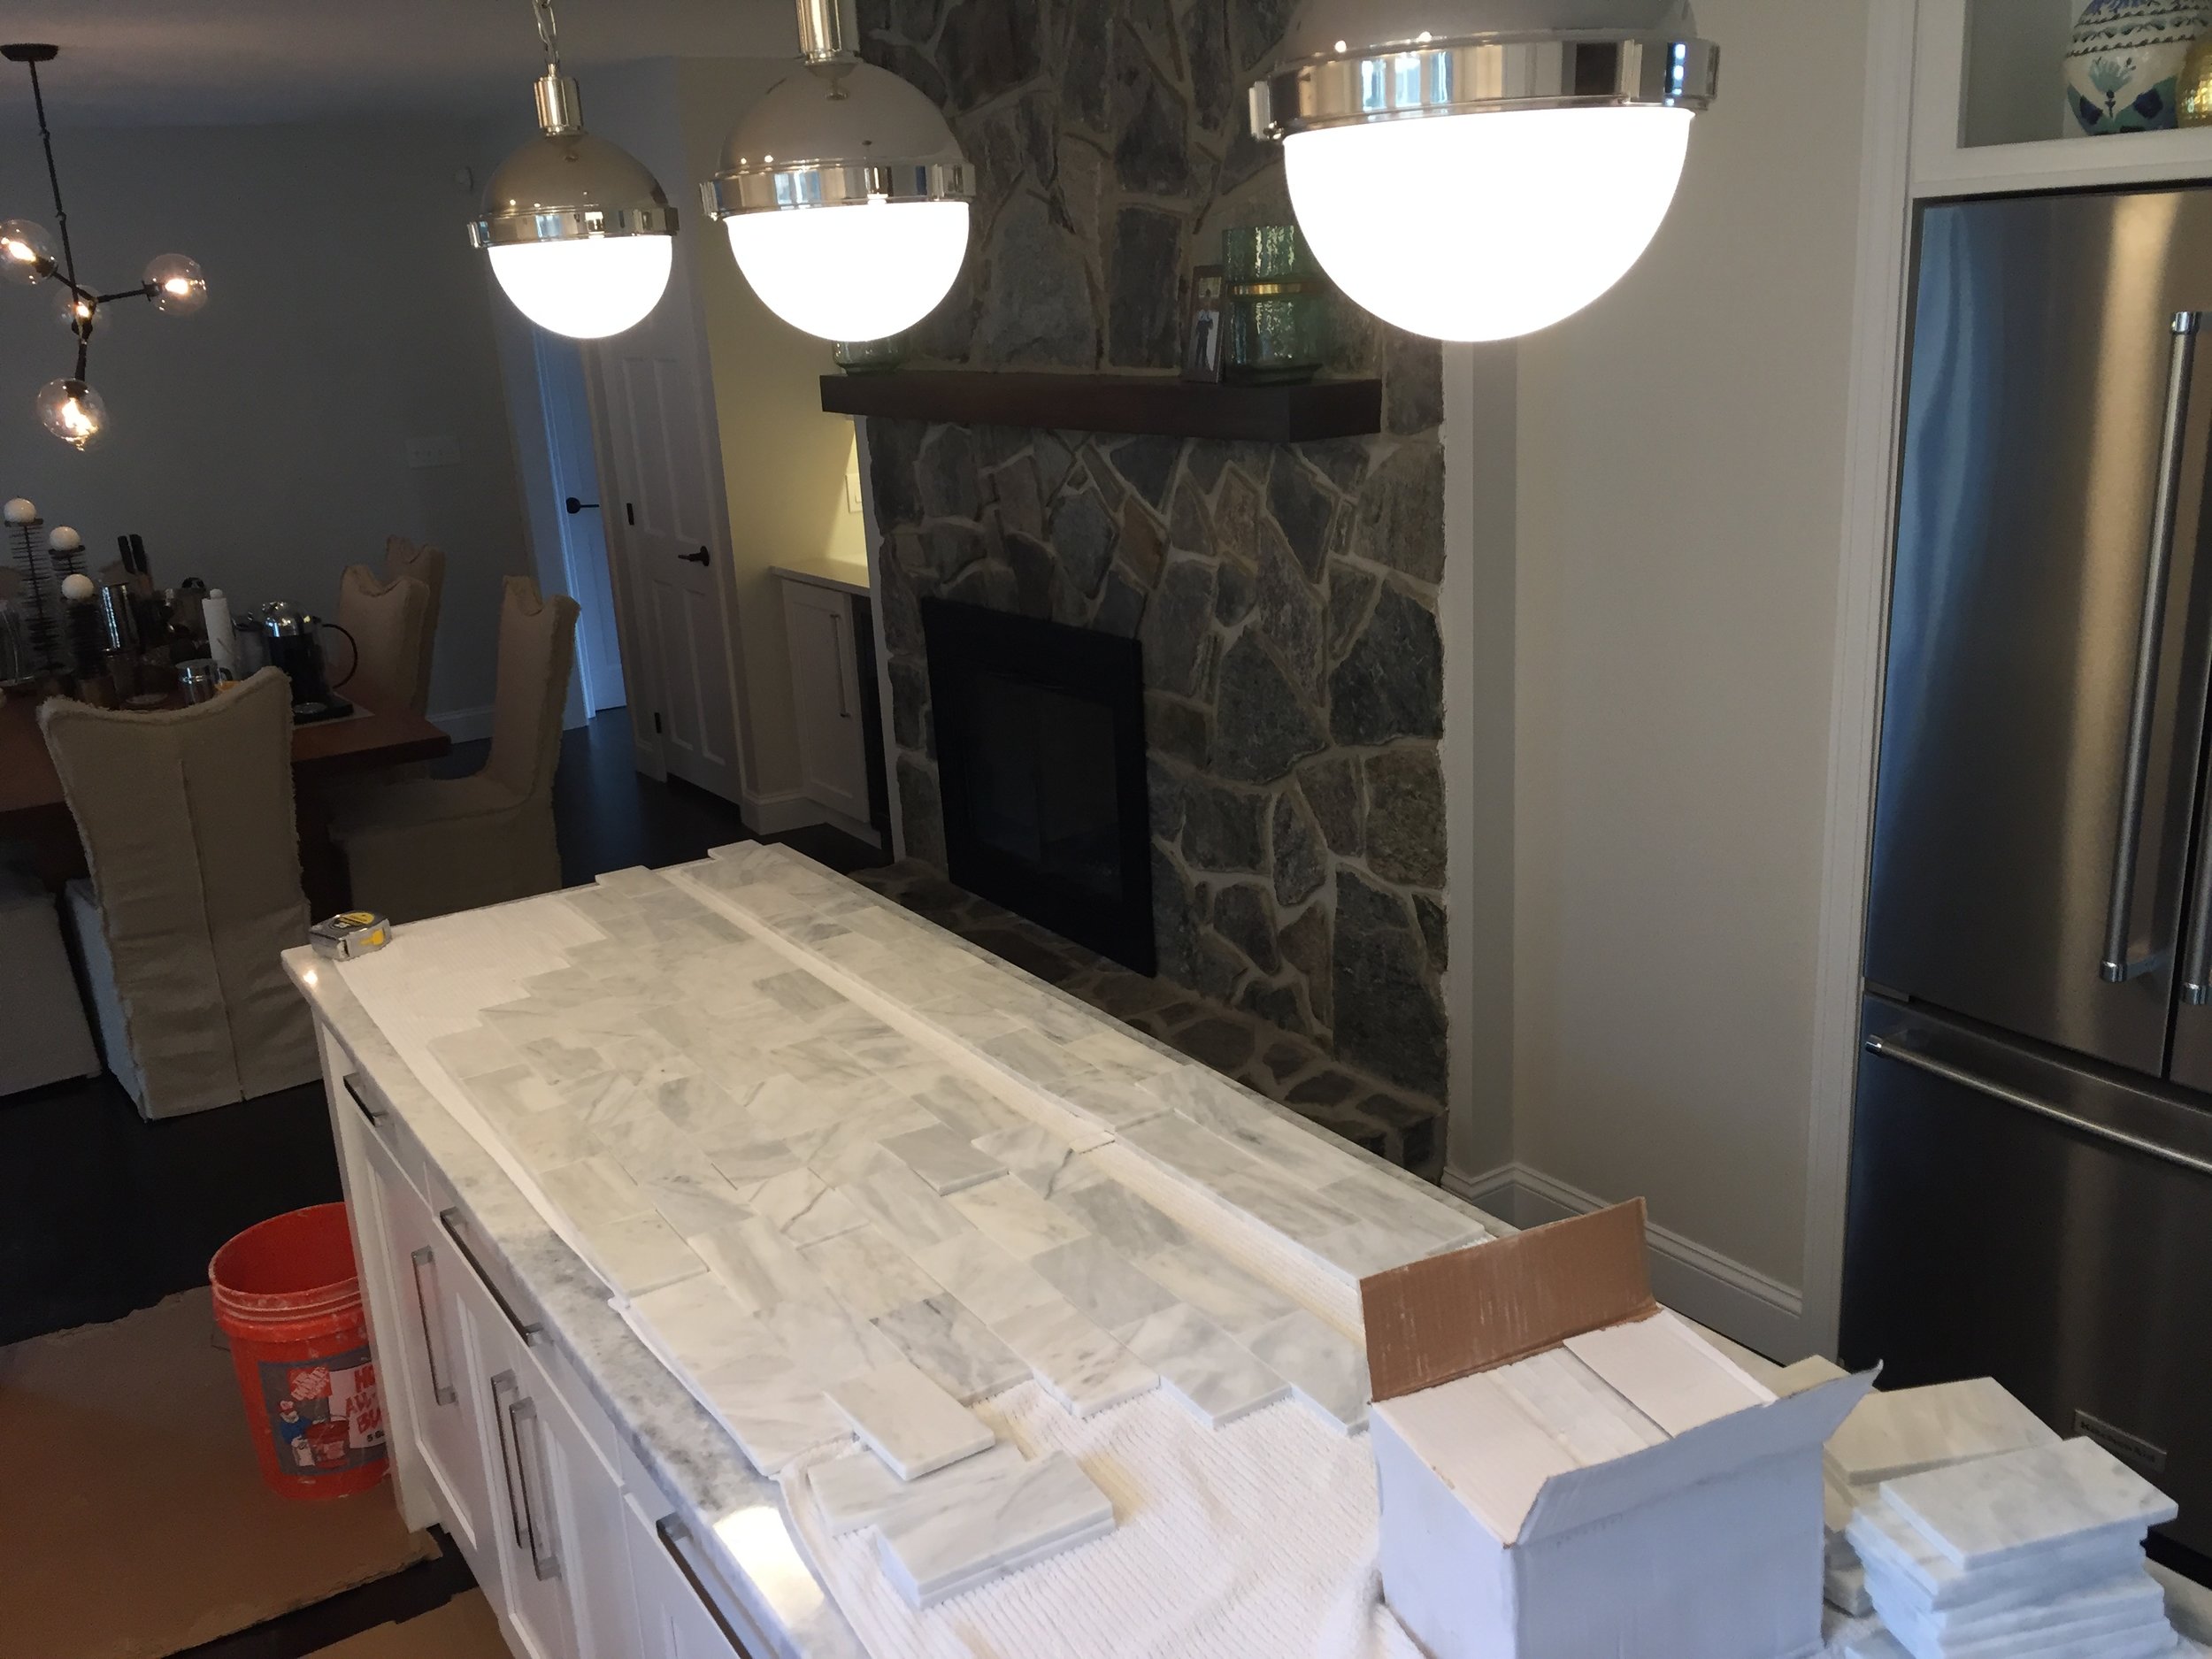
Polished Cristalizado Quartzite 3cm Countertops with Polished White Carrara Backsplash
I chose a different tile for the bar area because I wanted something unique here, as it's opposite and on the other side of the fireplace. I chose polished Snow White Quartz 3cm because it's much more durable and stain resistant than the quartzite I used for my main countertops. So when acidic drinks spillover I won't have to pray for no etching or damage.
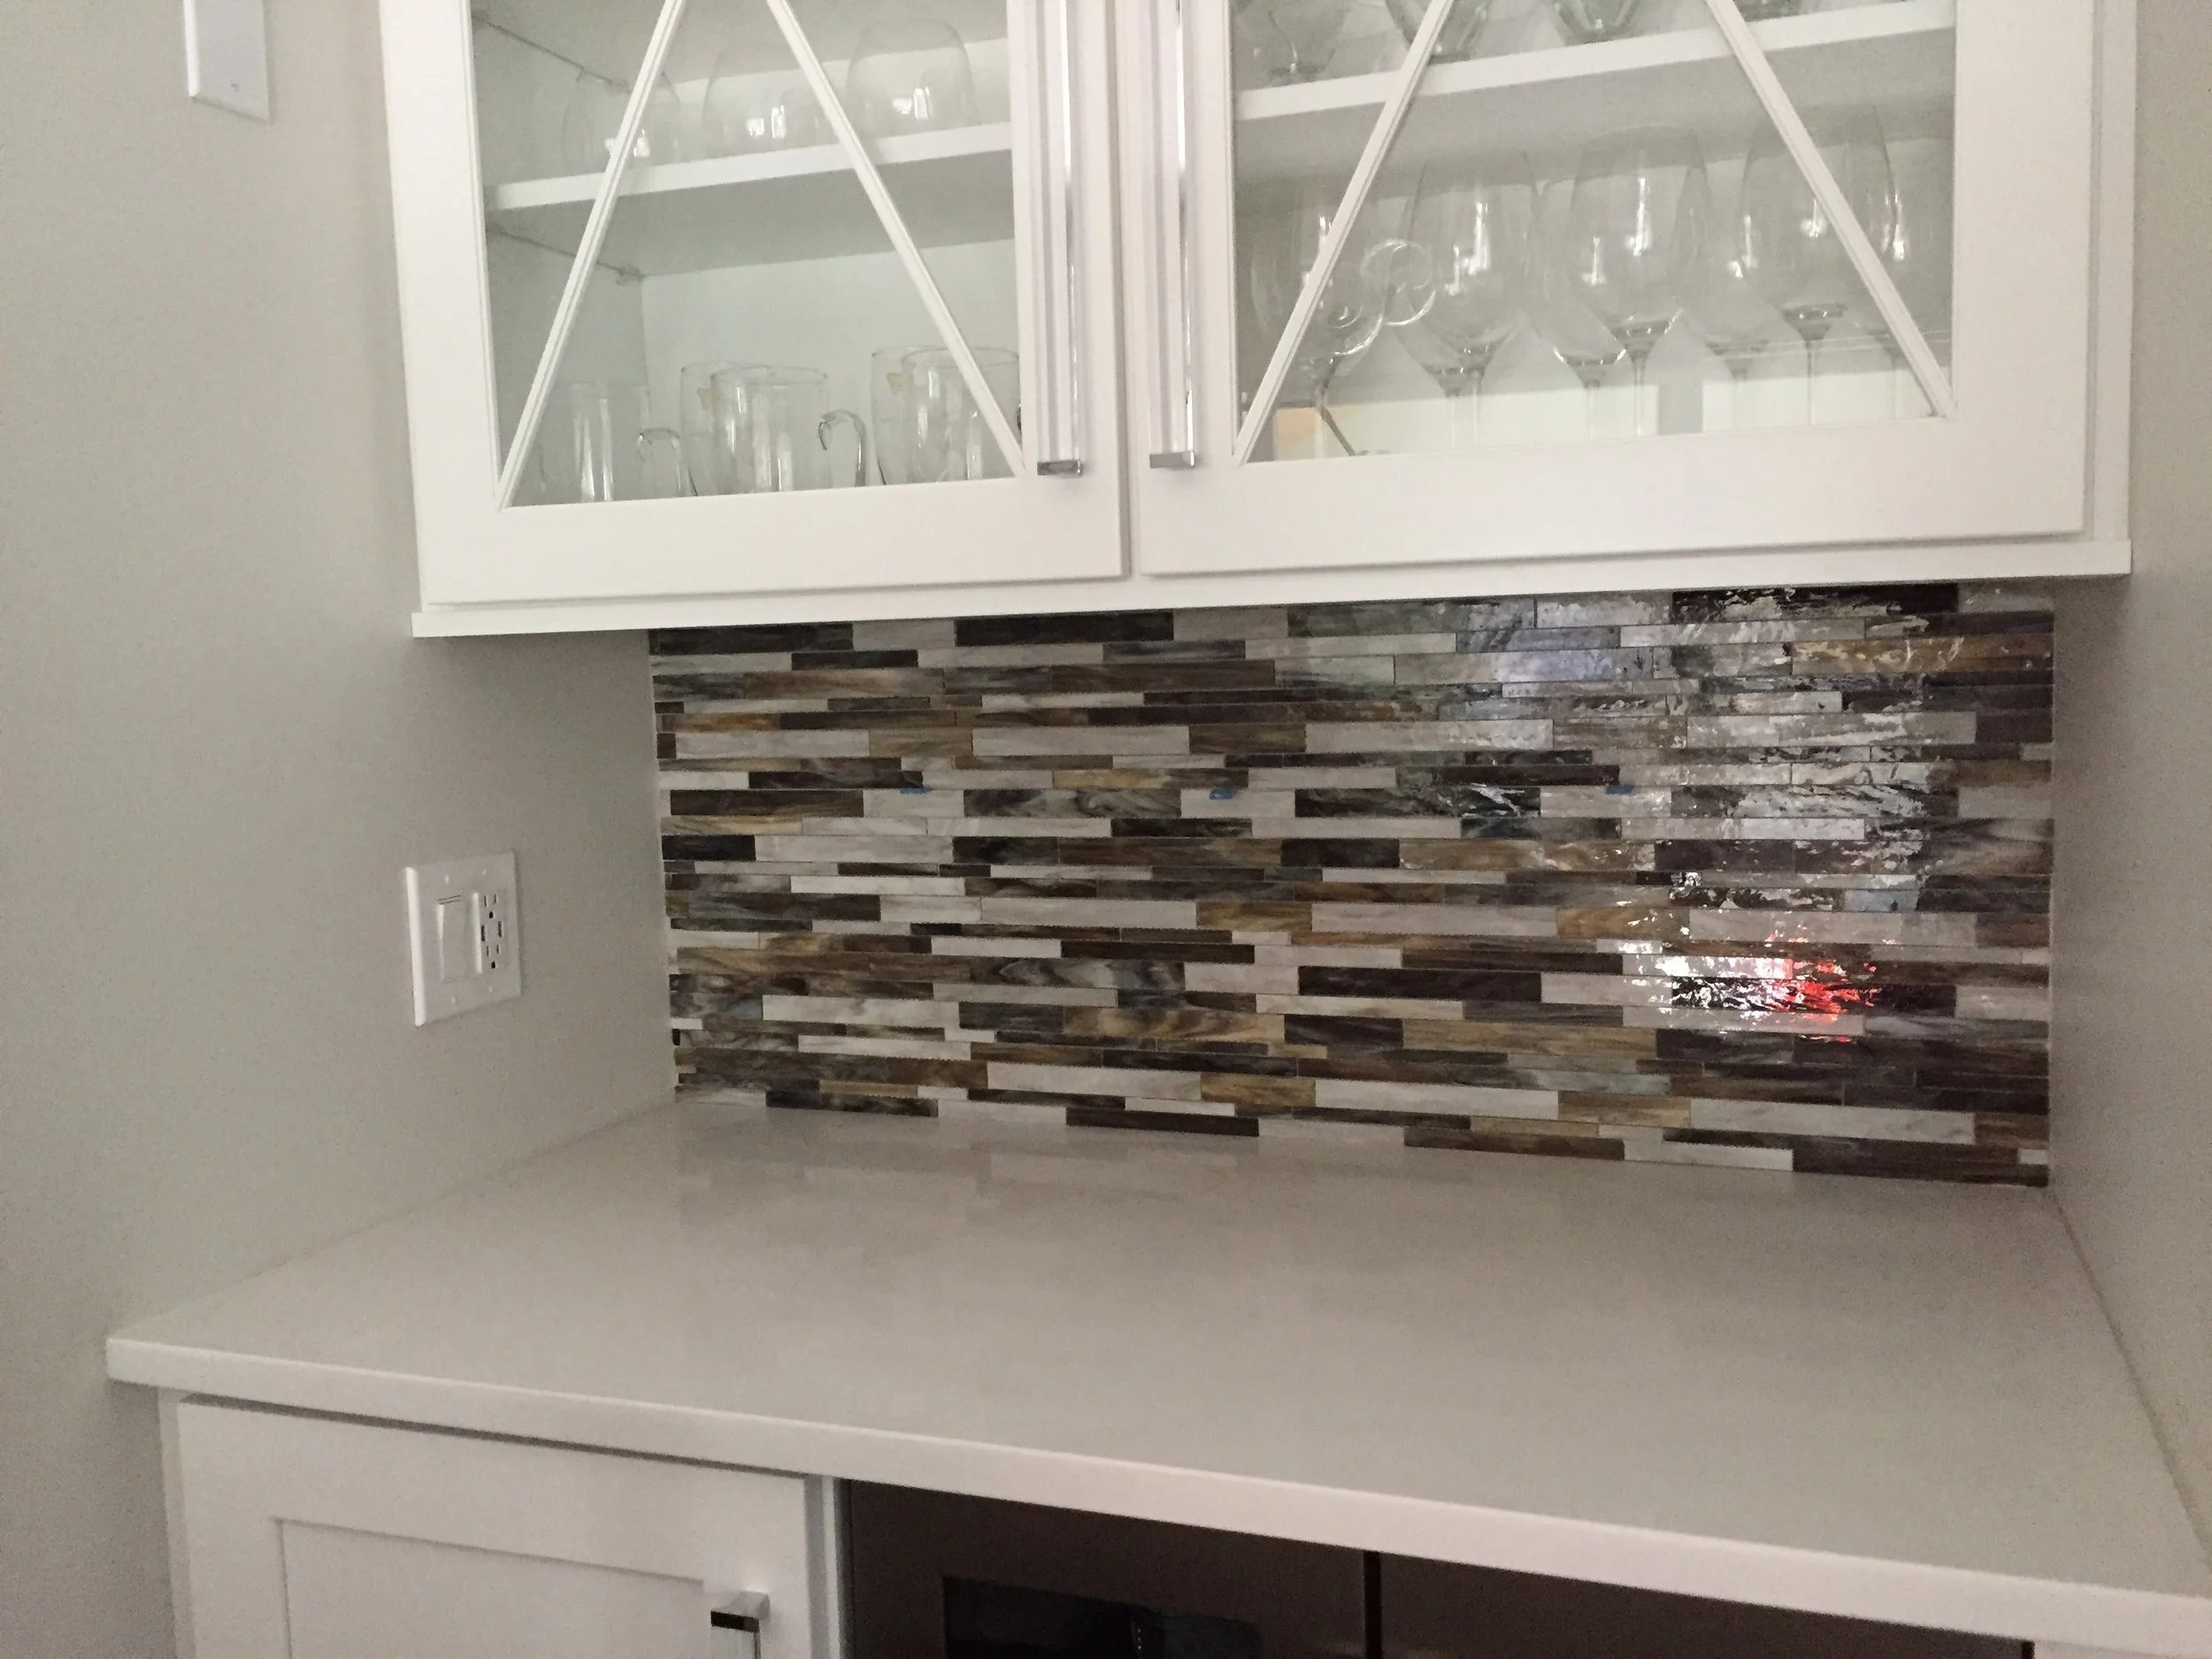
BAR - Snow White Quartz 3cm countertop with bliss Glass Mosaic Backsplash
The backsplash has arrived!
Laying out my own tile backsplash today! I can't wait for my kitchen reveal 😊
Bianco Marble Subway Tile
Kitchen Sneak Peak!
I know it's been a while since my last post; however you'll see what I've been working on in an updated blog post coming your way soon!
Here is a sneak peak and a look at what my blog post will be about...
Kitchen Cabinet Delivery
Our kitchen cabinets have been delivered and will be installed over the next 4 days.
We have been without a kitchen for 2 months now so this is a very exciting day!
I will be posting pictures once it all comes together!

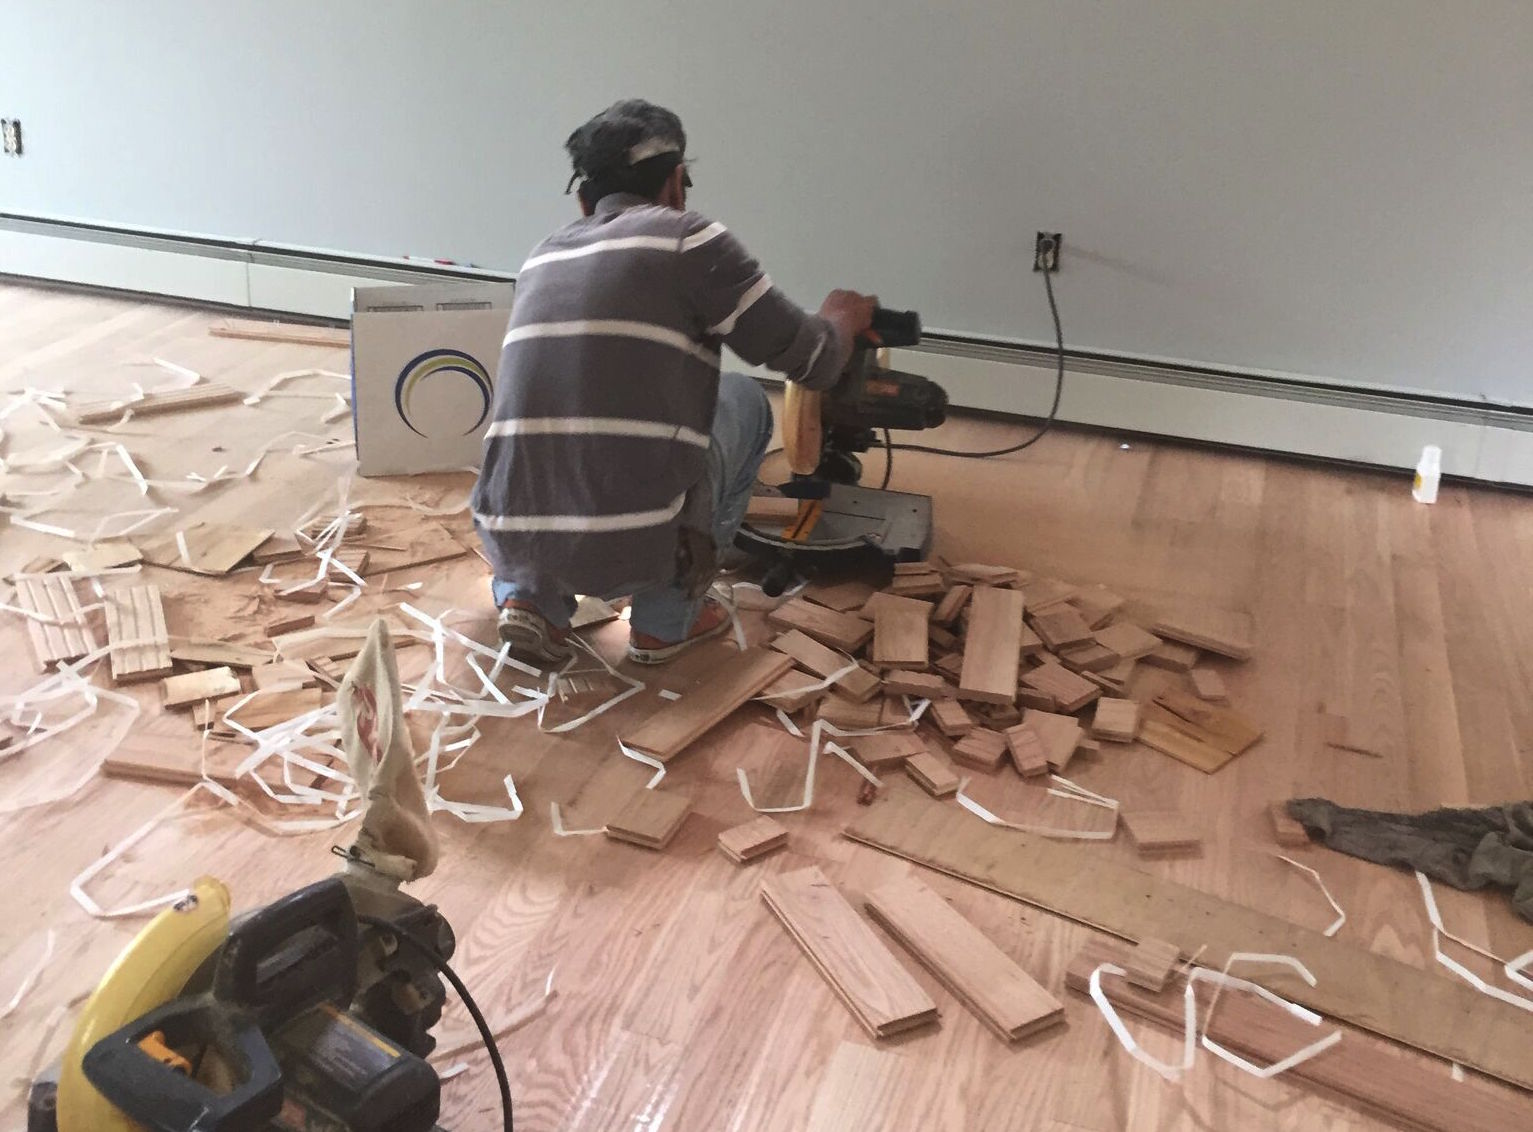
New Wood Flooring
It's an exciting time when my design vision (slowly but surely) becomes reality. The most recent transformation is the completion of hardwood floors all throughout the house.
As I mentioned in my previous post, solid red oak is our wood-of-choice, and it's the perfect type of wood to get creative with as the options are endless with the stain level and finish color. Also, you can always re-stain the wood at a later date to create a new look at a low-cost (talk about a win/win!)
I also adore solid red oak as it is timeless and classic and compliments our existing dark espresso stained wood and when it comes to additional statement pieces (glass & metal), it all comes together in a subtle yet sharp contrast look (ohh la la).
PROCESS
- I did research on minwax wood finishes, google imaged and searched on Pinterest for examples of dark brown stains (no red hints) to find examples. I came across Dark Walnut and Jacobean
- I purchased quarts of each stain to see what they were like. You can purchase them at most paint stores, Home Depot or Lowe's. The quarts are around $6 each.
- I tested the stains on red oak samples. When testing the stains I noticed that 1 coat wasn't doing it for me and I wanted something deeper and richer. So then I applied 2 coats and the color became more saturated, which is what I was looking for. The Dark Walnut wasn't as deep as it appeared in photos and the Jacobean ended up being darker, which is what I wanted.
- The decision was made - Minwax Jacobean 2750
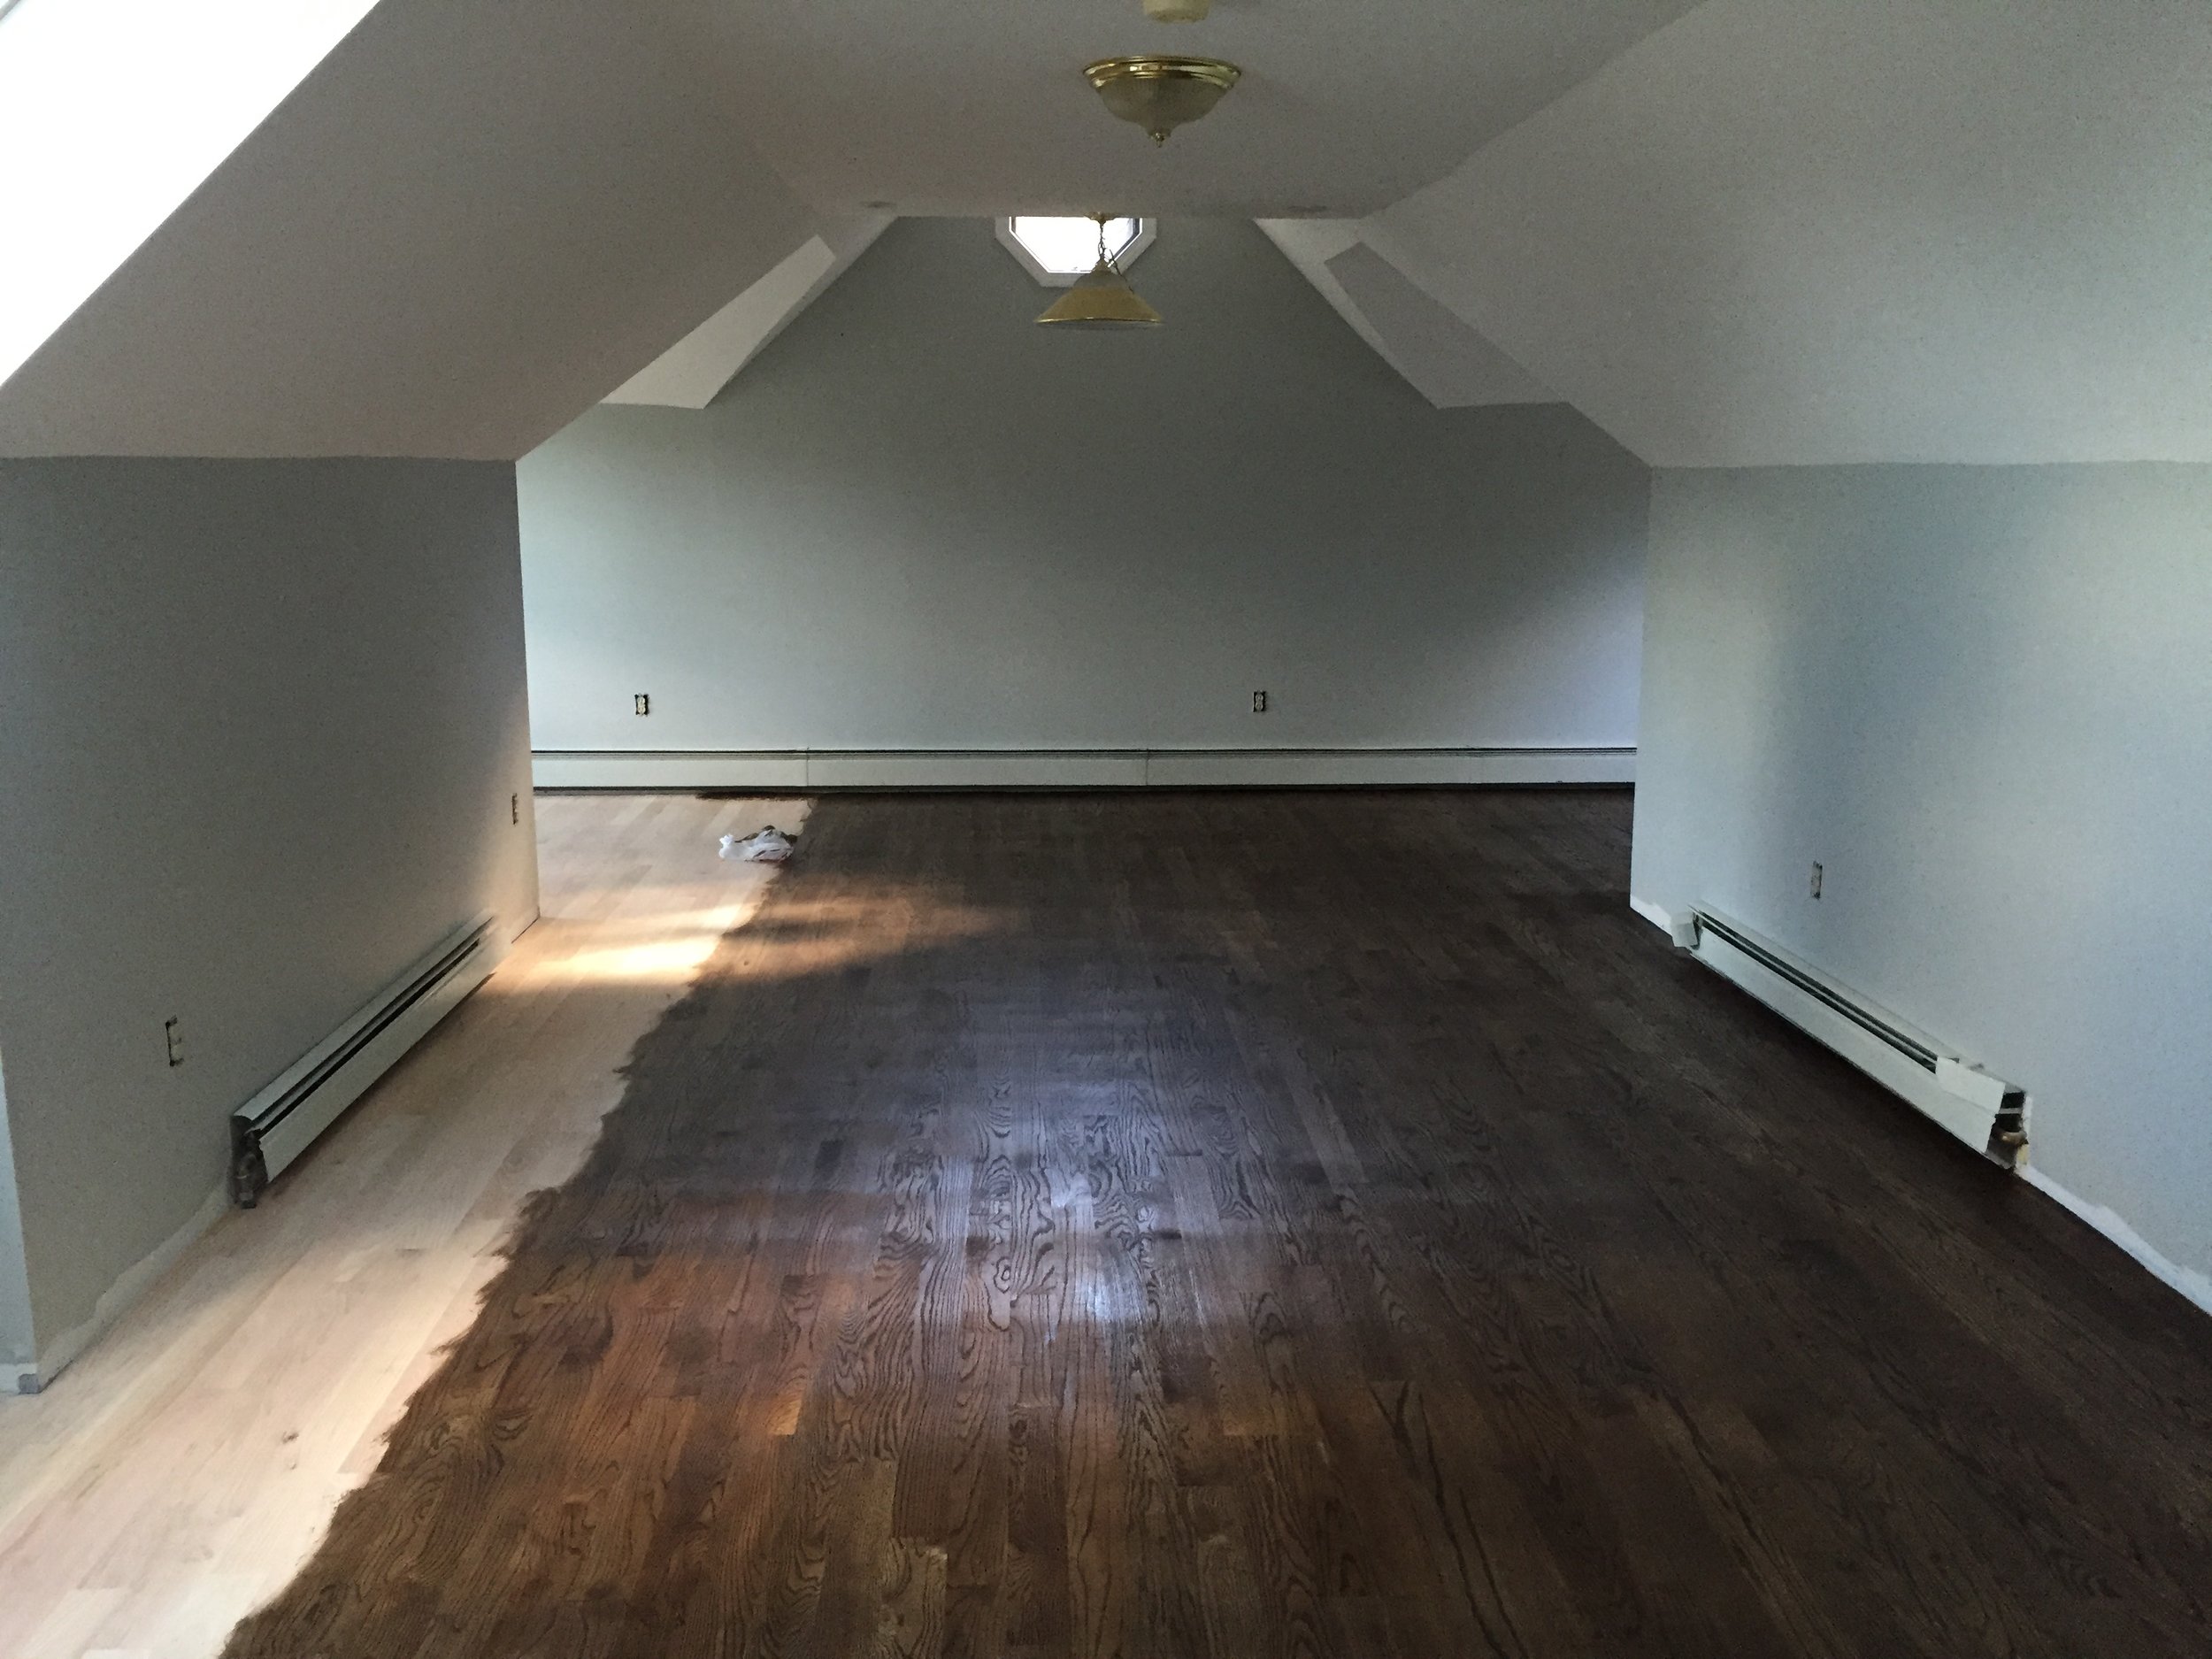
Below you'll see the two samples showing 1 coat versus 2 coats. As you can see, in the 2nd coat the grain has filled in more.
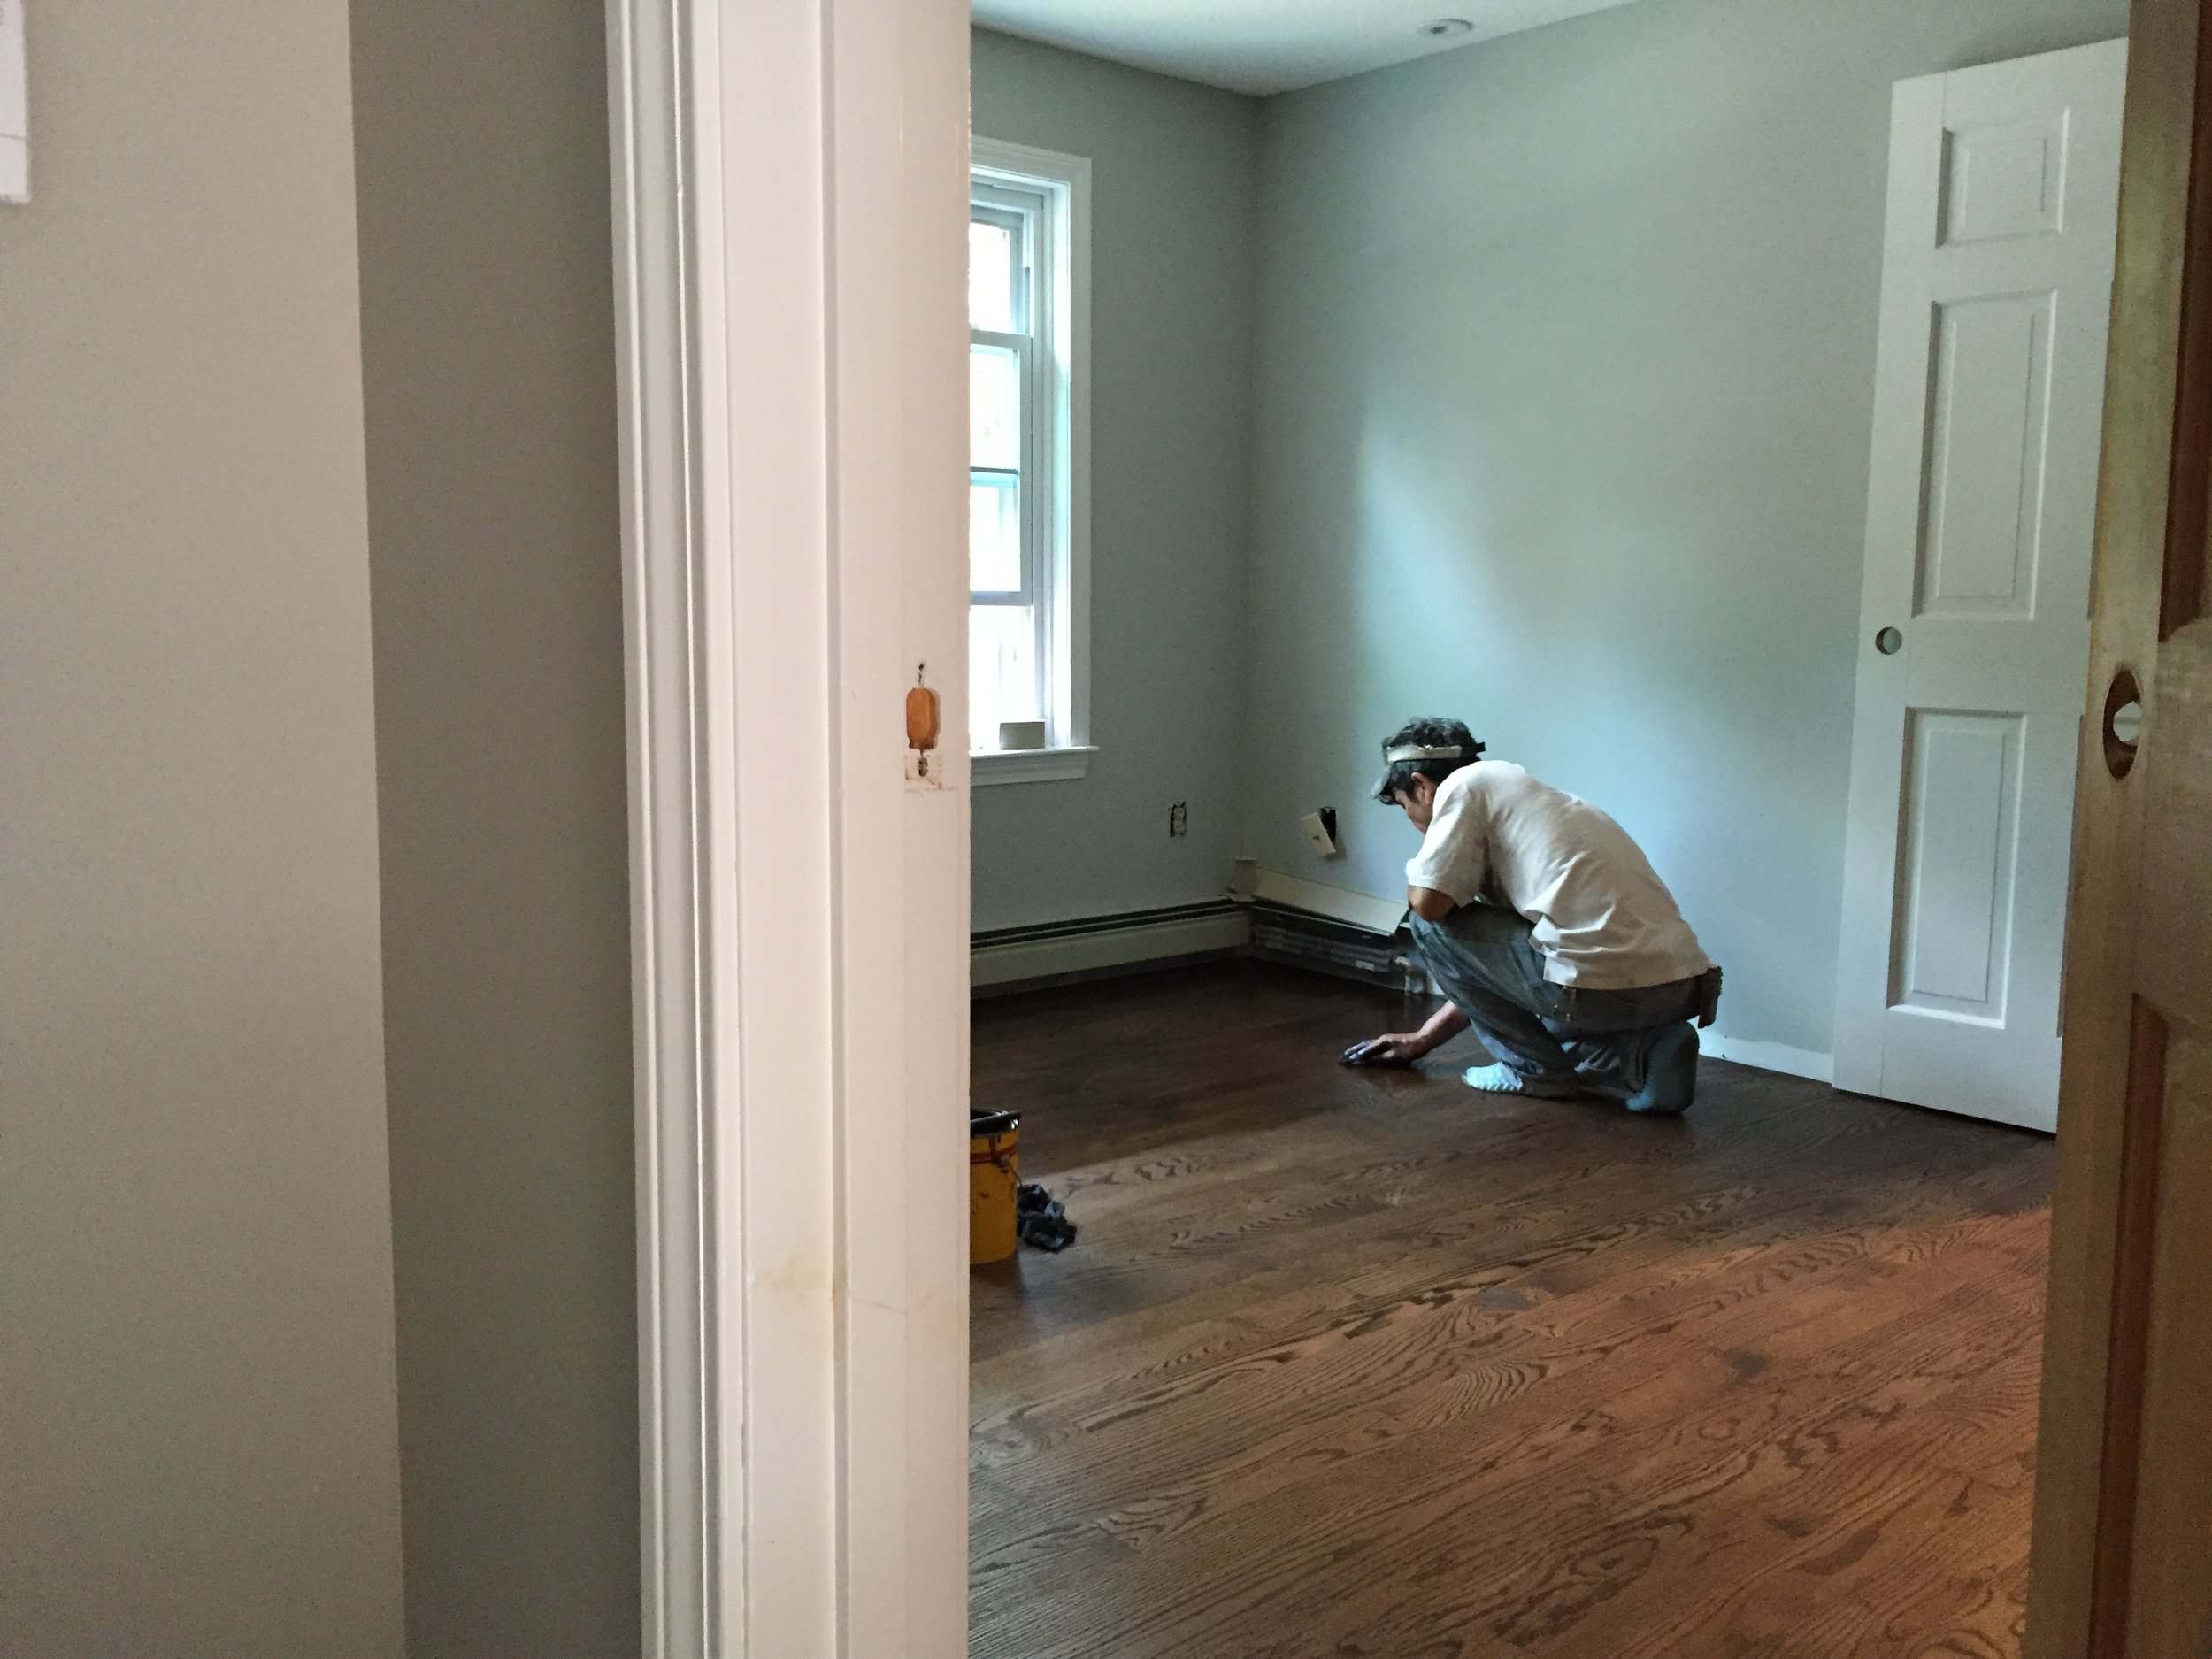
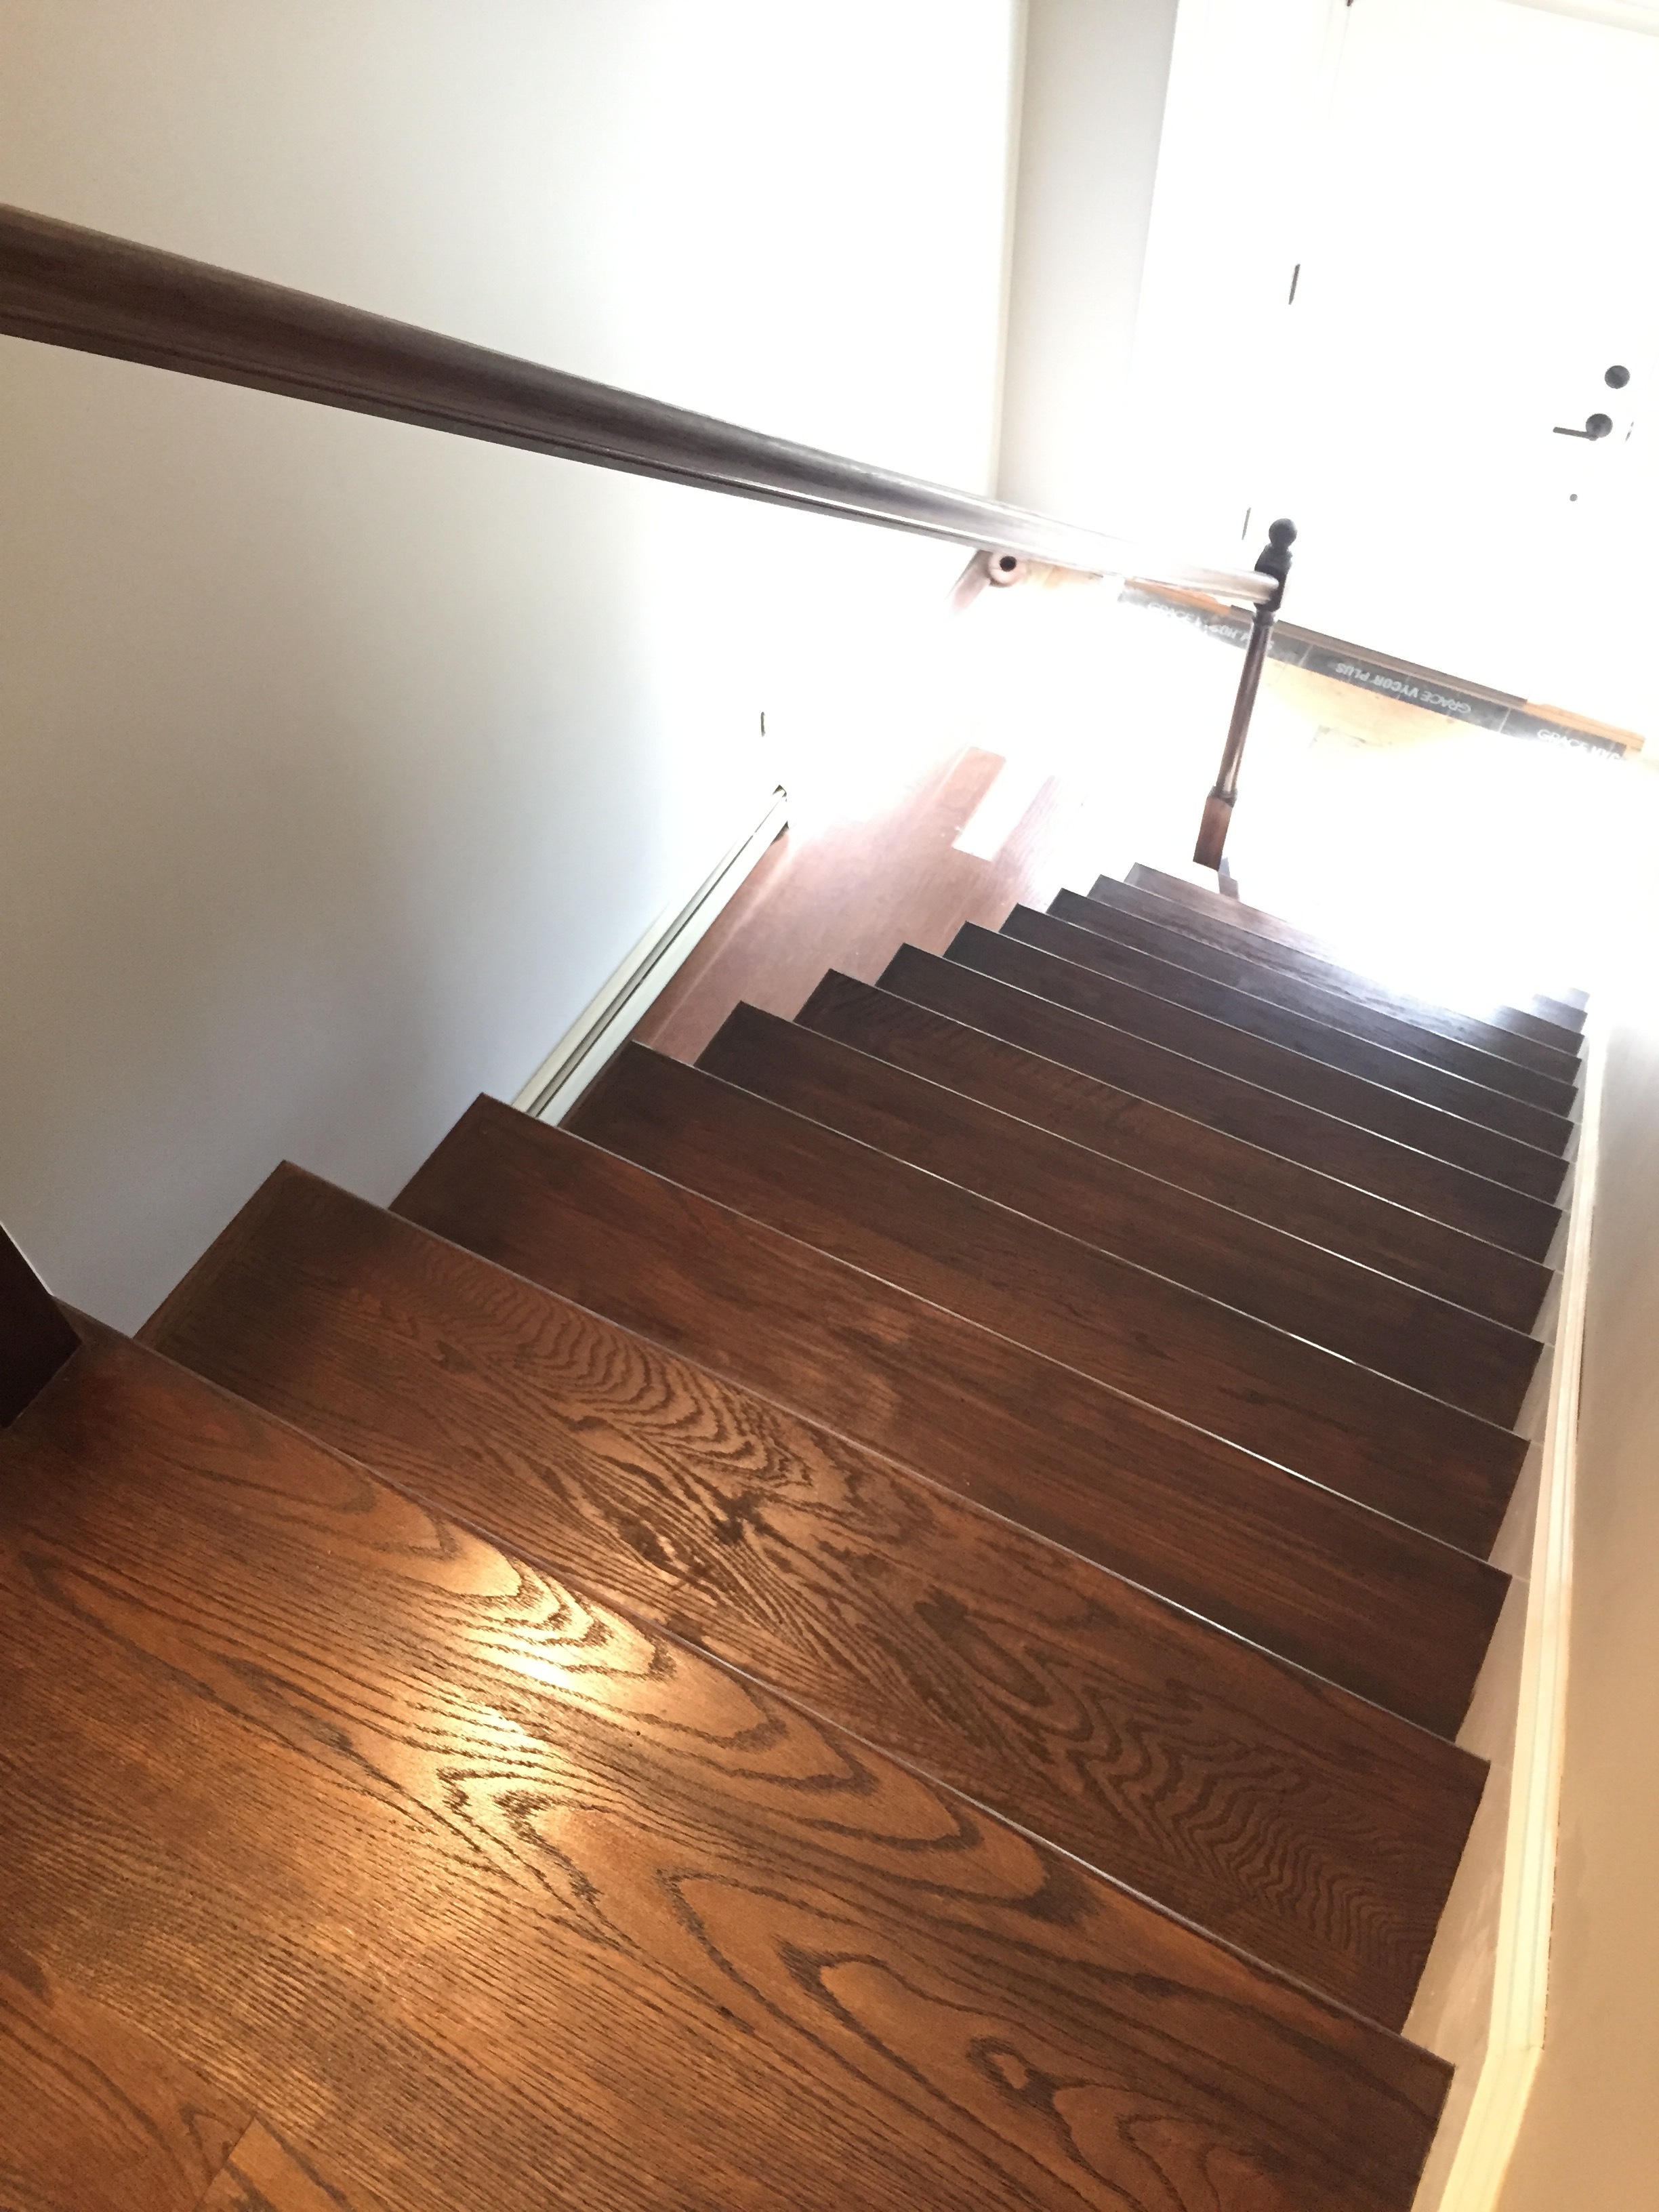
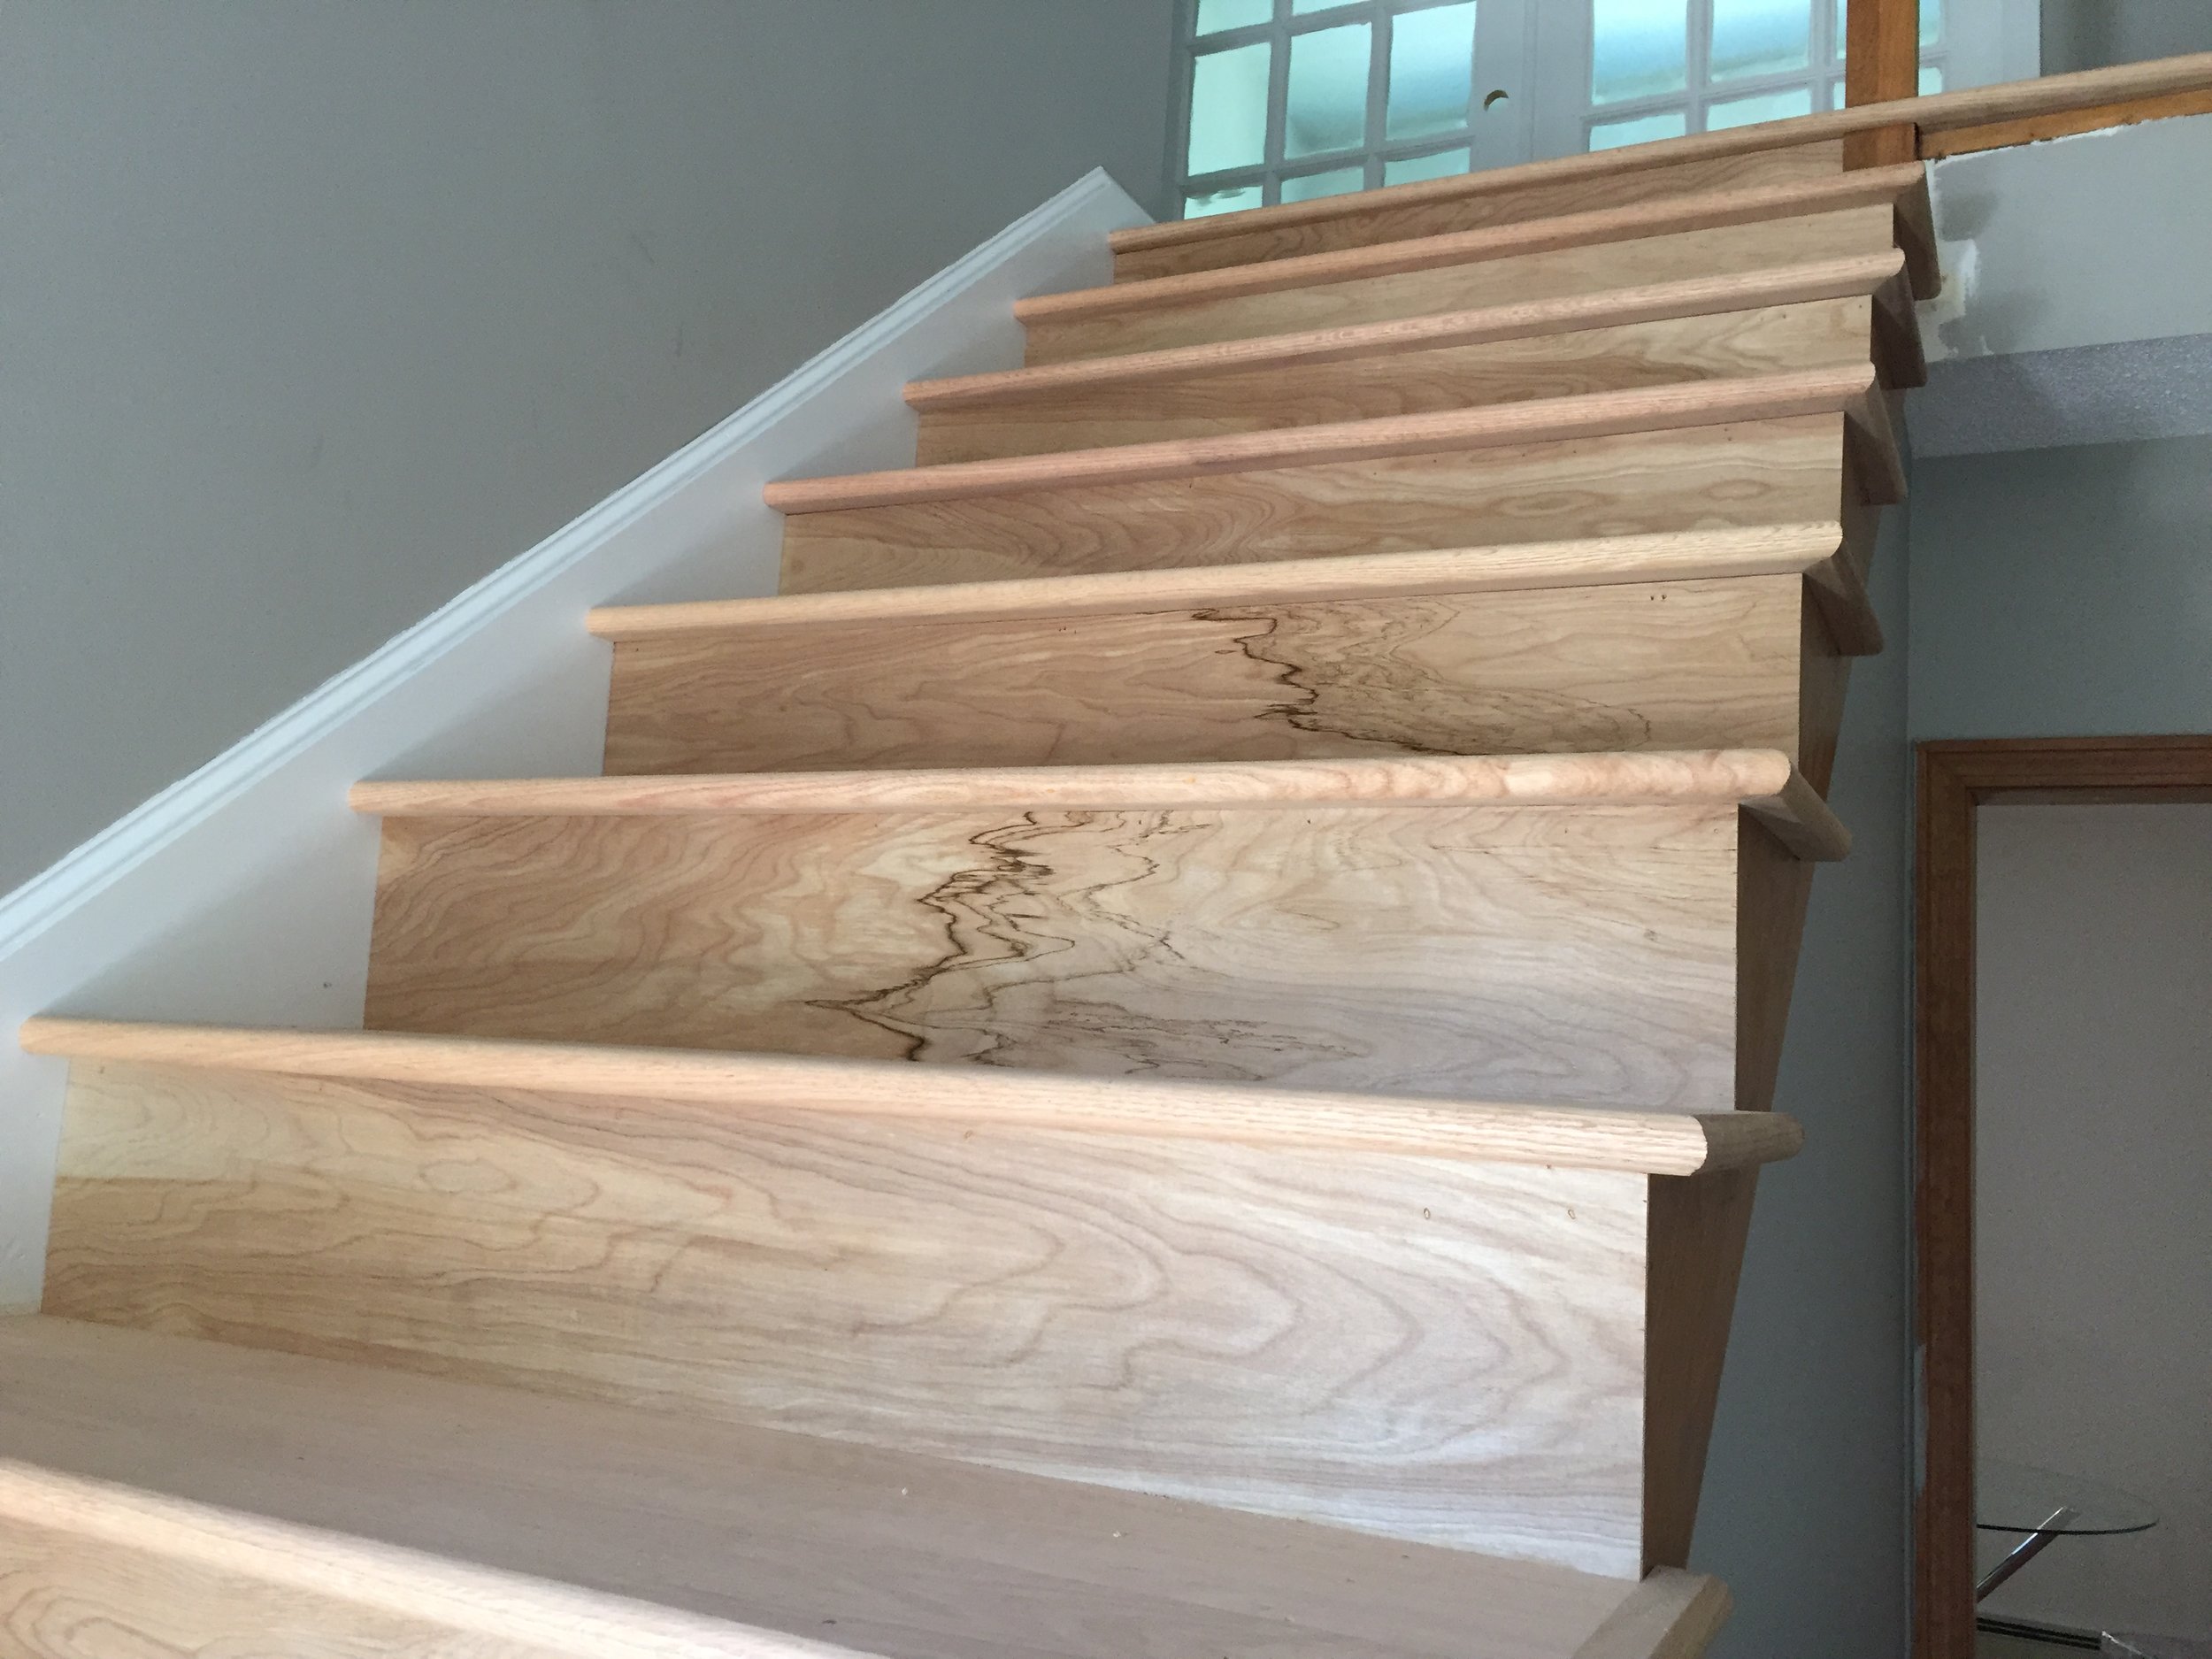
The thing is, the pre-fabricated stair treads took on the stain much darker which made the wood at the top of the stairs appear lighter. In order to match the color of the stairs to the color of the rest of the wood we had to do 3 coats! Luckily our flooring guy didn't mind and we achieved our goal.
Check out the photos below!
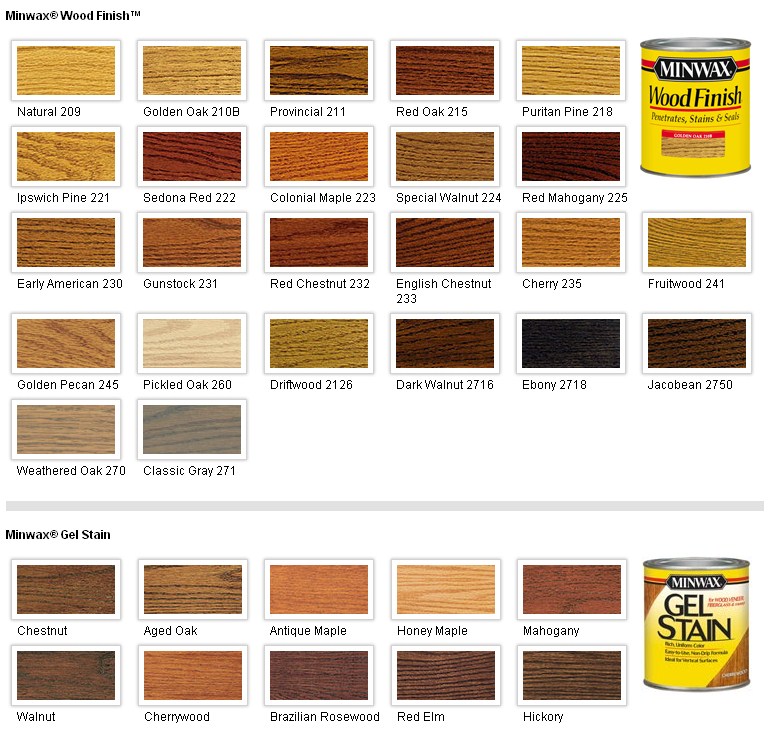
Minwax Stain Chart

Stain Choice - Minwax Jacobean 2750

Wood Sample - Red Oak - 1 coat of Minwax Jacobean 2750

Wood Sample - Red Oak - 2 coats of Minwax Jacobean 2750
Red Oak - 1 coat of Minwax Jacobean 2750
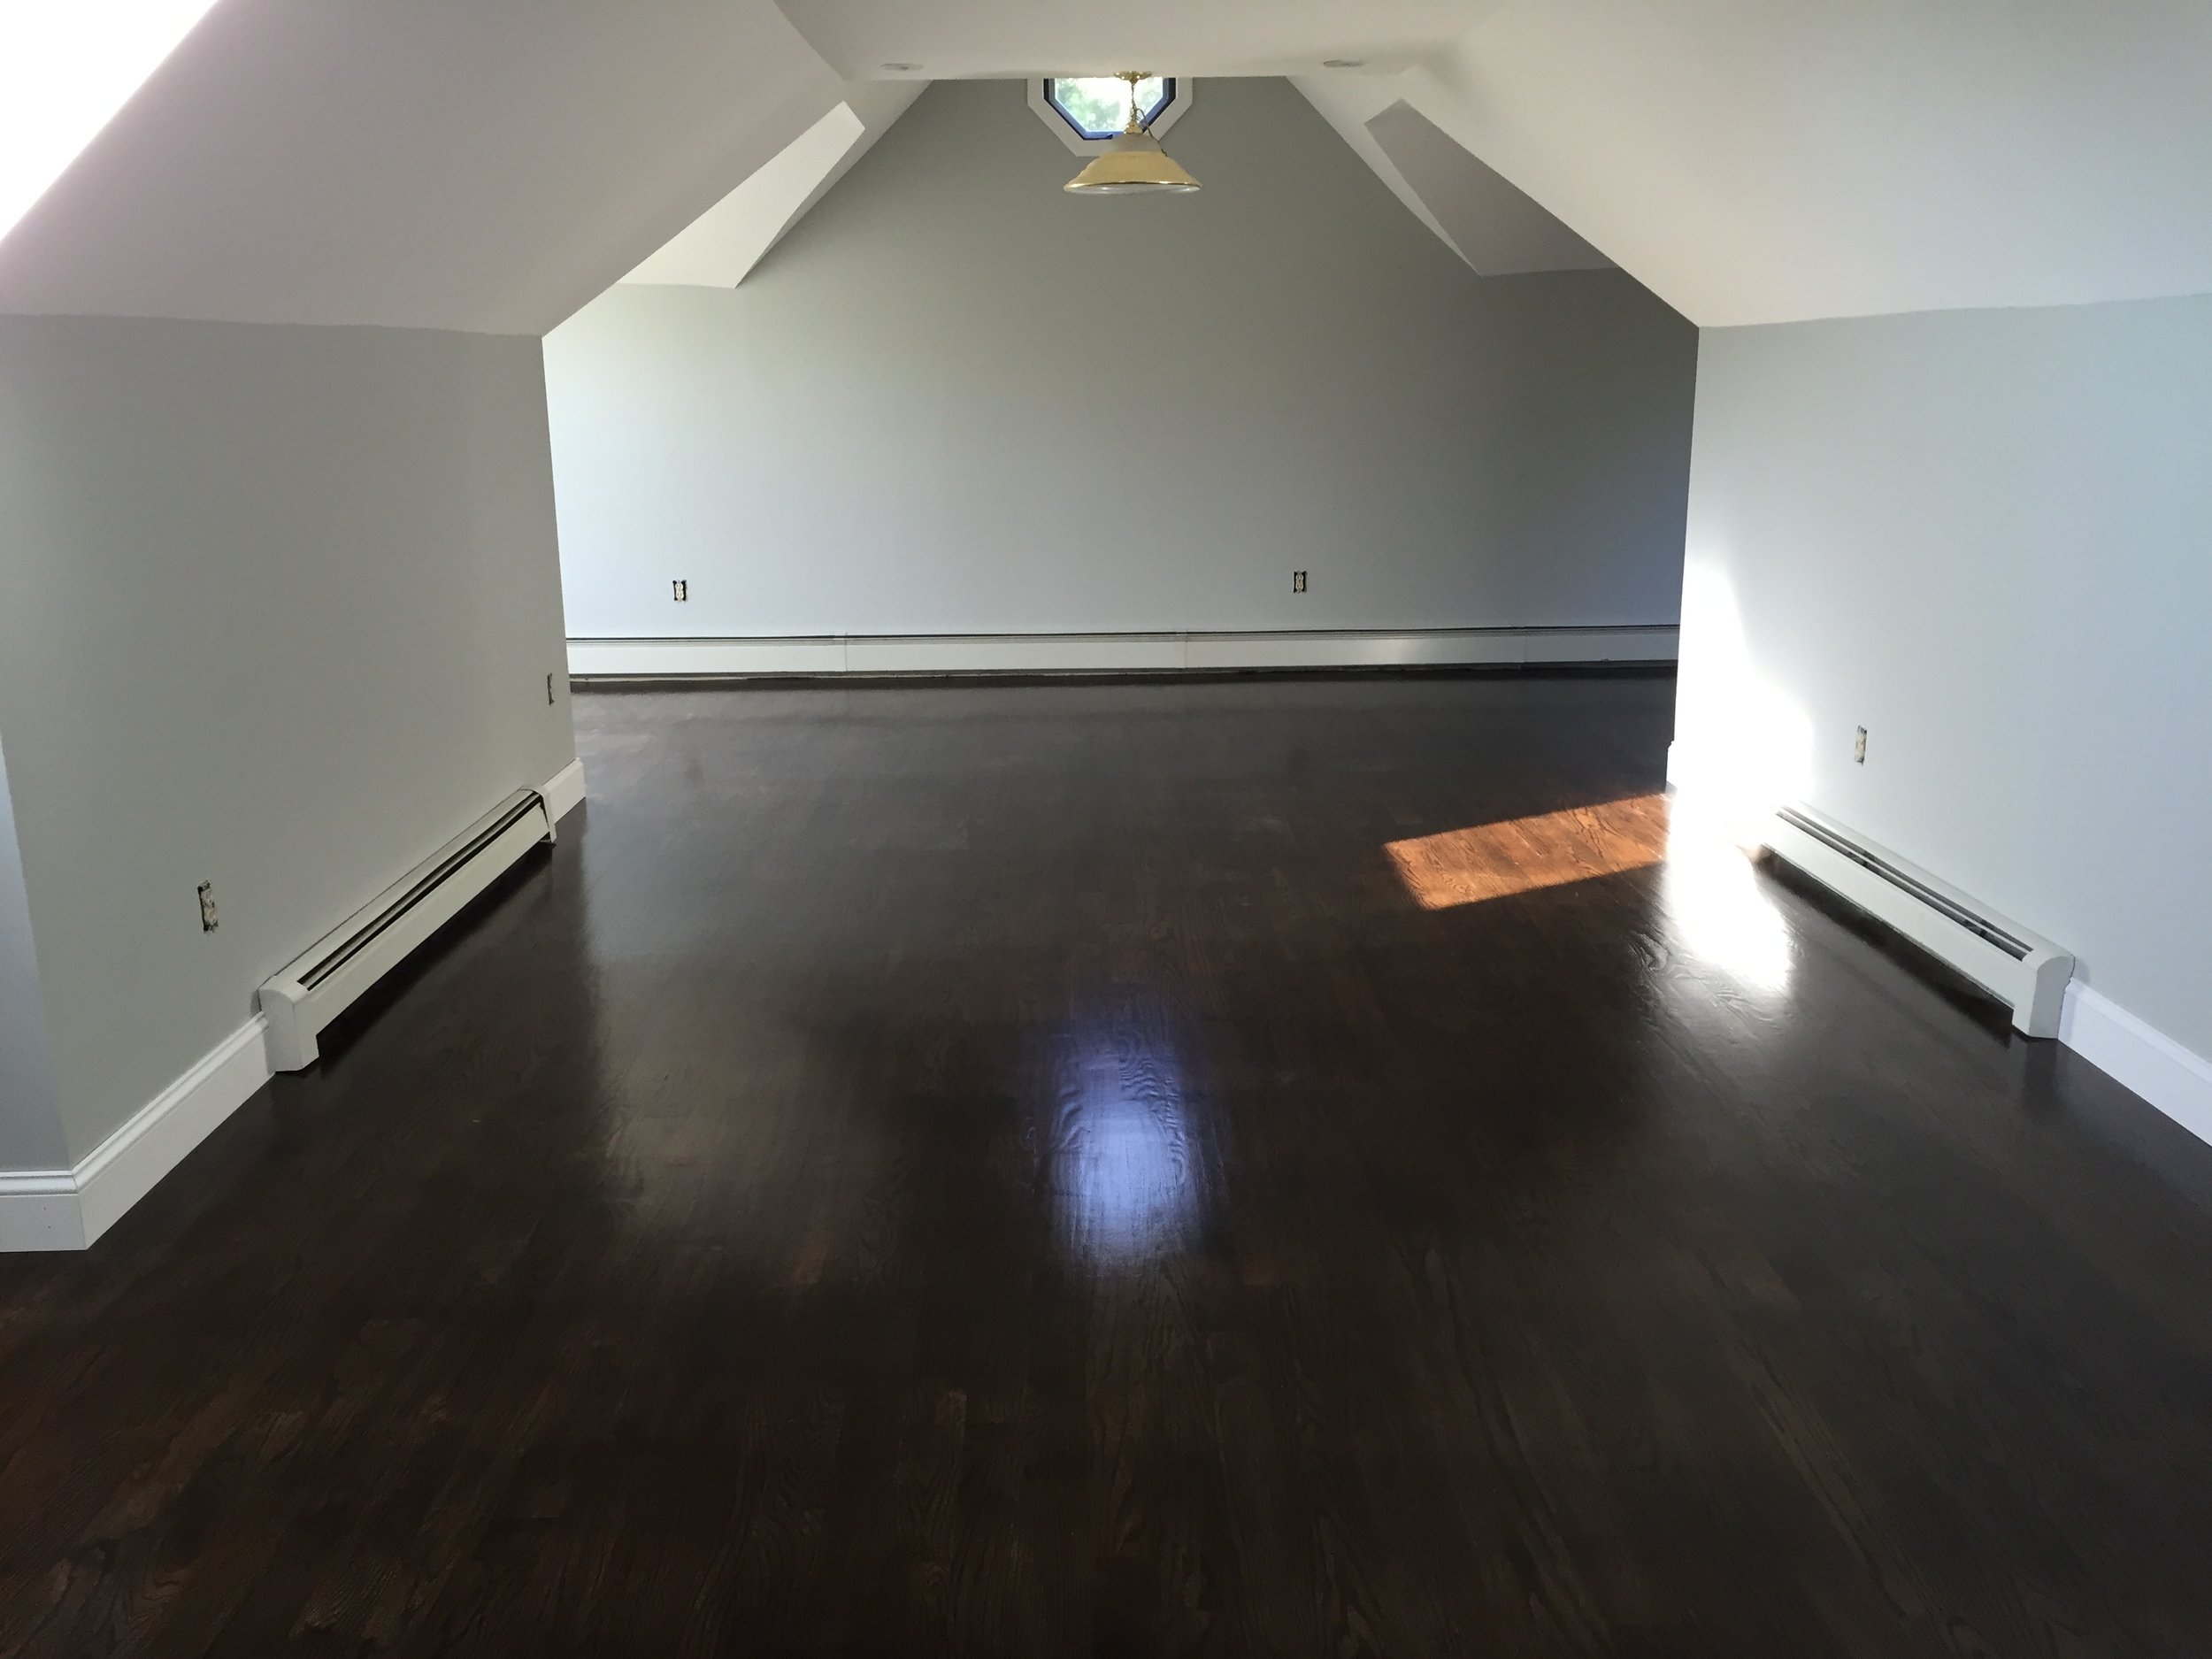
FINISHED - Red Oak - 3 coats of Minwax Jacobean 2750 with Satin Poly & New Baseboard

FINISHED - Red Oak - 3 coats of Minwax Jacobean 2750 with Satin Poly & New Baseboard
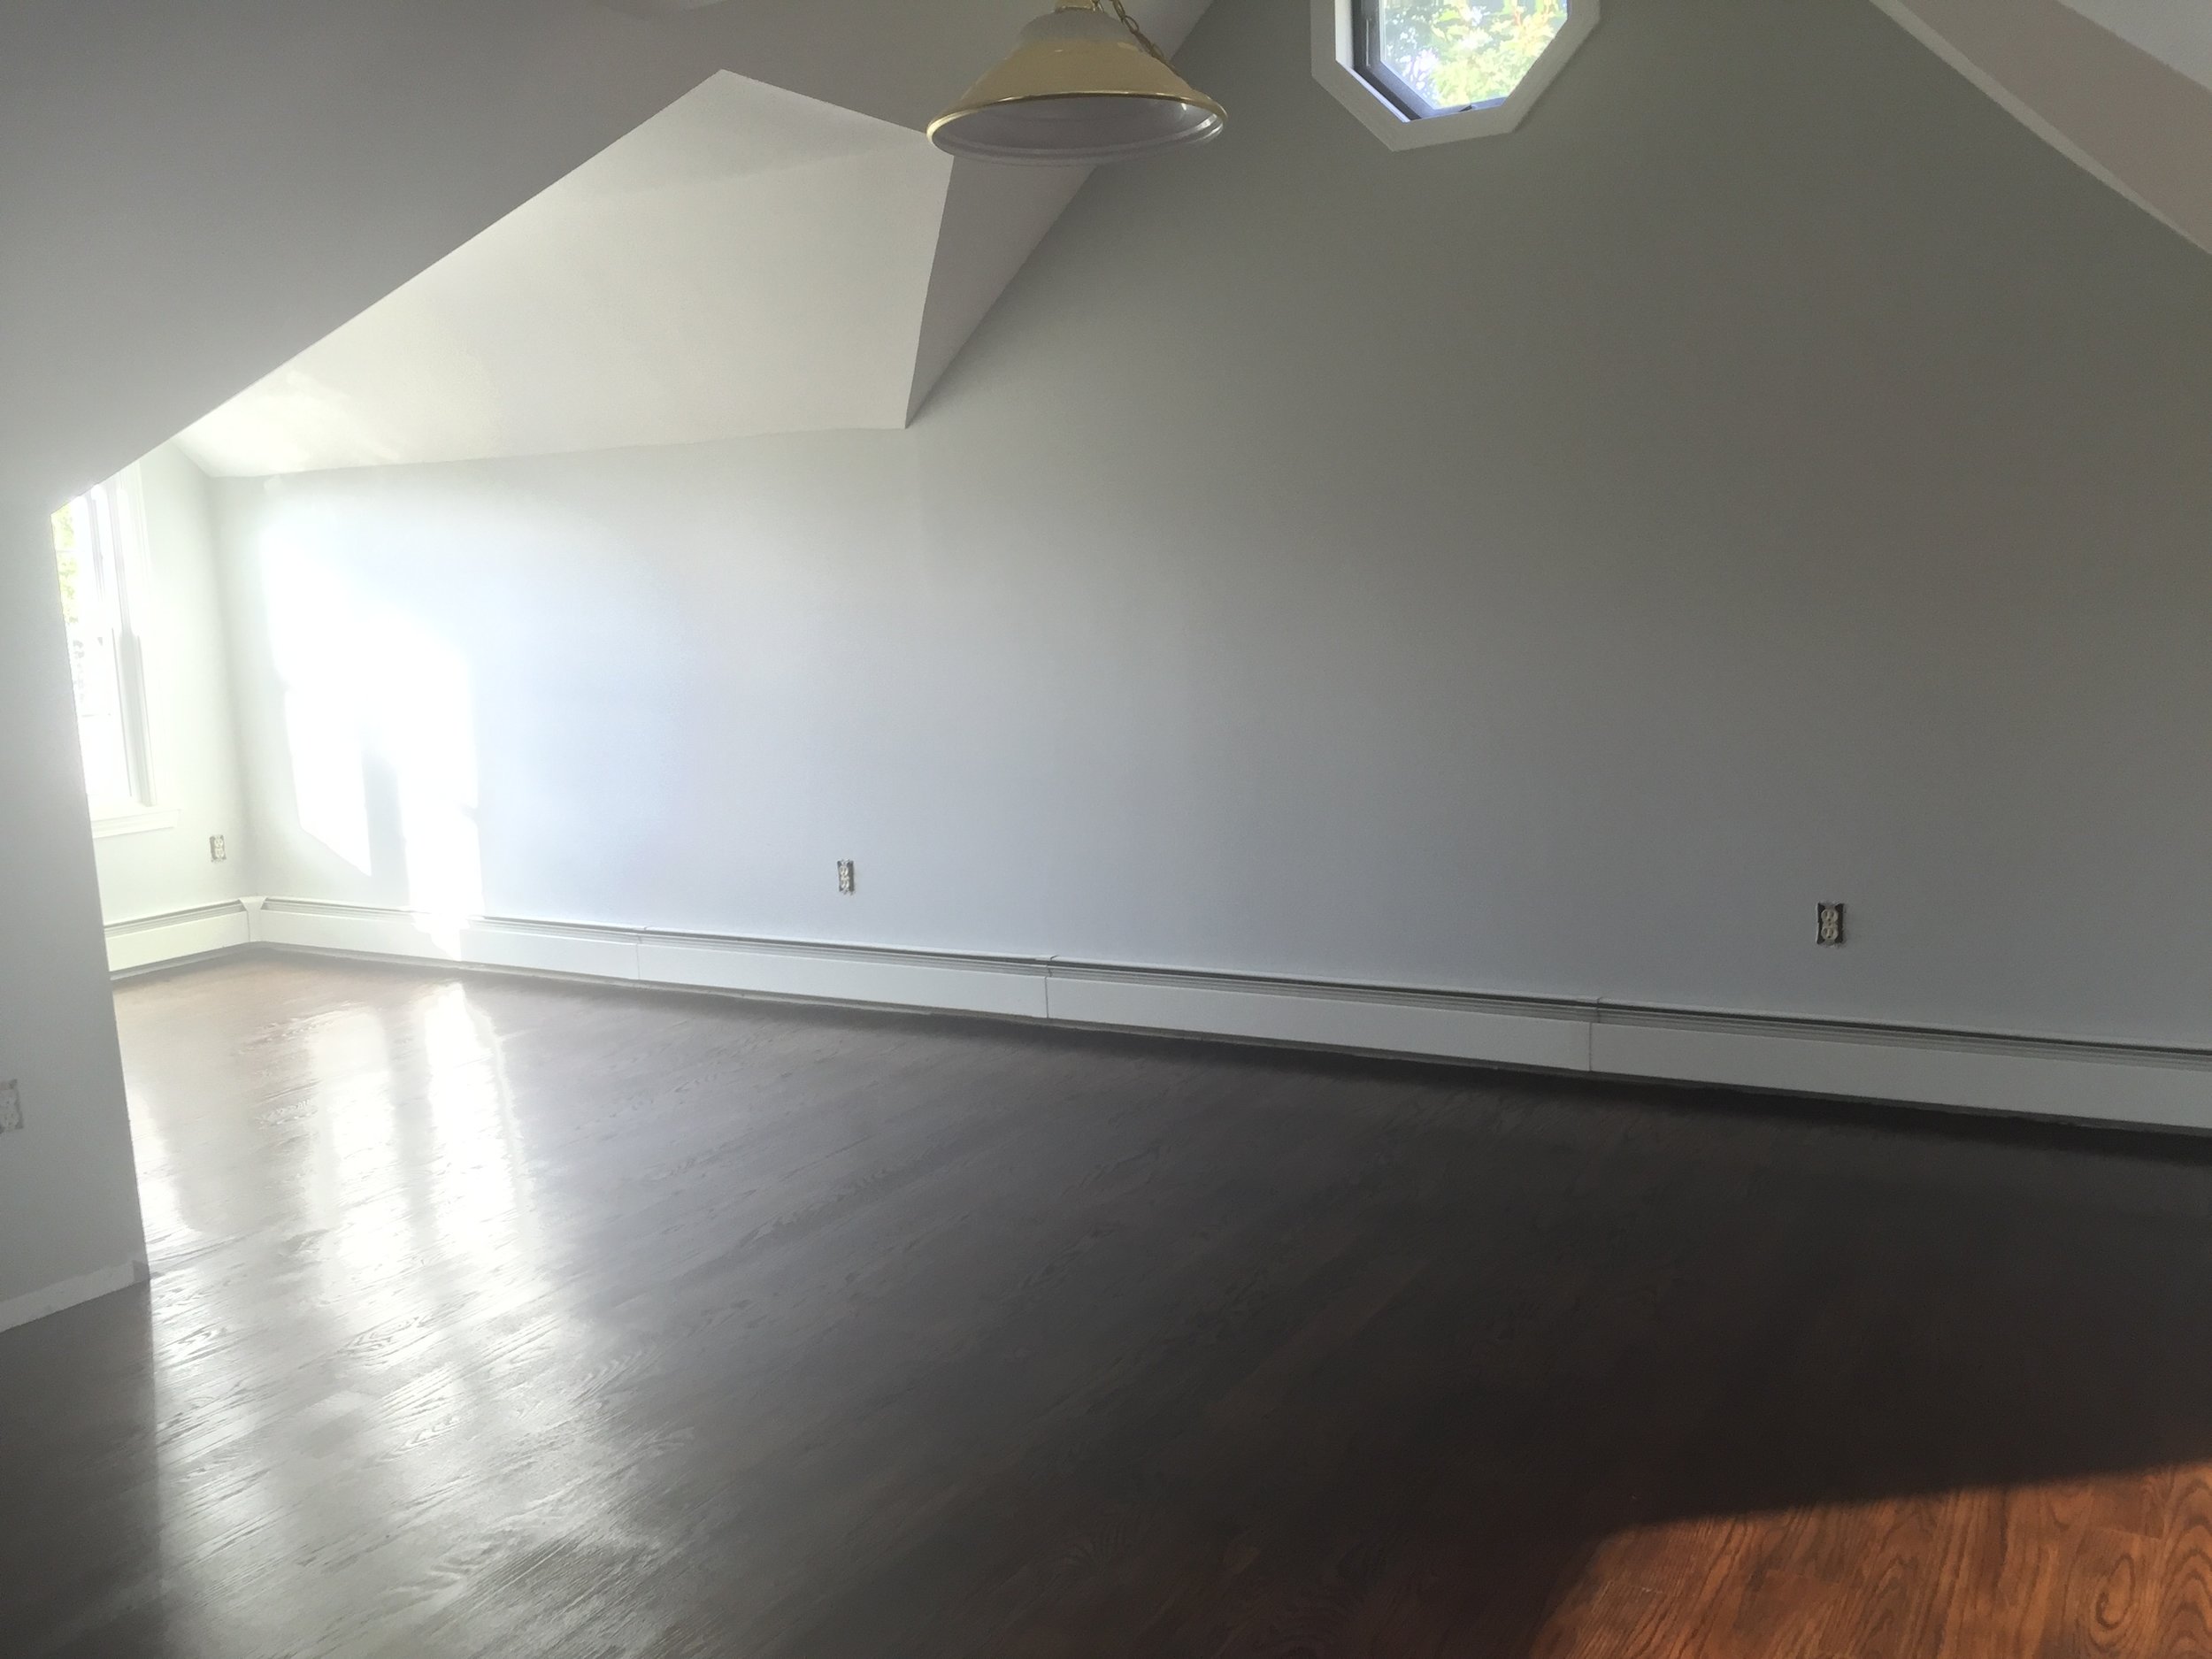
FINISHED - Red Oak - 3 coats of Minwax Jacobean 2750 with Satin Poly & New Baseboard
FINISHED - Red Oak - 3 coats of Minwax Jacobean 2750 with Satin Poly & New Baseboard

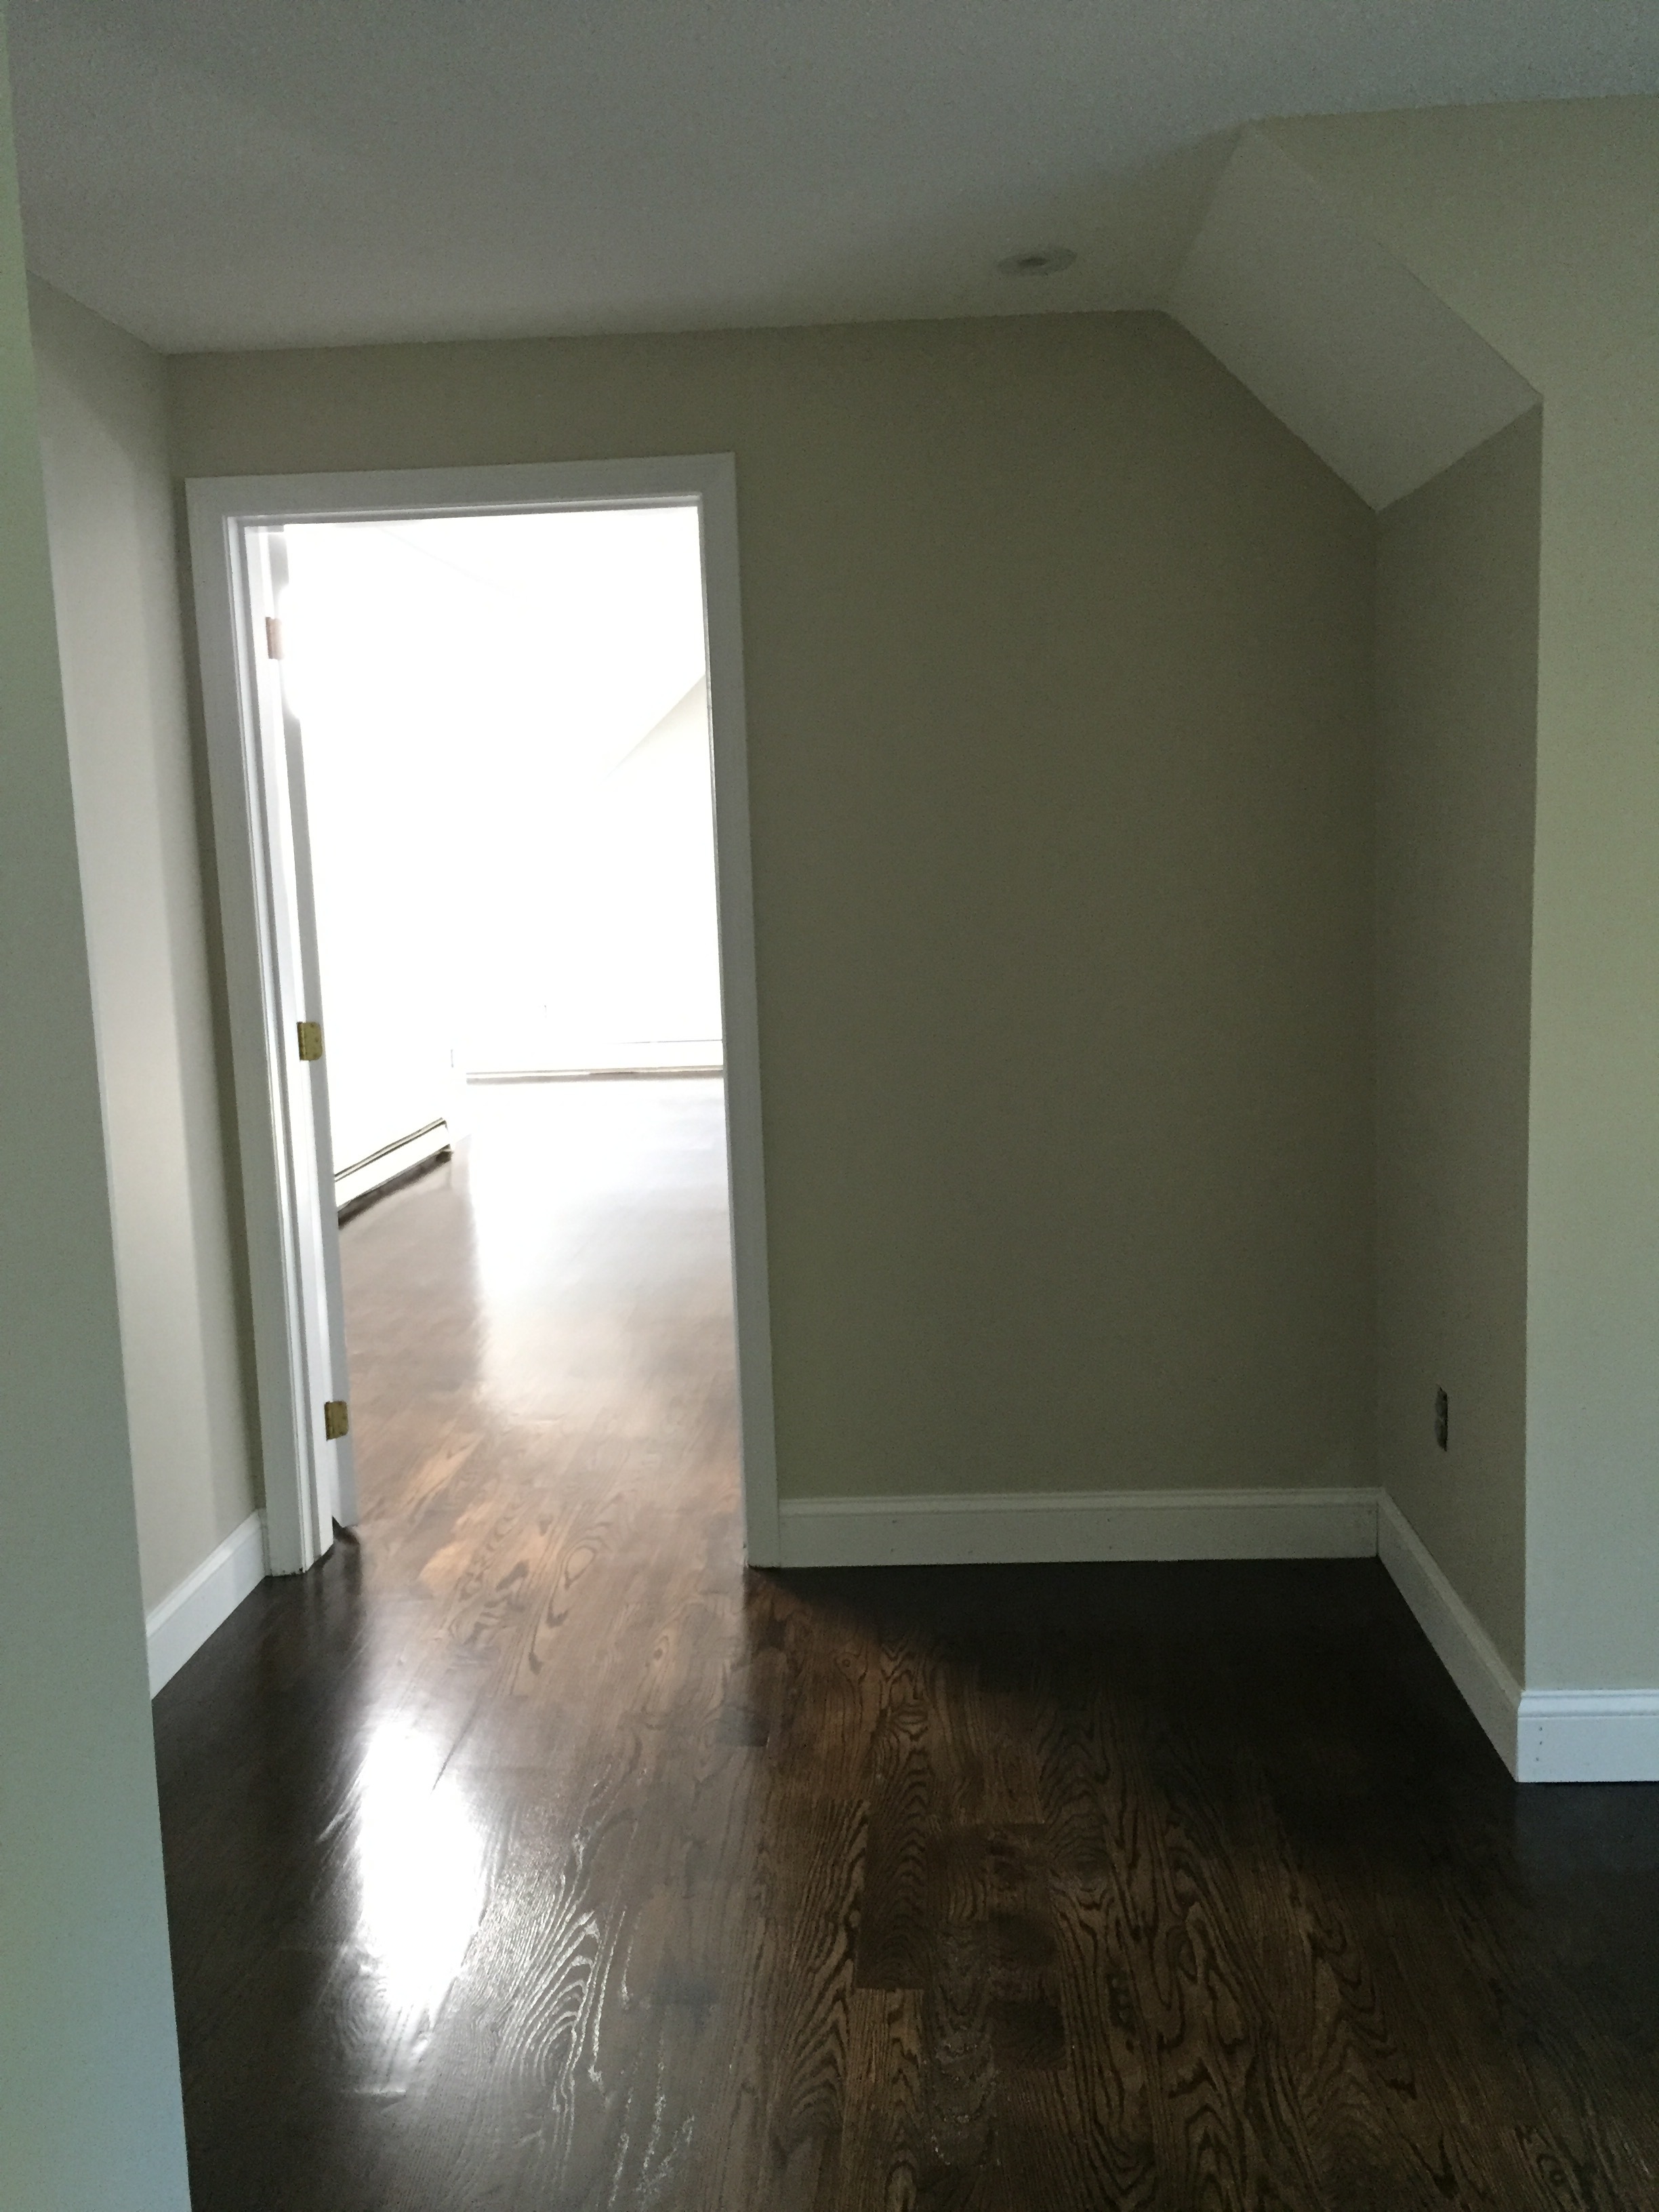
FINISHED BEDROOM - Red Oak - 3 coats of Minwax Jacobean 2750 with Satin Poly & New Baseboard

OFFICE - Red Oak - 3 coats of Minwax Jacobean 2750 - No Poly

BEDROOM - Red Oak - 3 coats of Minwax Jacobean 2750 - No Poly
BEDROOM - Red Oak - 1 coat with 2nd application of Minwax Jacobean 2750 - No Poly

BEDROOM - Red Oak - 3 coats of Minwax Jacobean 2750 - No Poly

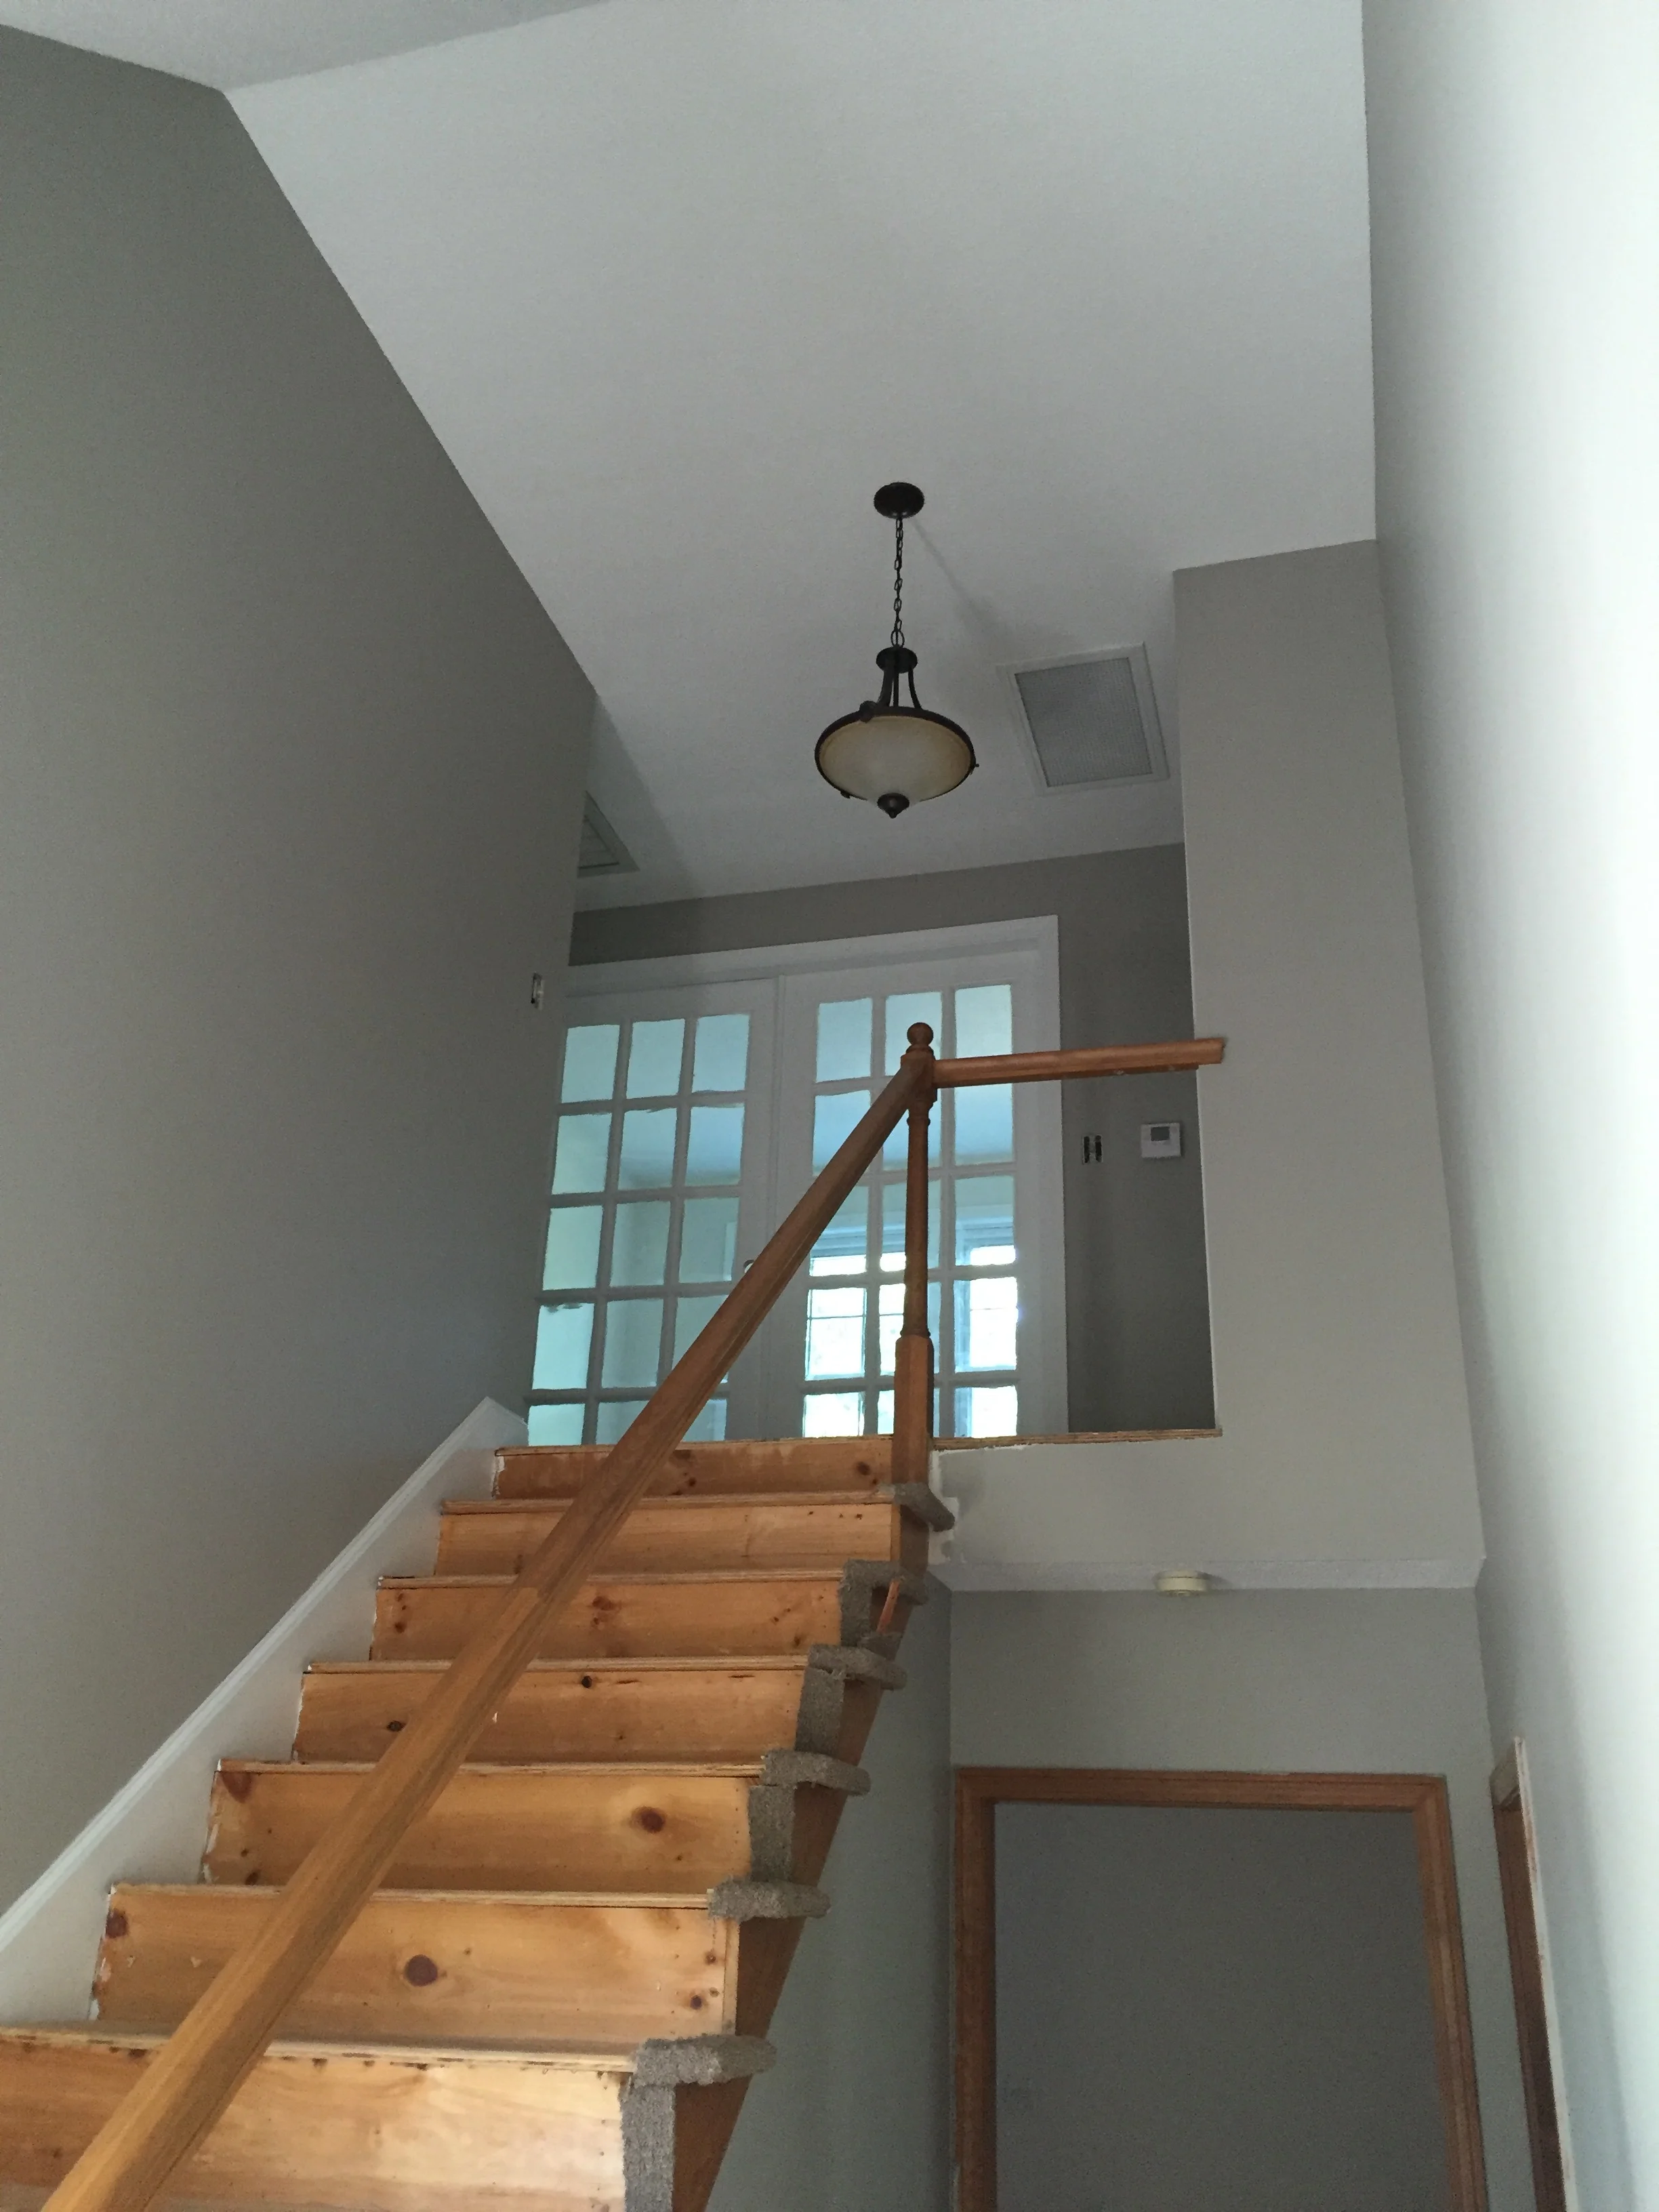
PANORAMIC from top of stairs - 1 coat with 2nd being applied - Minwax Jacobean 2750 - No Poly
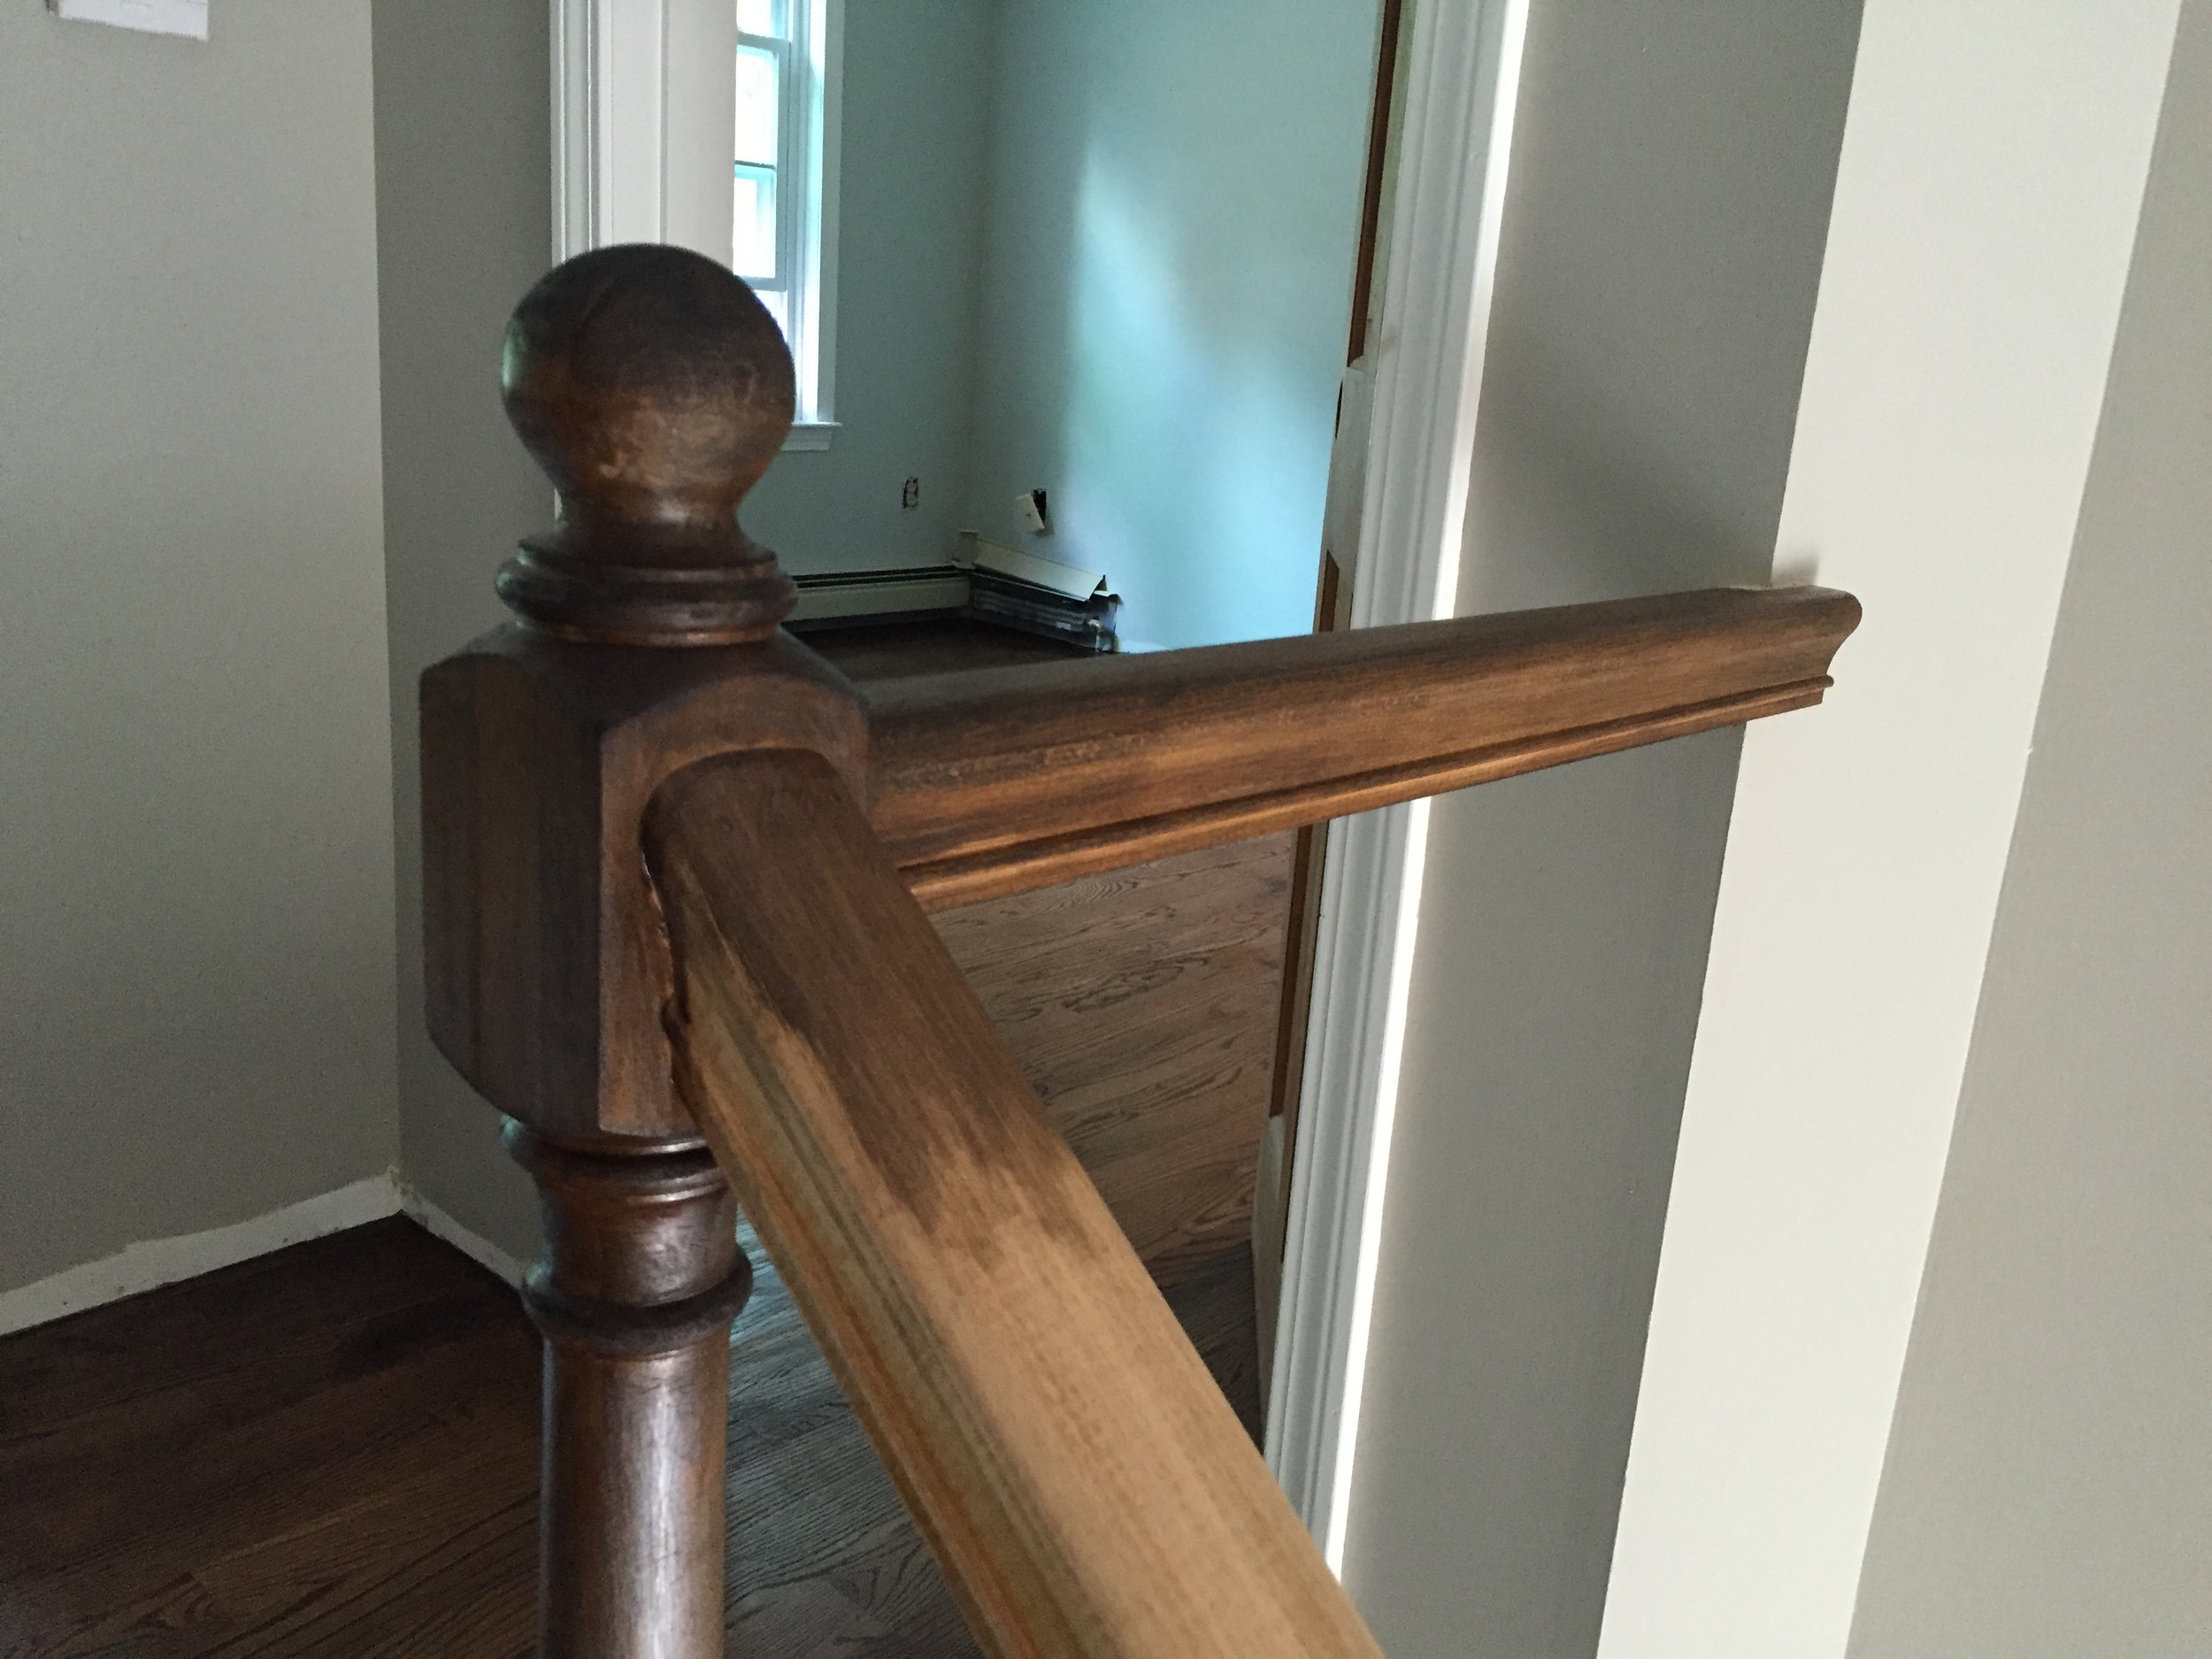
STAIR RAILING - 1 coat of Minwax Jacobean 2750 - No Poly

FINISHED - Red Oak - 2 coats of Minwax Jacobean 2750 - No Poly
STAIRS - 2 coats, does not match flooring 2 coats, so 3rd was applied to the floors
FINISHED - Red Oak - 3 coats of Minwax Jacobean 2750 - No Poly

FINISHED - Red Oak - 2 coats of Minwax Jacobean 2750 - With Satin Poly

FINISHED - Red Oak - 3 coats of Minwax Jacobean 2750 with Satin Poly & New Baseboard
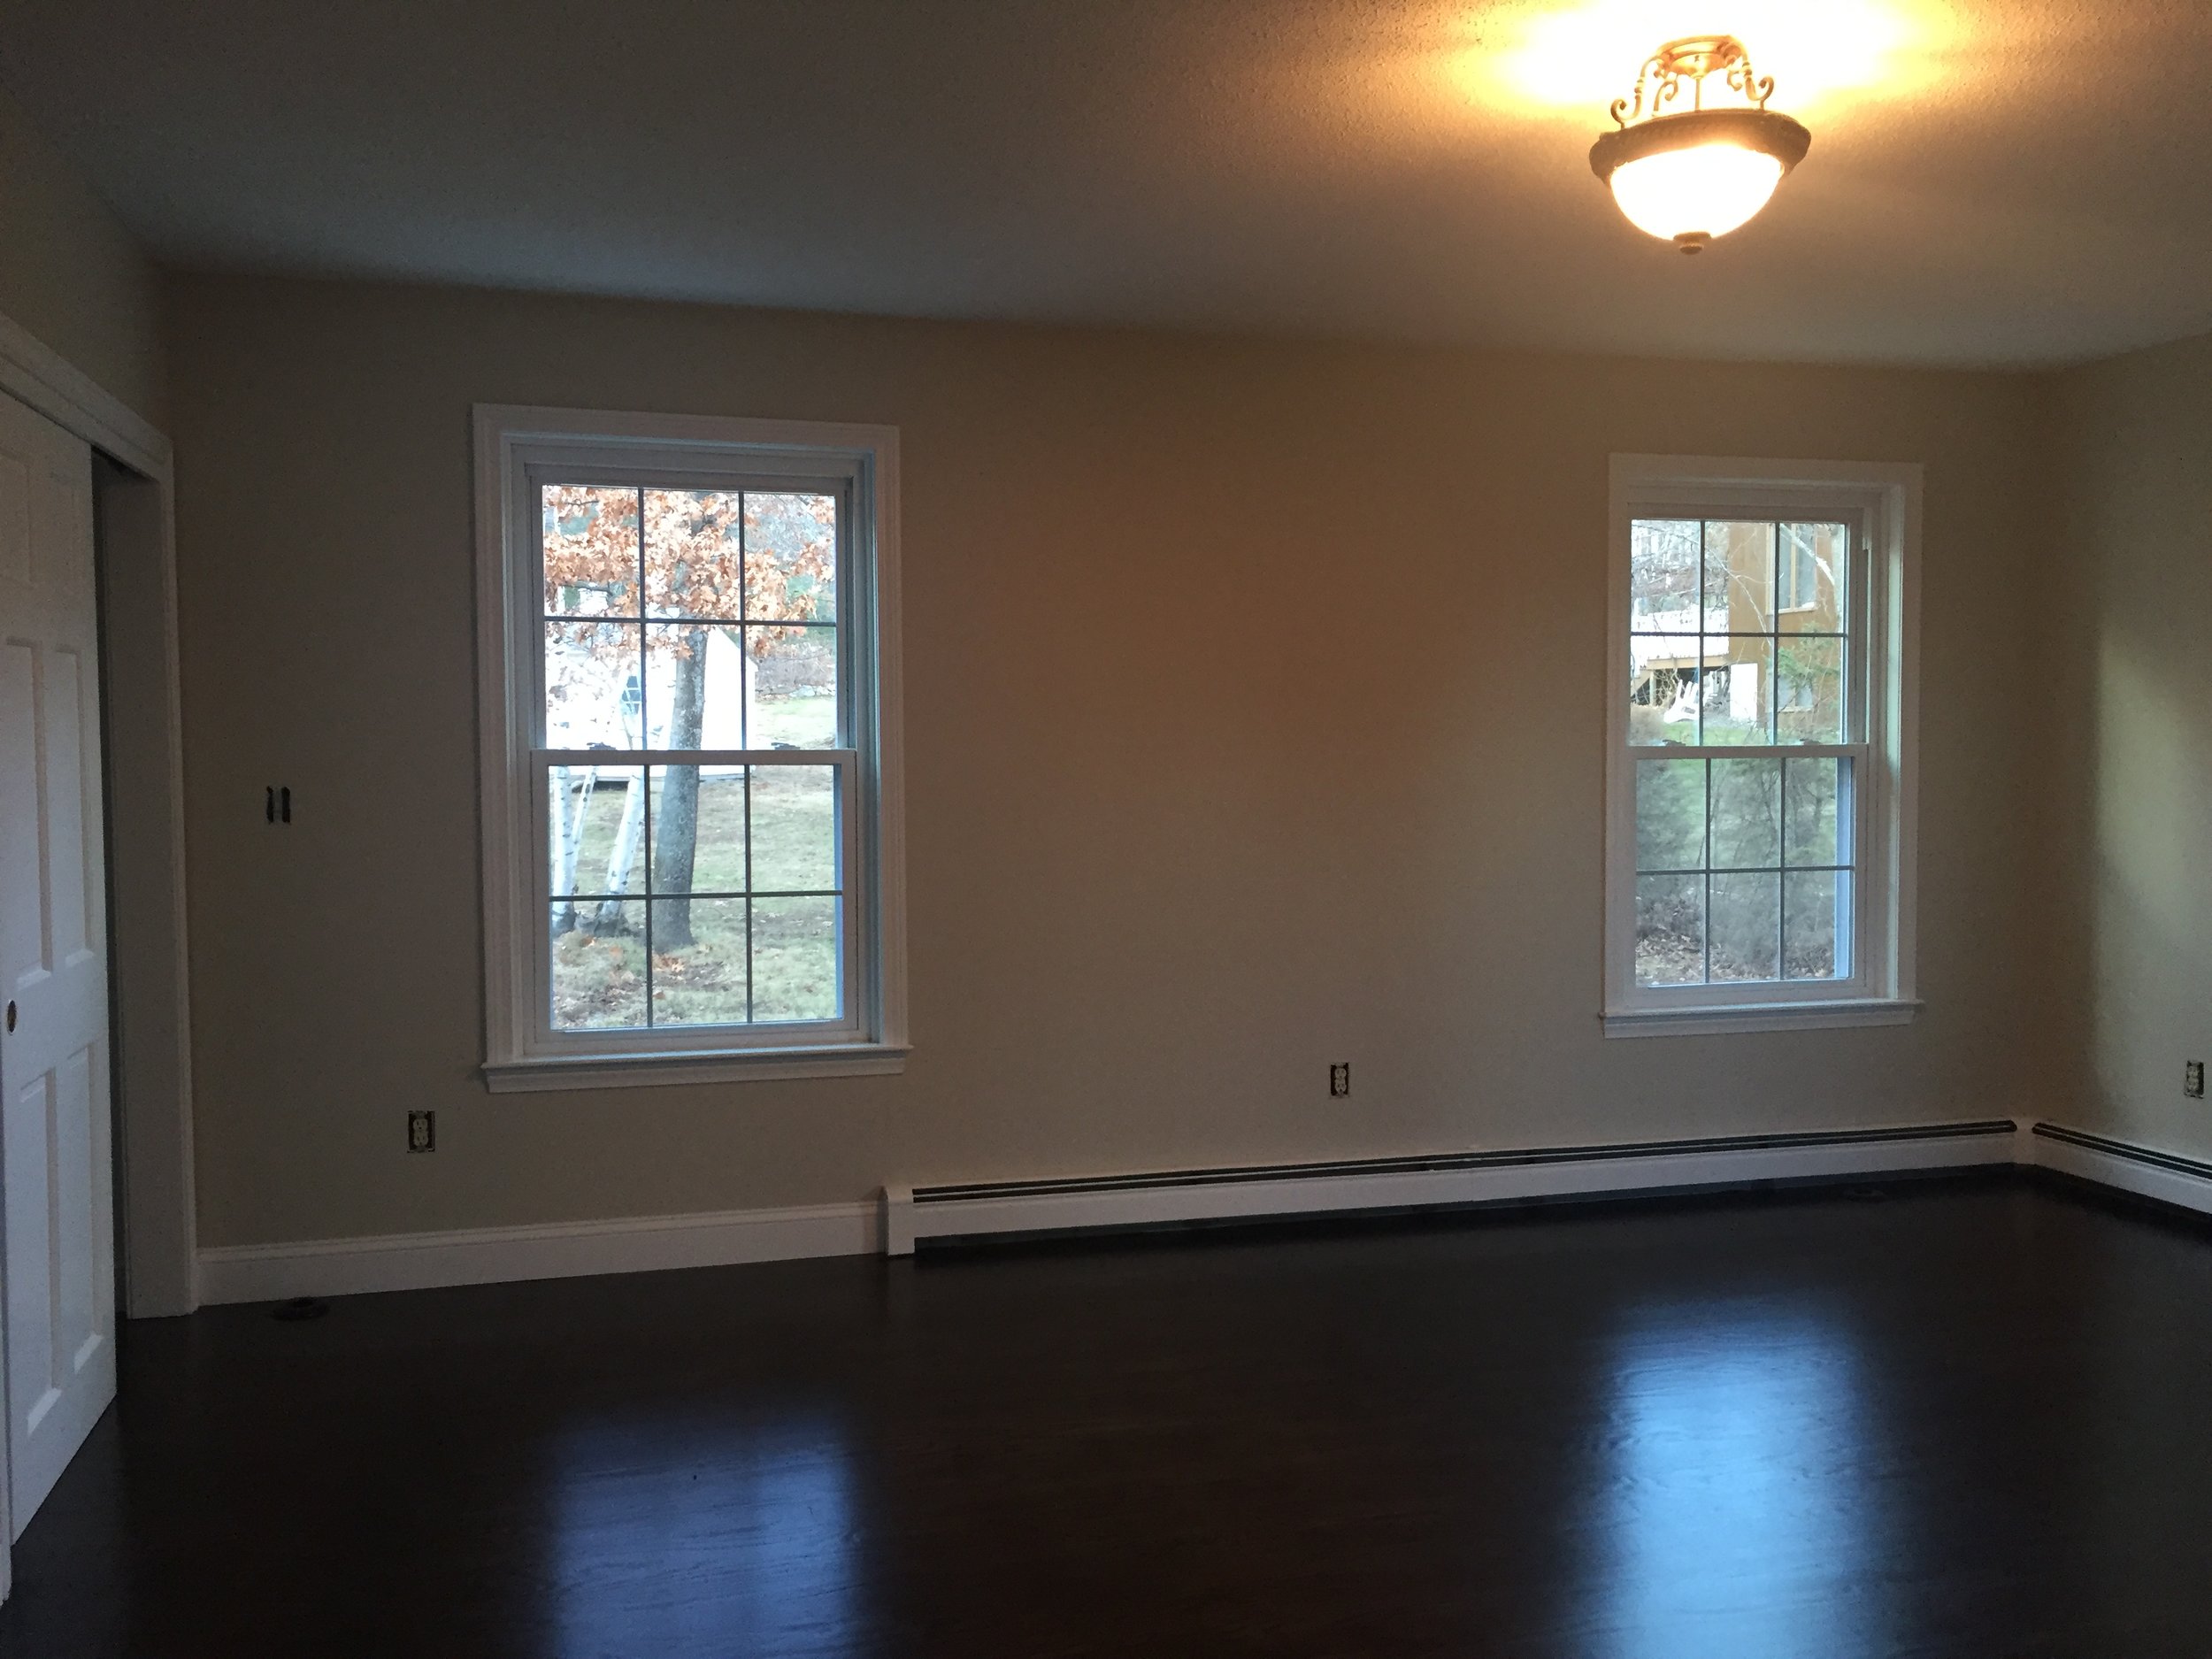
Master Bedroom - FINISHED - Red Oak - 3 coats of Minwax Jacobean 2750 with Satin Poly & New Baseboard
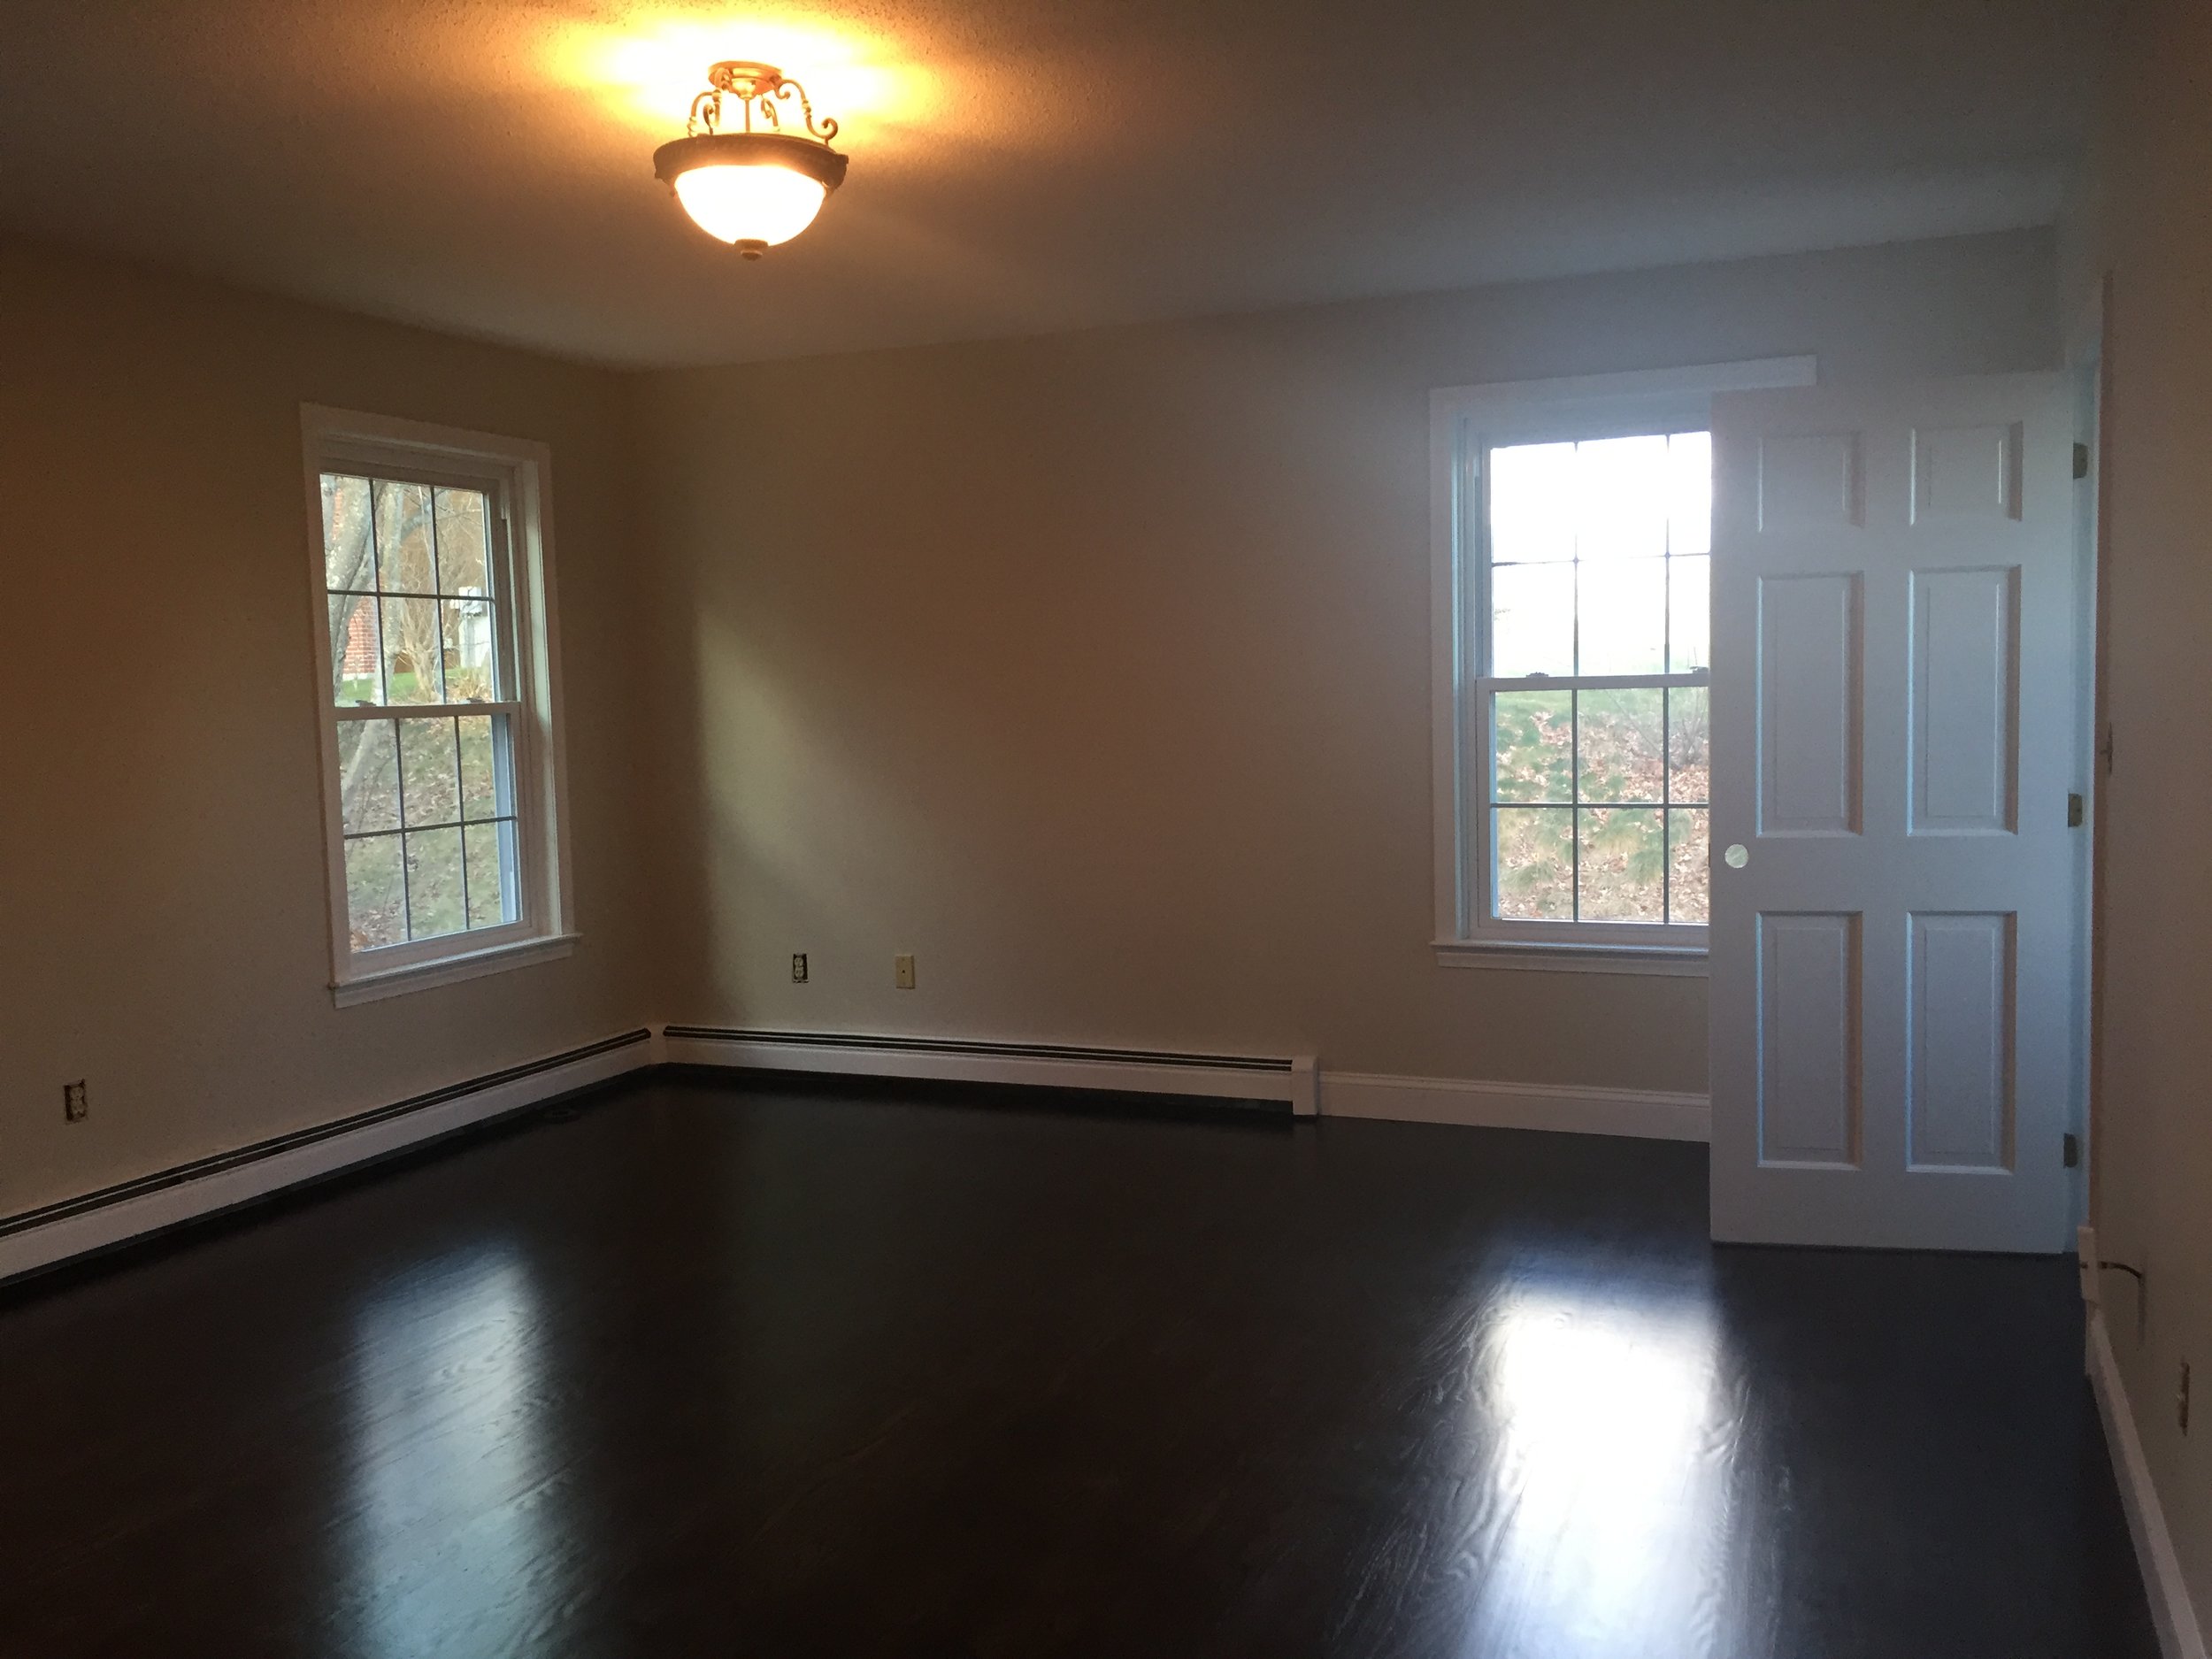
Master Bedroom - FINISHED - Red Oak - 3 coats of Minwax Jacobean 2750 with Satin Poly & New Baseboard
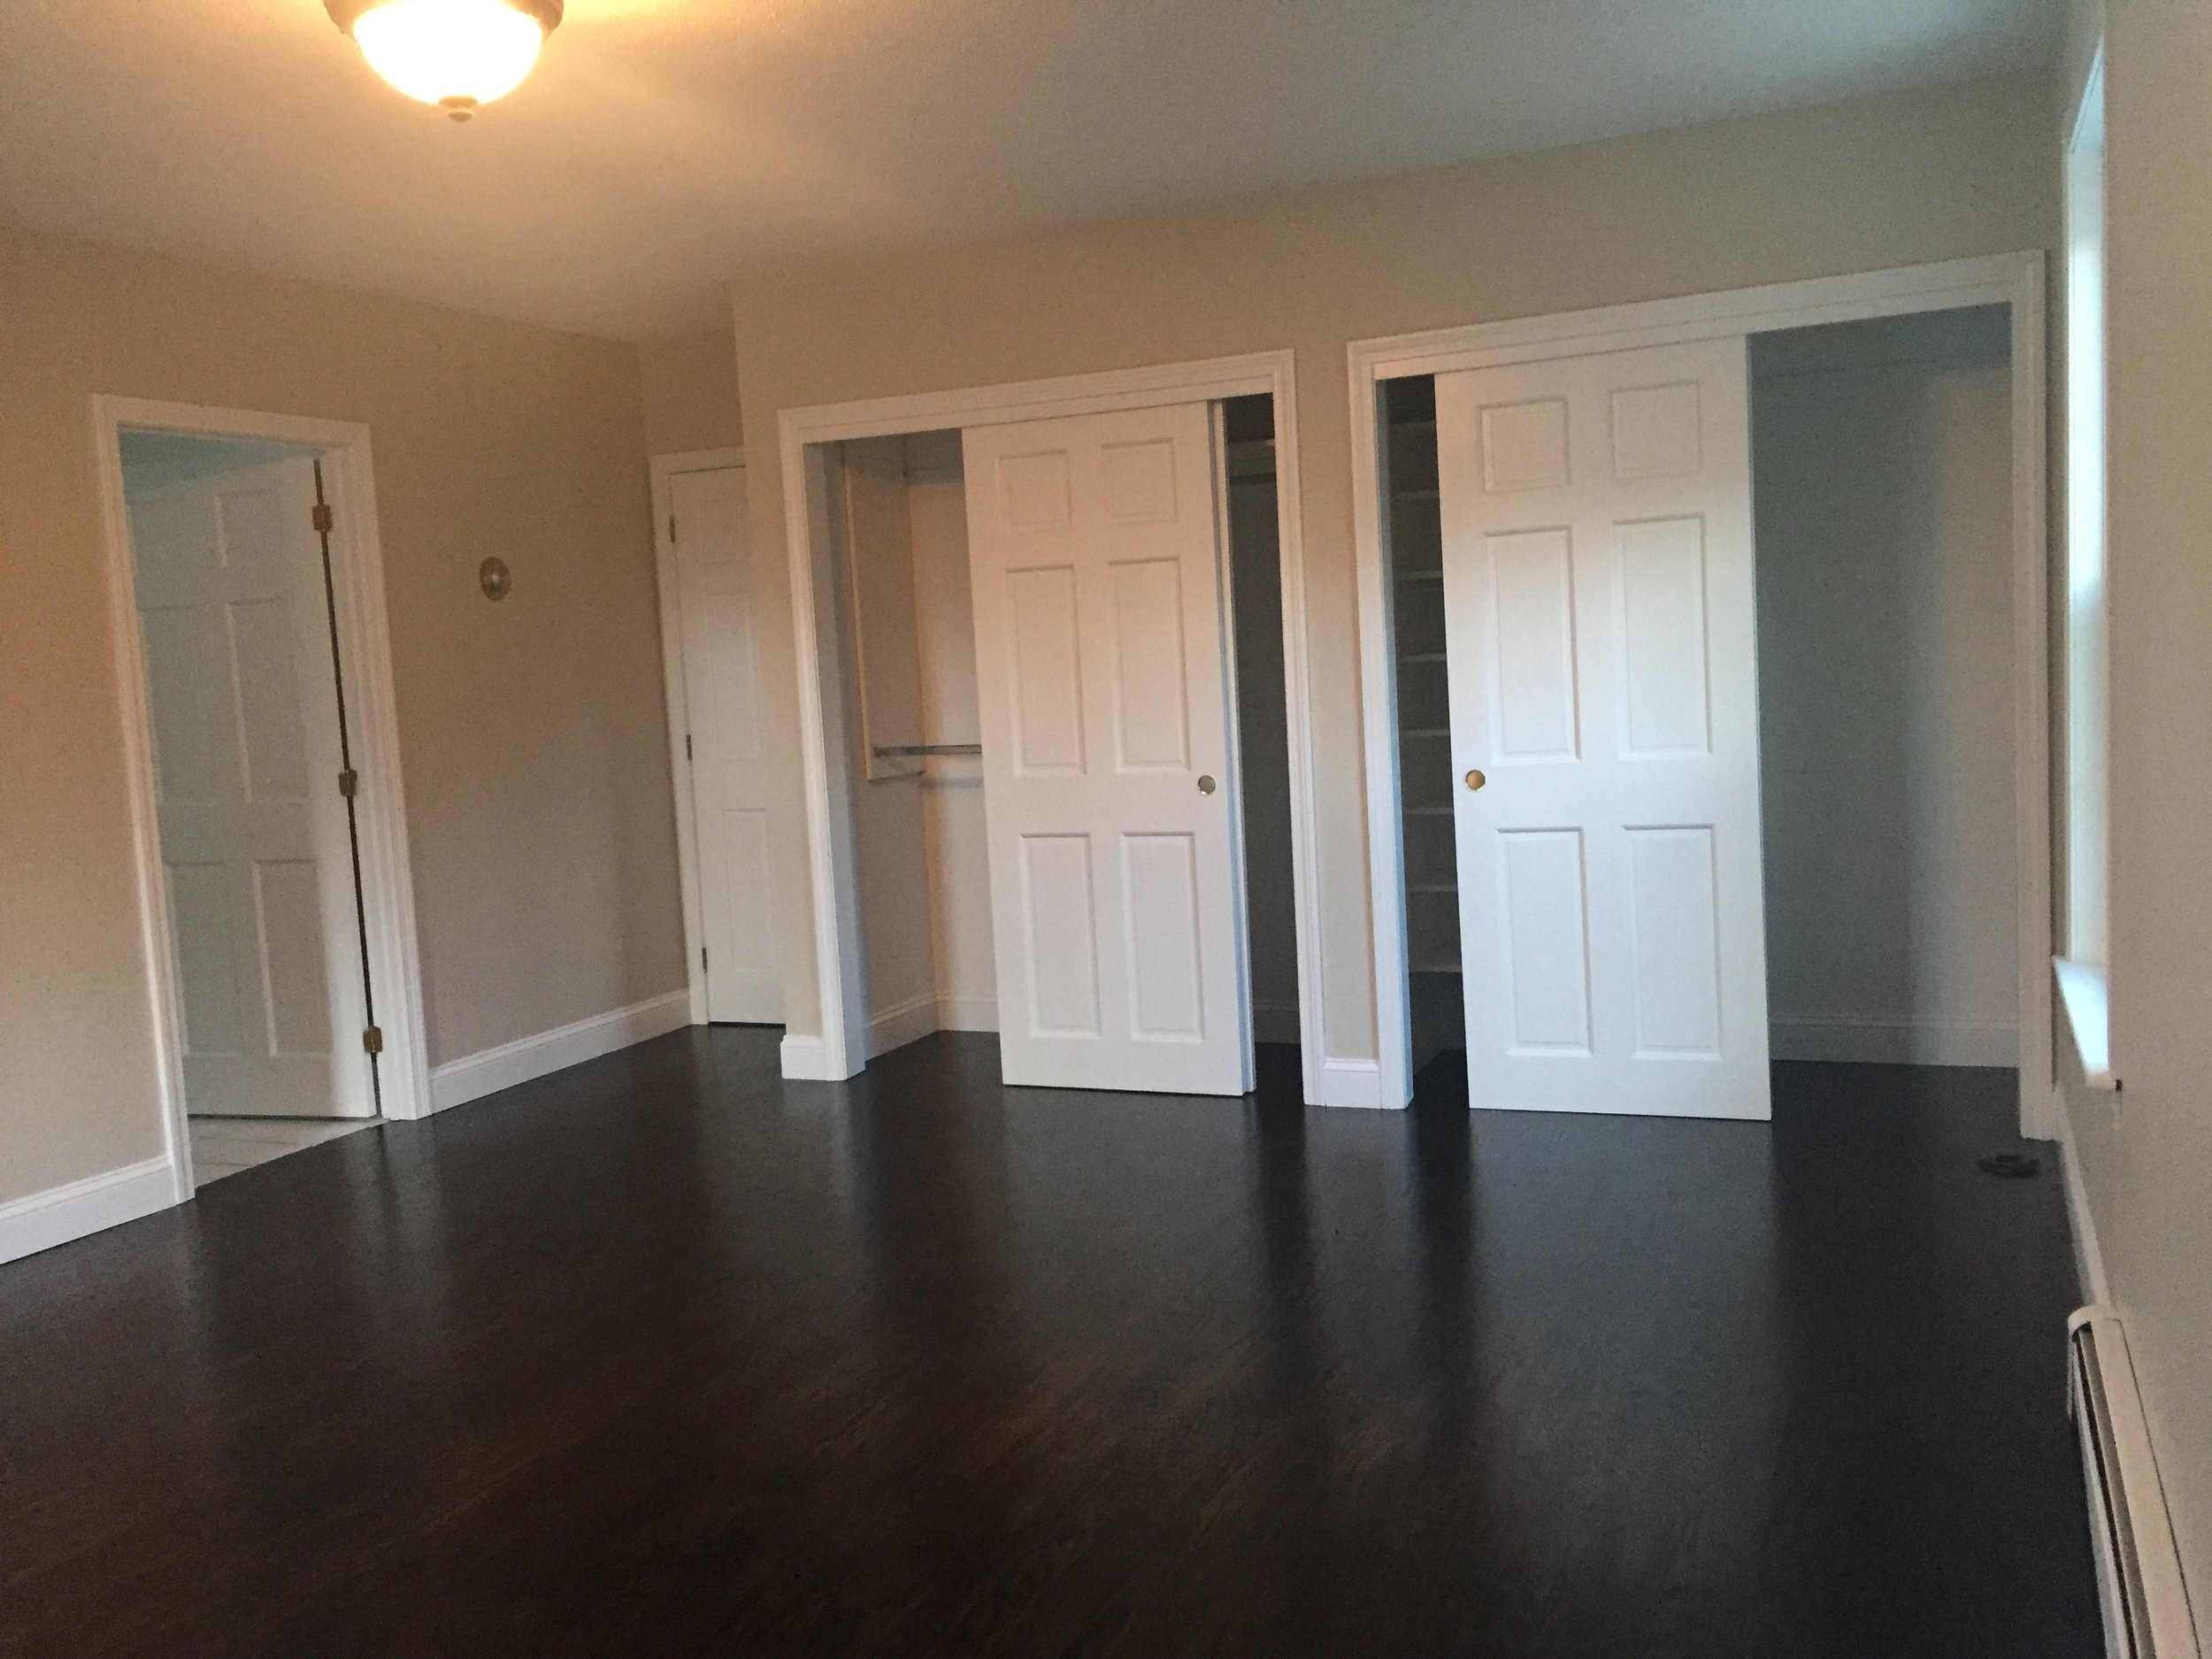
Master Bedroom - FINISHED - Red Oak - 3 coats of Minwax Jacobean 2750 with Satin Poly & New Baseboard

Master Bedroom - FINISHED - Red Oak - 3 coats of Minwax Jacobean 2750 with Satin Poly & New Baseboard

Dining Room - FINISHED - Red Oak - 3 coats of Minwax Jacobean 2750 with Satin Poly & New Baseboard
Out with the old (carpet + laminate), in with the new (hardwood floors)!
Our upstairs flooring is finally installed!
When picking out what type of wood you want for flooring, it’s important to do your research and make a list of what qualities you want as many people might not realize how many options there are.
Knowing that durability, natural graining and a moderate price point were my three key factors, solid Red Oak was the right choice. We decided on 3.25" for a more modern look.
Another key component about Red Oak, is that this type of wood soaks up stain really well, which allows for more options as to what shade you can create (pictures included below are not of stained wood…stay on the edge of your seat as those are coming soon!).
PROCESS:
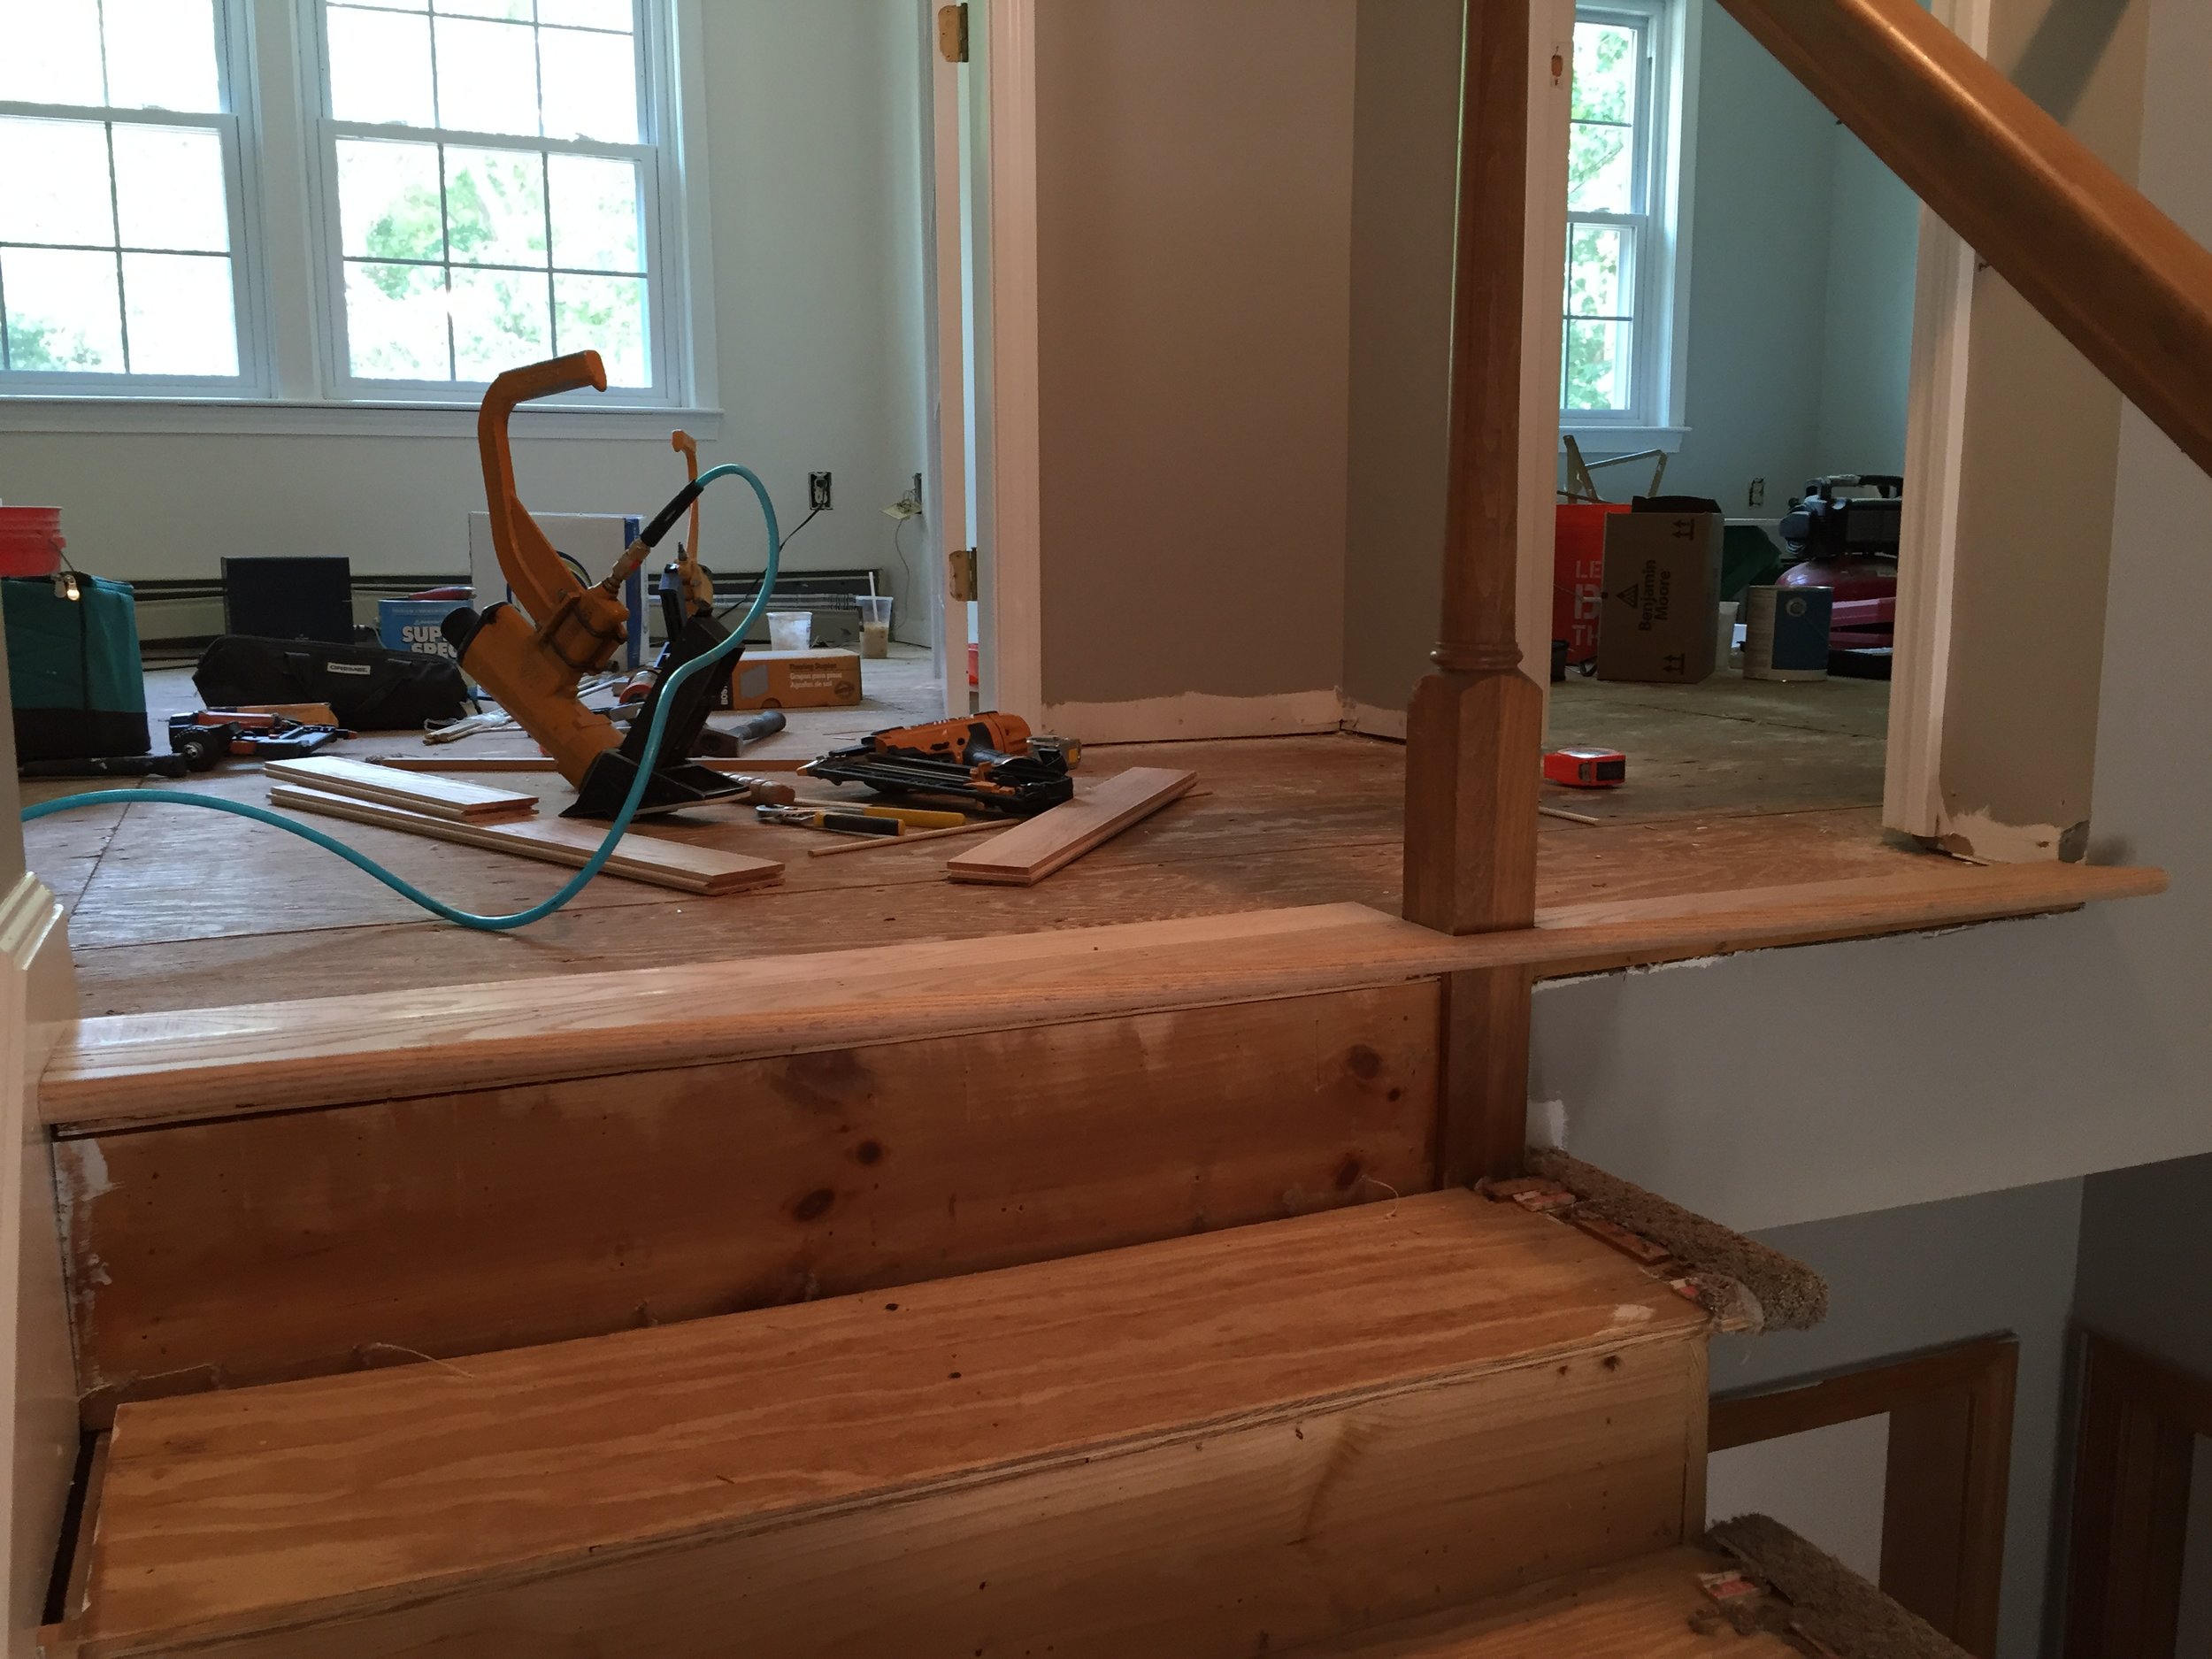
- It took about 3-4 days for the installers to demo, tighten the floor boards and lay the wood down (the new wood baseboard will be installed after the staining and poly are applied)
- The floors are sanded for a nice smooth finish
- They sanded the stair's railing to prep for the new stain, which took a few hours in itself
- In order to install the wood stair treads they had to remove the balusters
- The treads are also red oak and come prefabricated with a bull-nose attached
- The new risers are applied consecutively as the treads are being installed
- The new balusters, similar to the previous style, will be installed after the staining and poly are applied
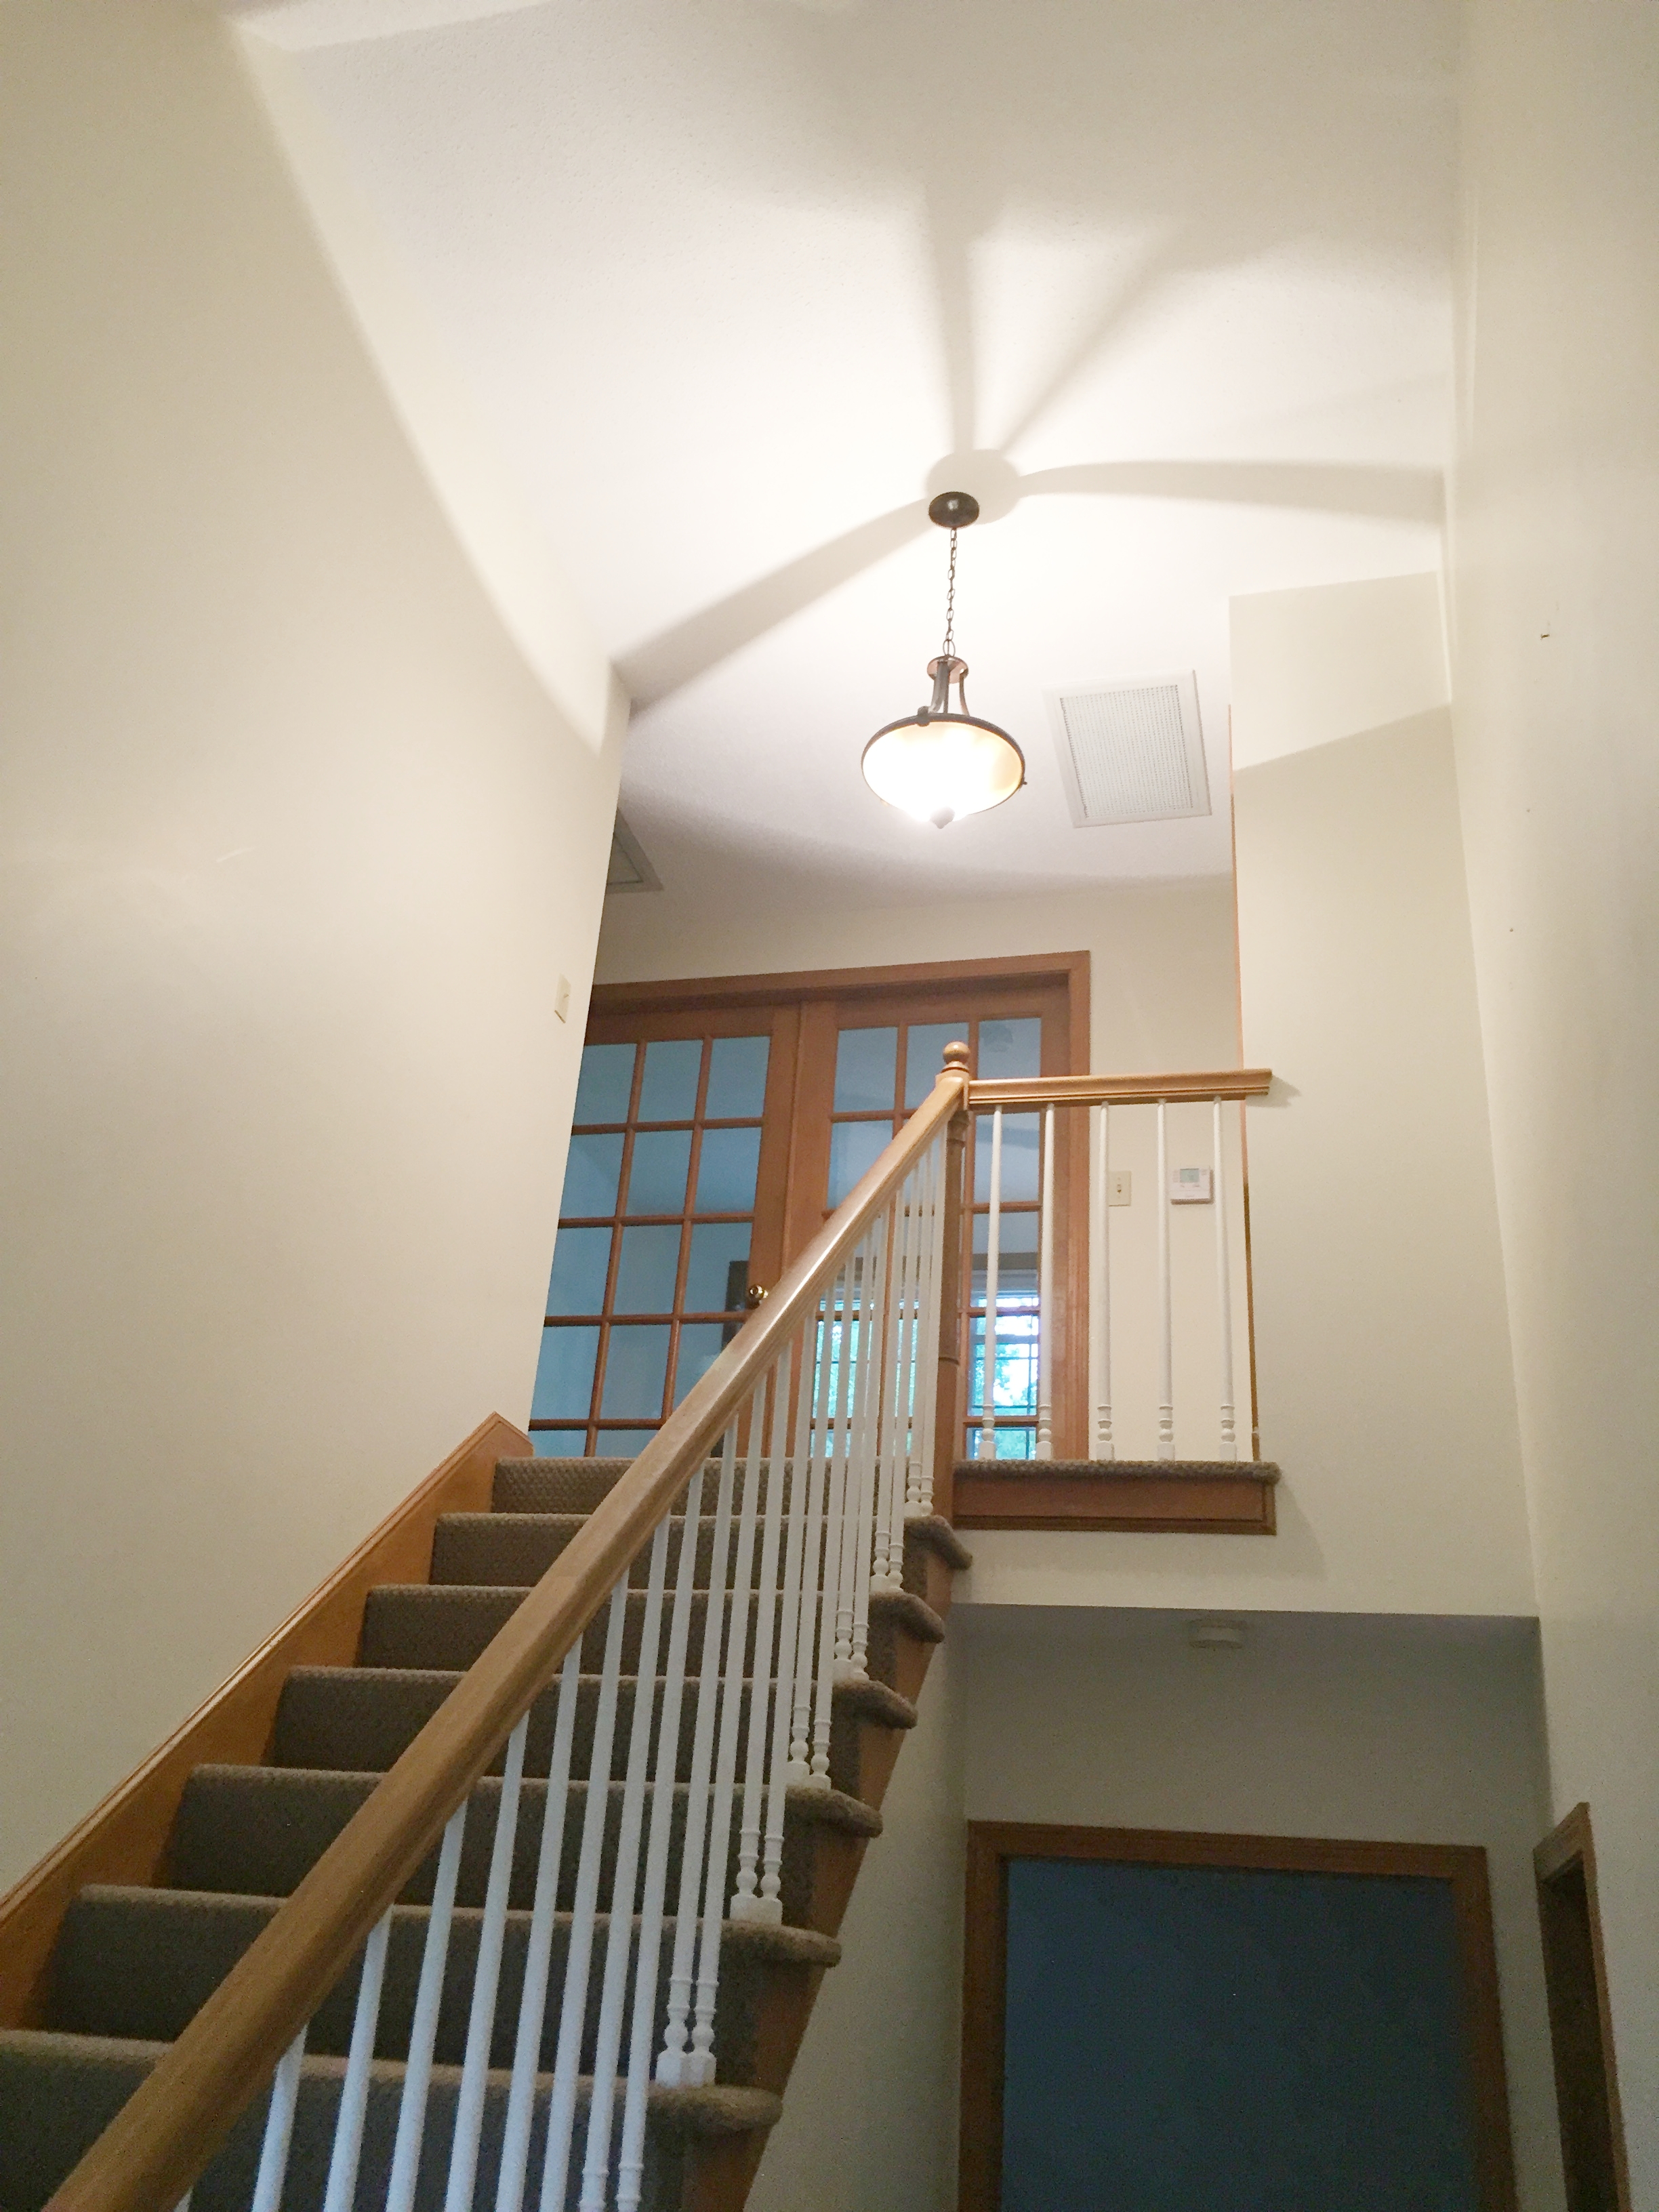
BEFORE - Entry Stairs with carpeting and light oak railing

PROGRESS - Entry Stairs with carpeting, pad and balusters removed
PROGRESS - Entry Stairs They started the wood here
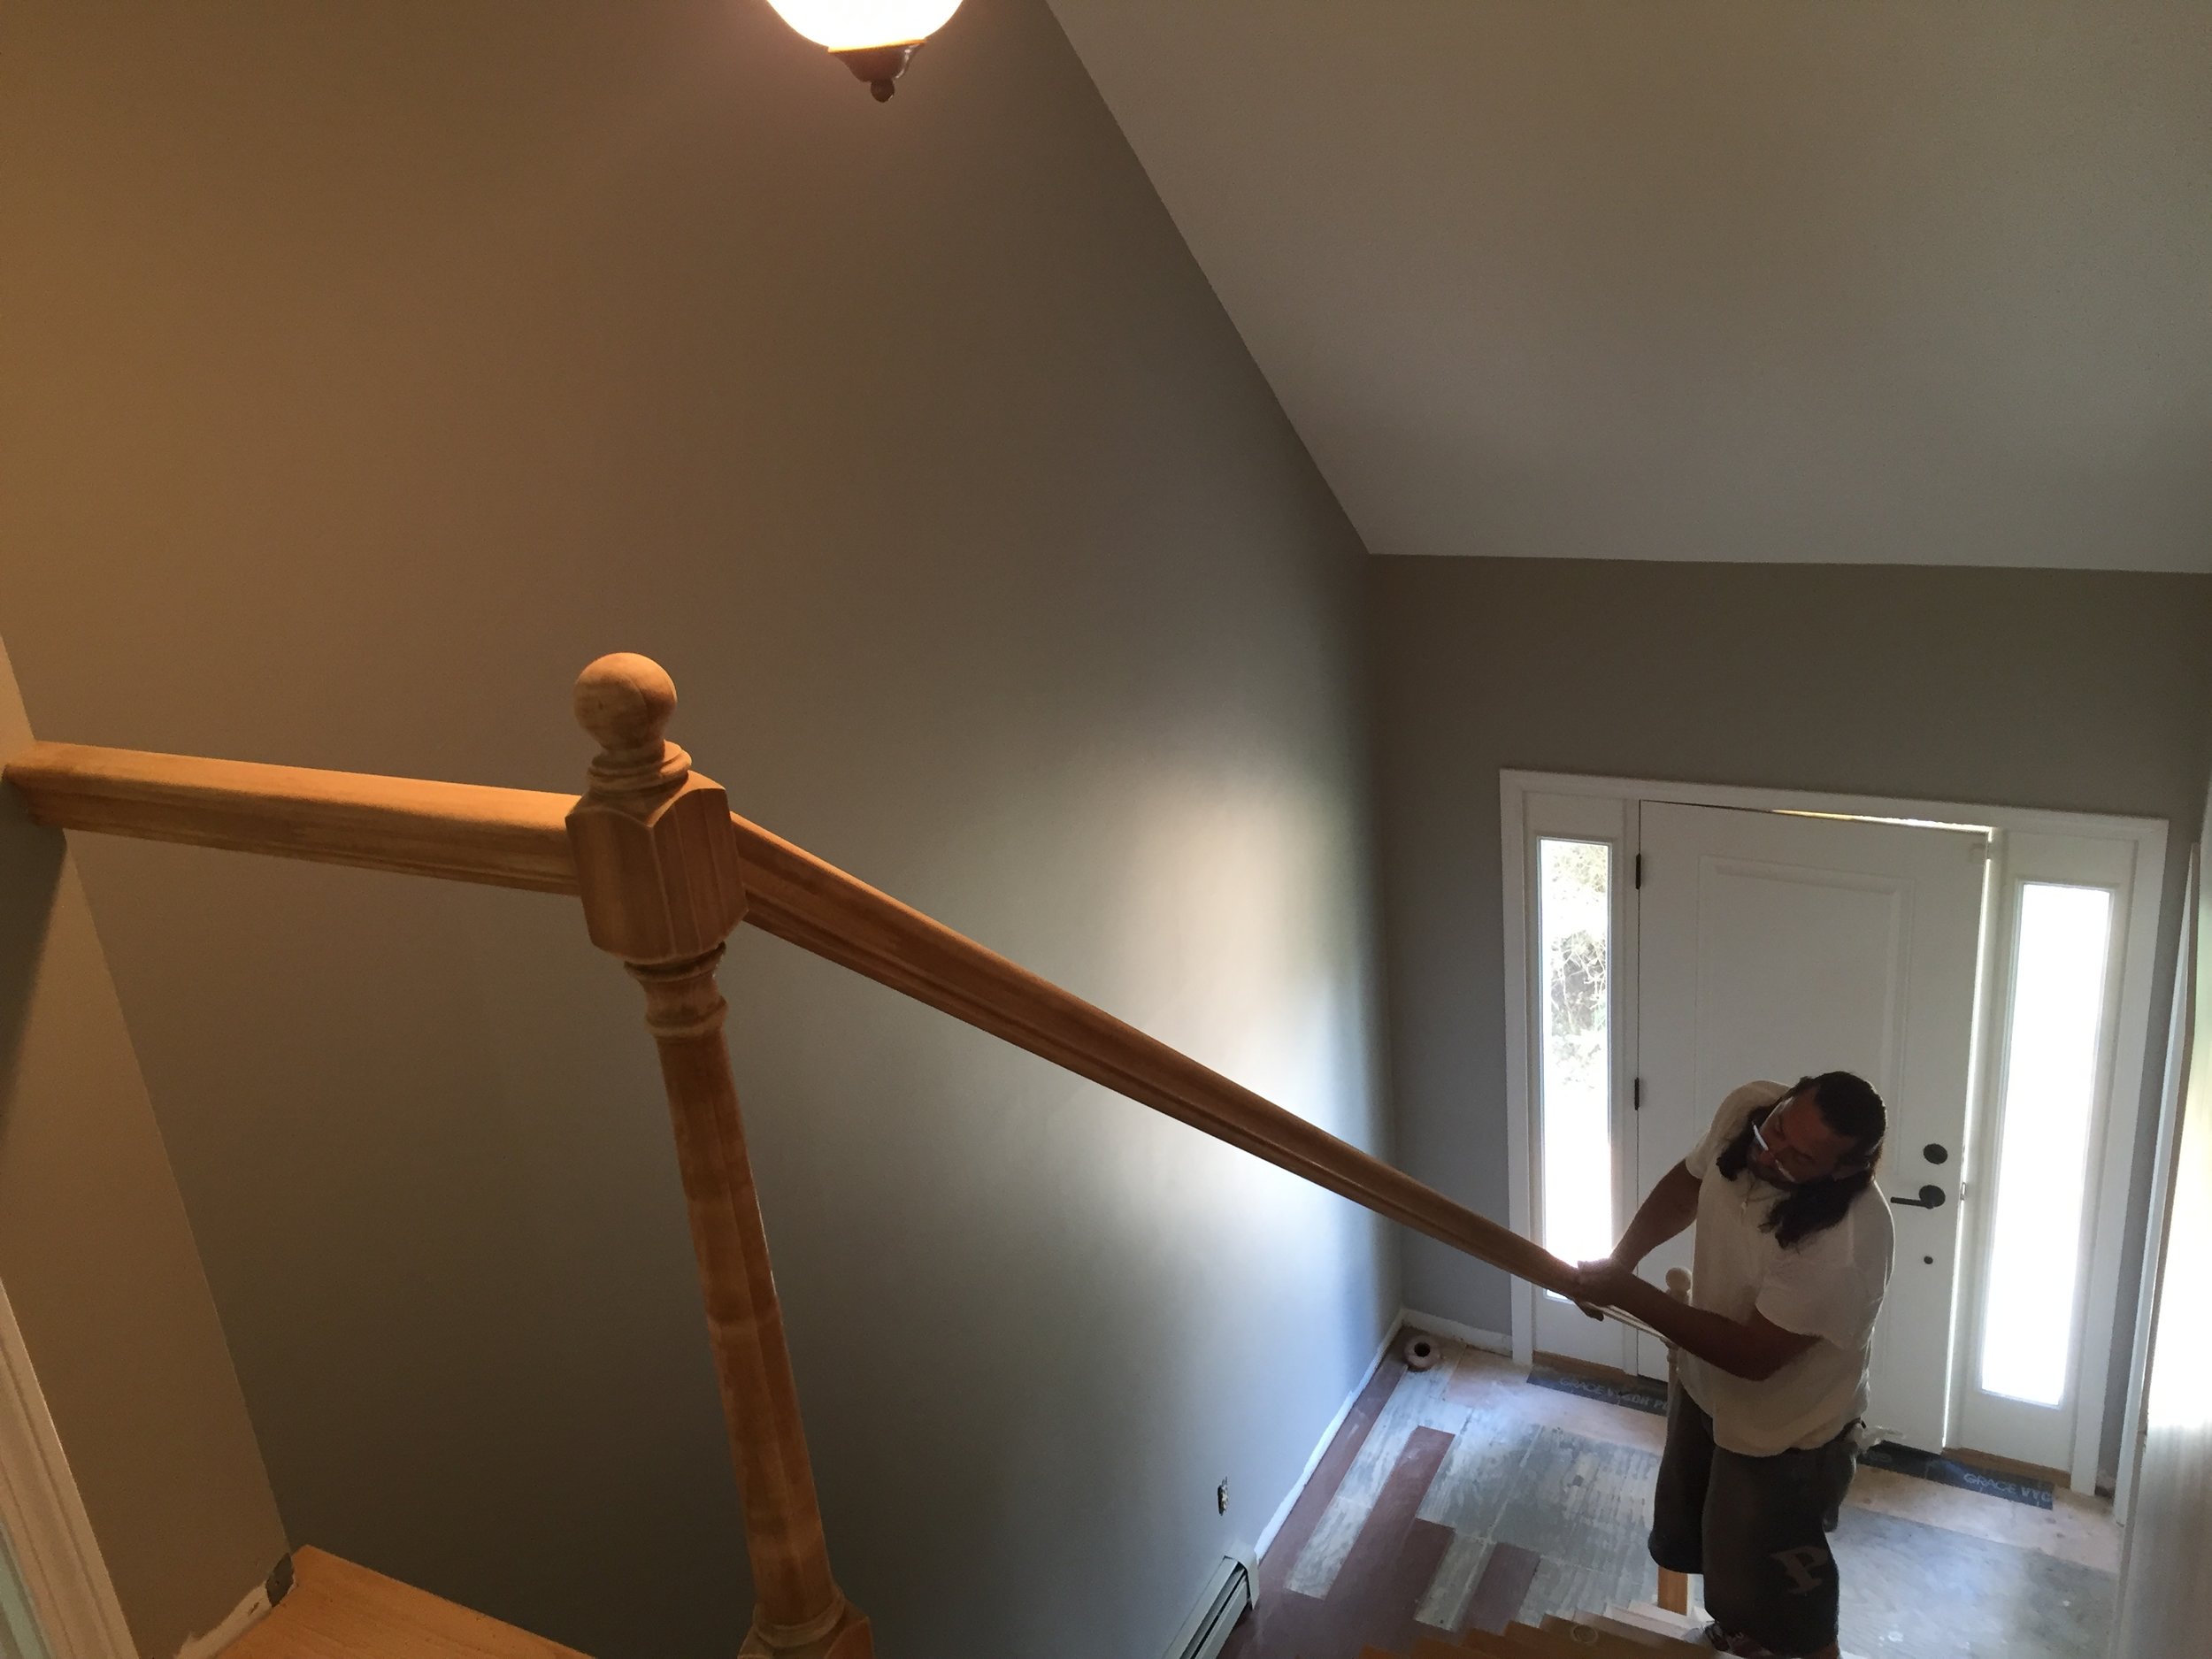
PROGRESS - Entry Stairs railing sanded for refinishing

PROGRESS - Entry Stairs with sanded railing and new red oak flooring installed (unstained)

PROGRESS - Entry Stairs new red oak treads and risers installed (unstained)
PROGRESS - Entry Stairs closeup of red oak boards (unstained)

PROGRESS - TV room with carpeting removed + screwing the subfloor to the floor joists to eliminate squeaking

PROGRESS - TV room with new red oak flooring being installed (unstained)
PROGRESS - TV room with new red oak flooring being cut down to fill in the gaps

AFTER - TV room with new red oak flooring installed (unstained)

AFTER - TV room with new red oak flooring installed (unstained)

AFTER - hall with new red oak flooring installed (unstained)
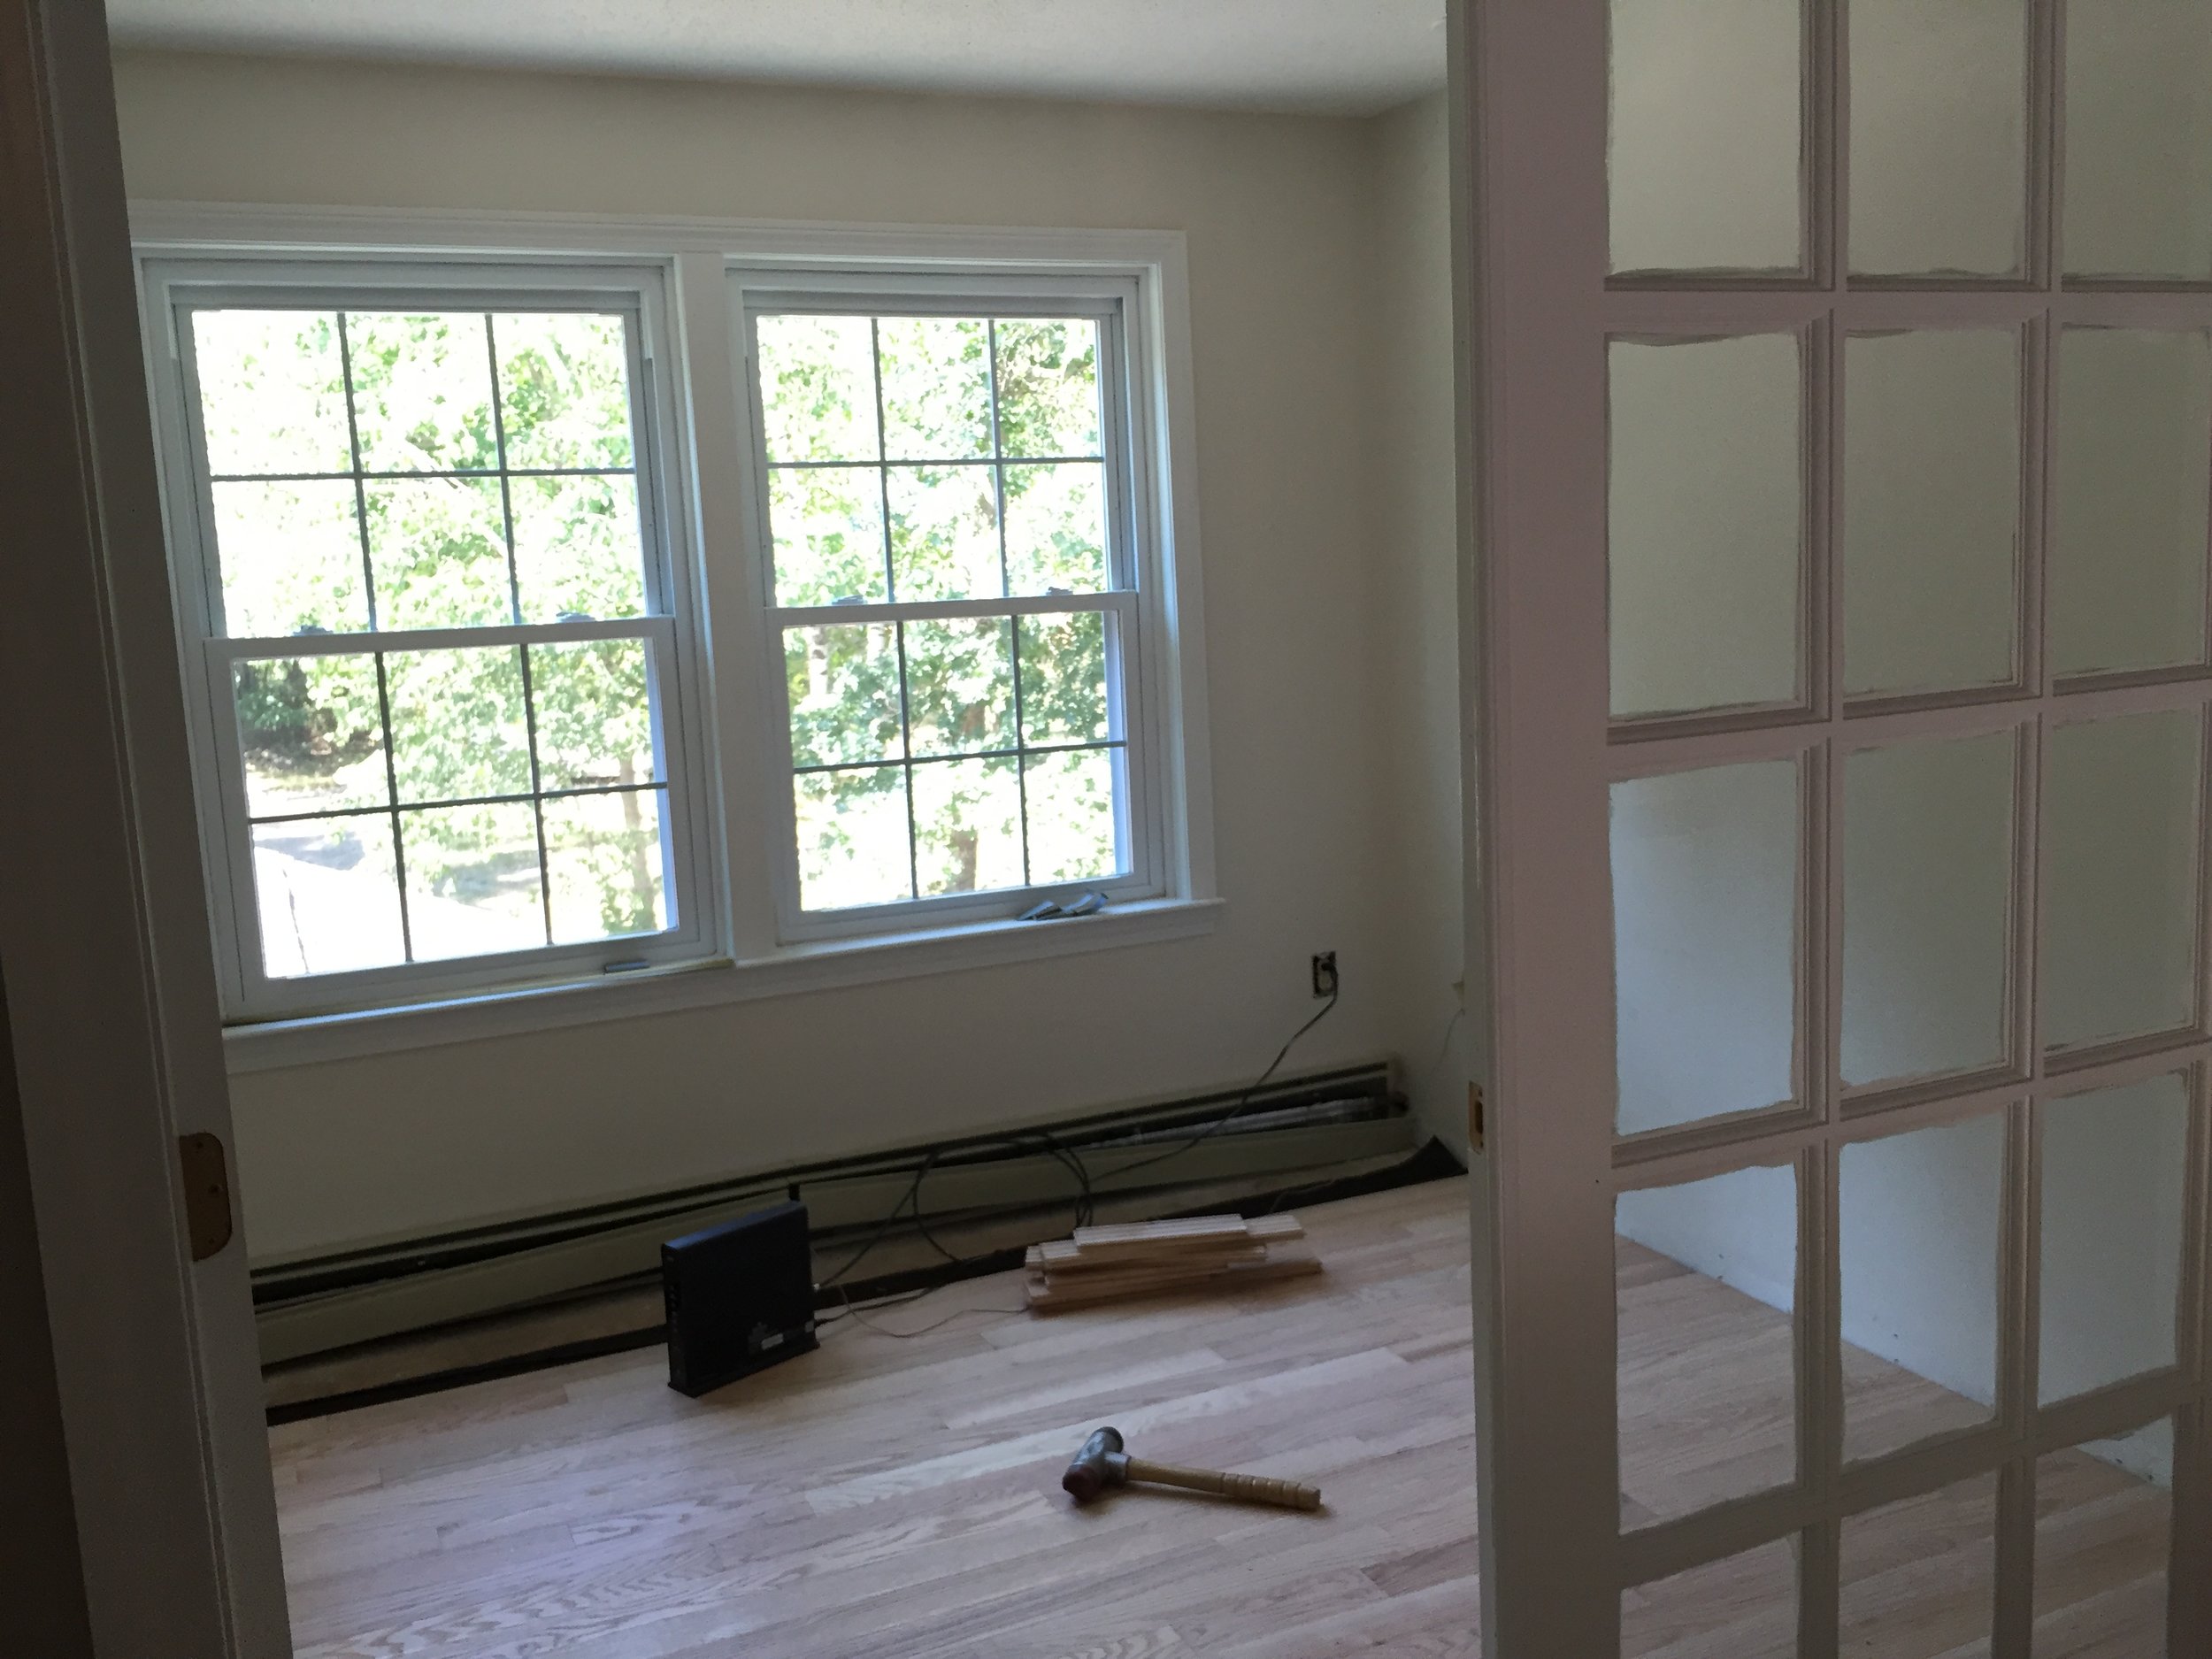
AFTER - Office with new red oak flooring installed (unstained)

AFTER - Bedroom and closet with new red oak flooring installed (unstained)

AFTER - Bedroom with new red oak flooring installed (unstained)
A Fresh Coat of Paint!
In my 10 years of being an Interior Designer, the main commonality that occurs is the need and/or desire to have a “quick fix” to a room or house, which can easily be fulfilled by a simple change of paint color. Changing the color on walls can determine what type of tone/mood you want to set for the room and for most people a fresh coat of paint can cause instant gratification. The best part is that a new fresh color can pack a big punch visually, but not financially!
I started to visualize what colors I wanted throughout the house and took my time to do research (it is my passion and profession after all!) and it is important you have fun with this and not let it stress you out too much about picking the “perfect” color as it can easily be changed.
PICTURES BELOW!
I decided to remodel the top floor first, so it would be ready for out-of-town visitors, so below are the before and after pictures as well as paint colors listed out. When it comes to the best quality, I find Benjamin Moore and Sherwin Williams to be quite comparable so I color matched them the best I could for your convenience.
Let me know what you think and stay tuned for new wood flooring pics...!
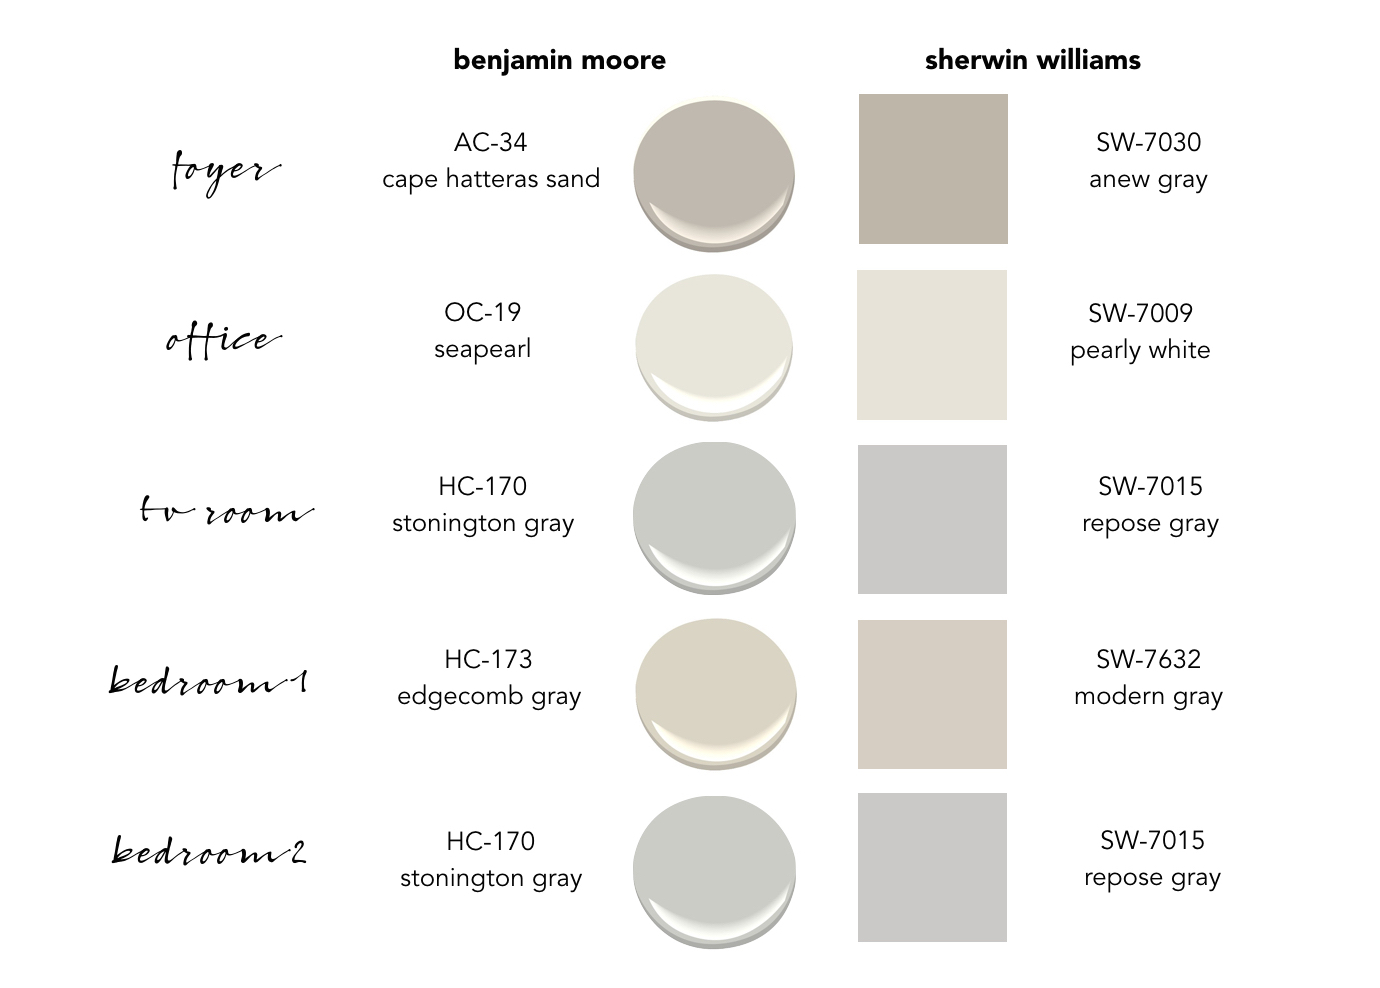
Doors + Windows + Trim is Benjamin Moore Interior Latex Semi-Gloss White 276-01

TV ROOM - BEFORE PAINT

TV ROOM - PROGRESS PAINT & REMOVAL OF BASEBOARDS + CARPETING

TV ROOM - AFTER PAINTED WALLS + PAINTED CEILINGS + CARPETING REMOVED
- I chose a soft gray for the TV room because I wanted a very light gray that would coordinate with my existing charcoal sectional and black and white rug but contrast with the dark wood floor stain. Pictures to come with the room furnished

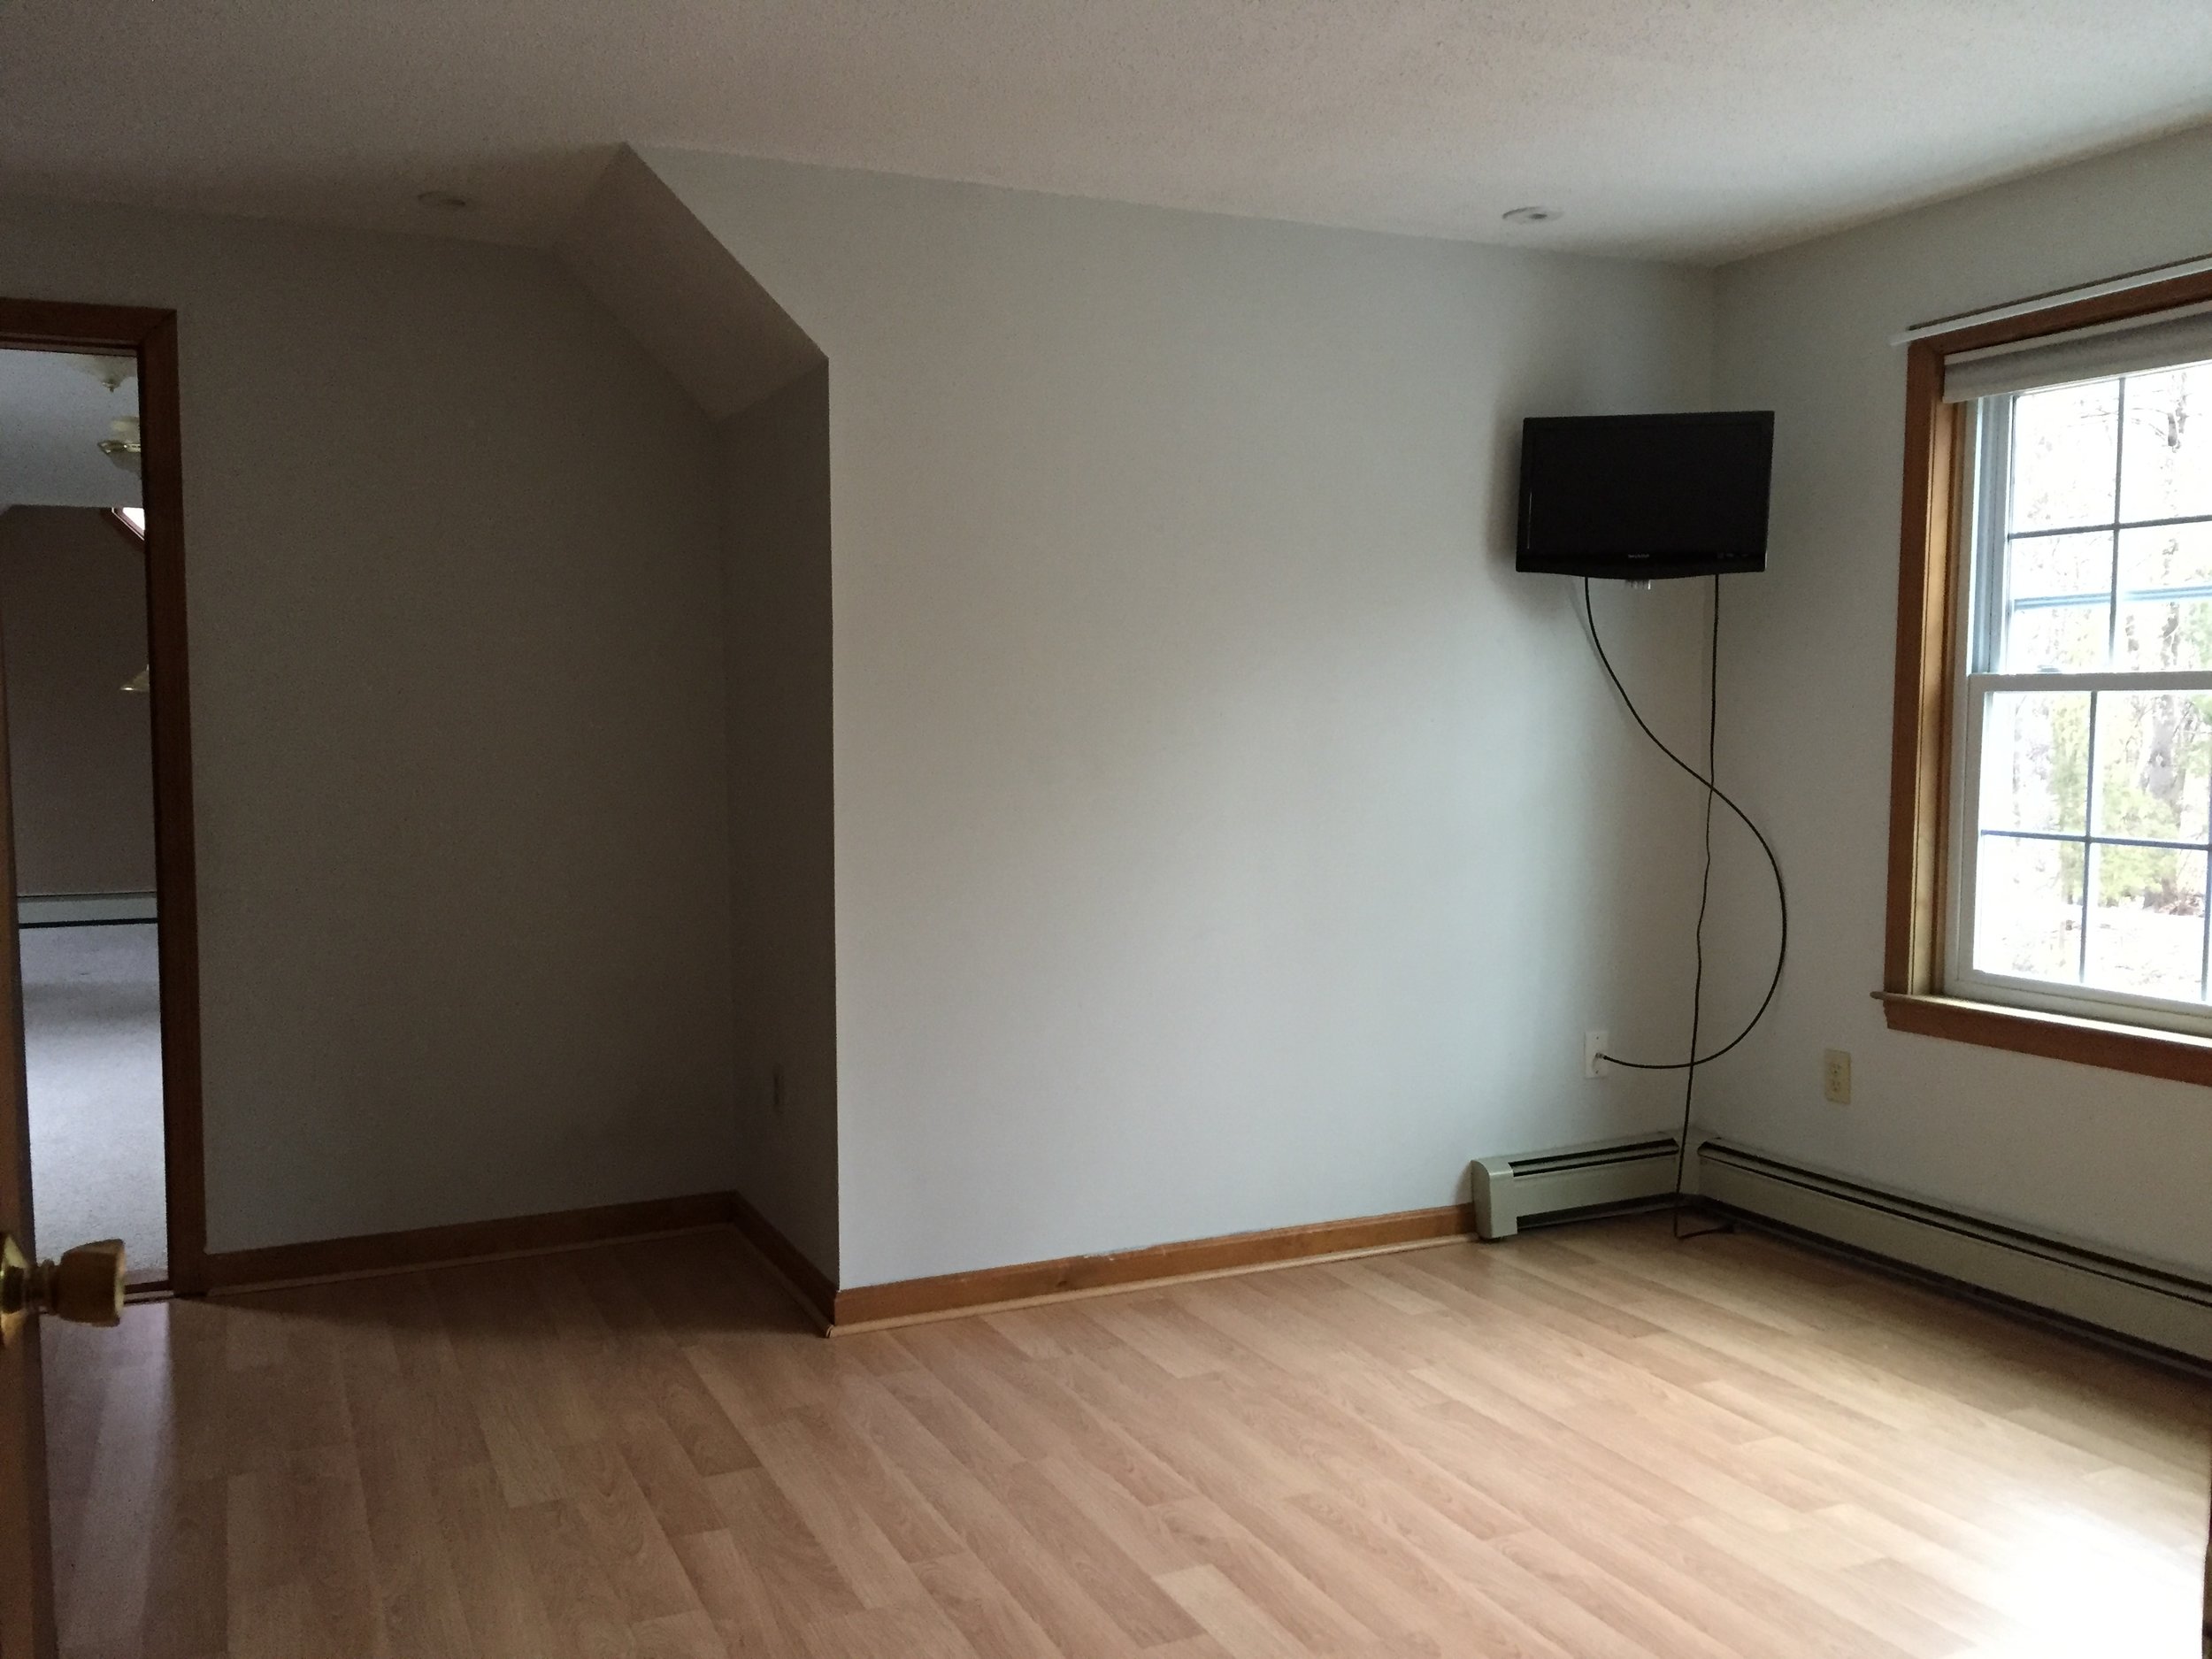
BEDROOM 2 - BEFORE PAINT

BEDROOM 2 - AFTER PAINT + NEW HARD WOOD FLOORING IN (UNSTAINED)
*FORGIVE THE BAD LIGHTING*
- I repeated the same color here as the TV room because I wanted a consistent flow from room to room on the top floor
BEDROOM 1 - BEFORE PAINT + WITH LAMINATE FLOORING
BEDROOM 1 - AFTER PAINT + WITH NEW FLOORING + STAIN + BASEBOARD (SPOILER!)

BEDROOM 1 - BEFORE PAINT + WITH LAMINATE FLOORING

BEDROOM 1 - AFTER PAINT + WITH NEW FLOORING + STAIN + BASEBOARD (SPOILER!)
OFFICE - BEFORE PAINT

OFFICE - AFTER PAINT + NEW HARD WOOD FLOORING IN (UNSTAINED)
- For my office I matched an off-white paint with the off-white in my existing office area rug, so it will blend nicely
- Originally I was thinking to go a little bold with the paint, but because you can see this from the bottom of the stairs and entry I decided to go very neutral and then go more bold with the future window treatment
OFFICE DOOR TRIM - PROGRESS PAINT

STAIRWELL - PROGRESS PAINT
STAIRWELL - PROGRESS PAINT

STAIRWELL - PROGRESS PAINT
STAIRWELL - AFTER PAINT
- I wanted something a little more dramatic for the foyer so I went with a darker warm gray, so that it felt richer but still welcoming. I am able to envision the 'end result' in my head so these colors will work perfectly!
Soot be gone!
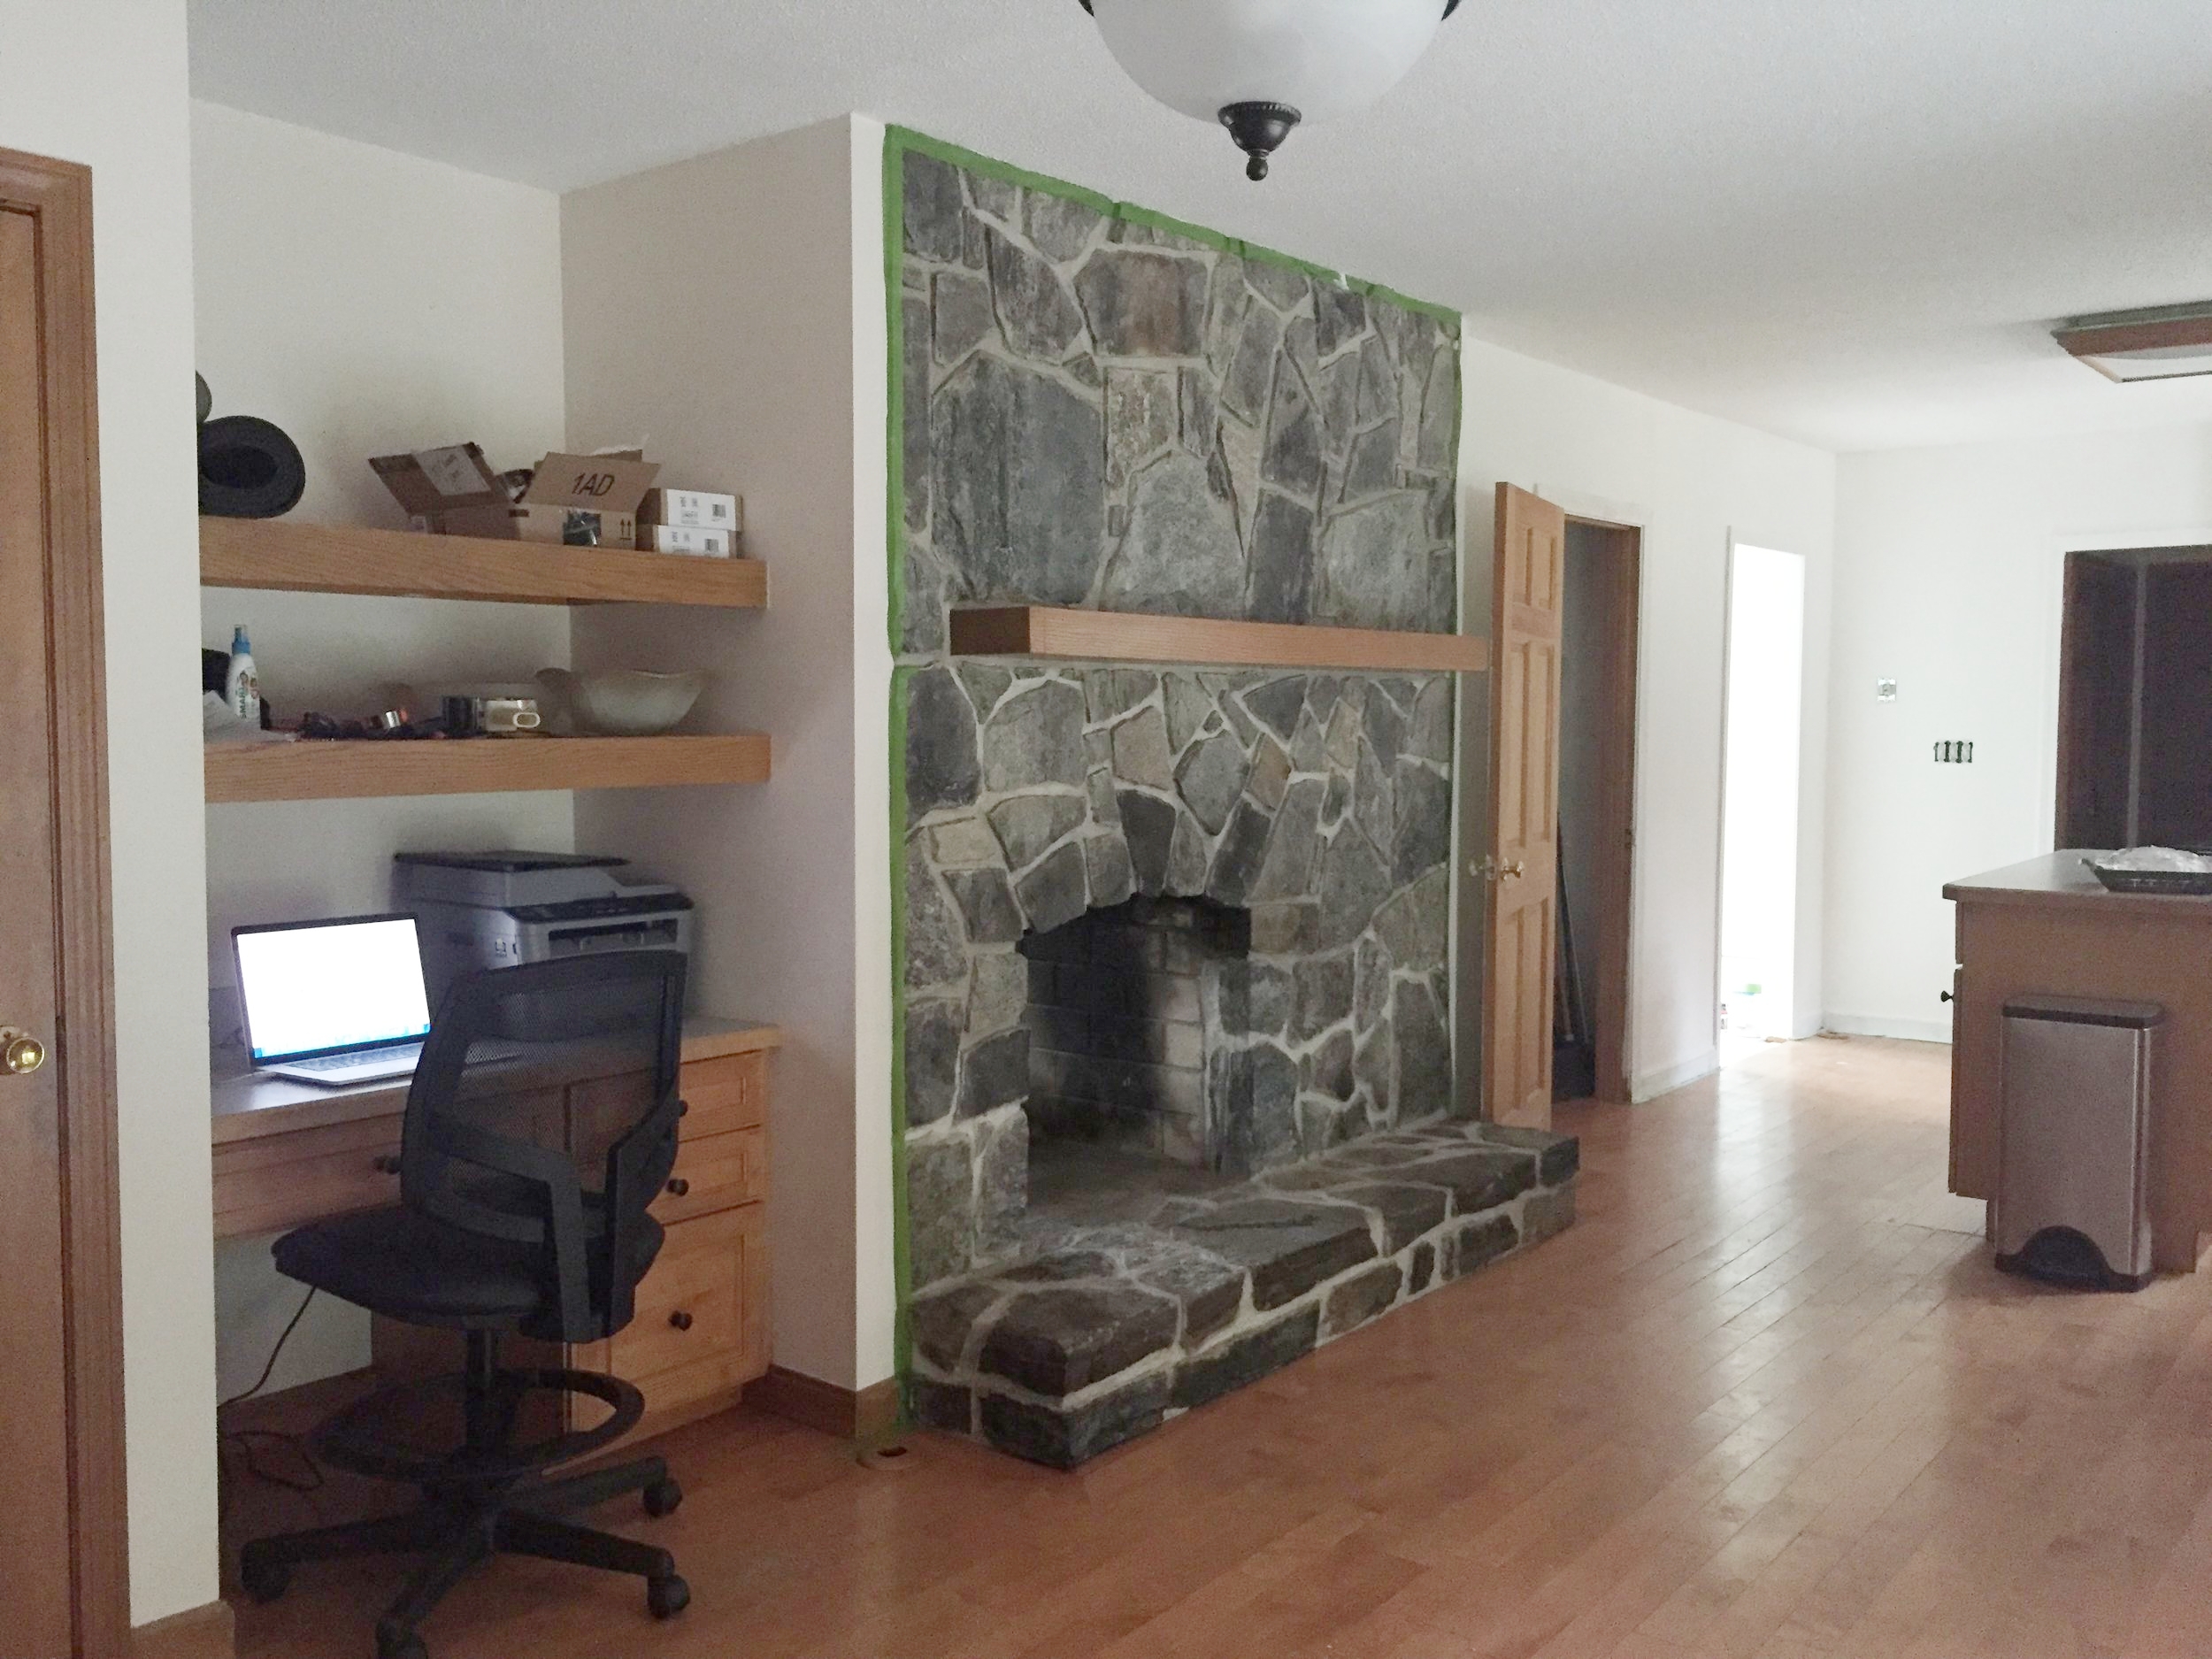
I have started narrowing down DIY projects around the house as there are many projects going on where professionals are needed, so I figured I would start tackling jobs around the house which I can handle myself. The first DIY job on the (what seems to be a never ending) “to do” list, was to remove build-up soot on the stone fireplace. I noticed in the real estate photos and during inspection this needed to be done, so I researched cleaning products early on that were non-toxic and effective which lead me to Quick 'n Brite.
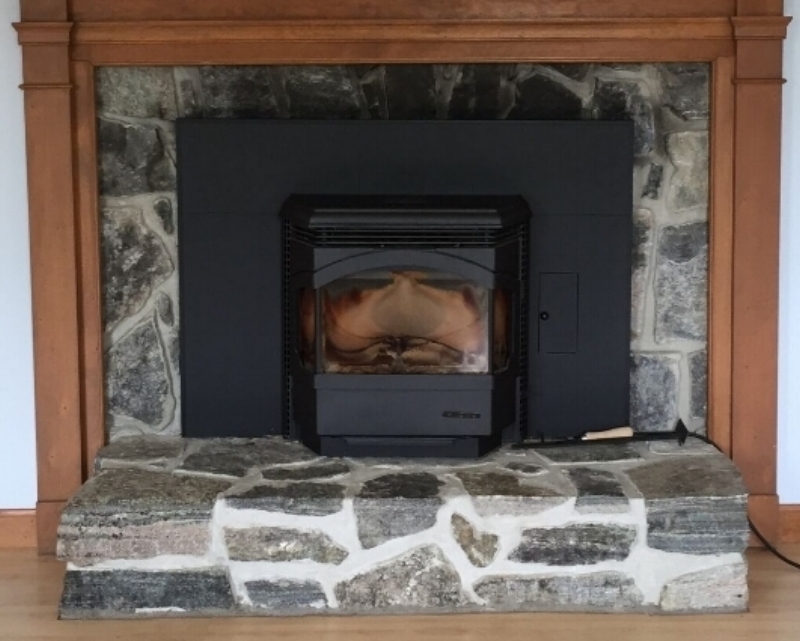
The fireplace is a two-sided/see-through fieldstone, which is hands-down one of my favorite things about the house. One modification that was made was removing a pellet stove insert on the side facing the living room as I felt it took away from the beauty of the fireplace altogether. The duct insert/liner in our chimney remained untouched for the time being (which you can see coming down the center); however, this will be removed before temperatures call for a real wood burning fires (bring it on Winter!)
With the following product list (and some good ol’ fashioned elbow grease) I was able to successfully remove the soot for a “good as new” look:
- Quick 'n Brite Paste
- Plastic Measuring Cup (Dollar Store)
- Spray Bottle (Dollar Store)
- Rubber Gloves (Dollar Store)
- Large Scrub Brush (Dollar Store)
- Old Toothbrush
- White Rag/Cloth
- Paper Towels (Dollar Store)

My Process:
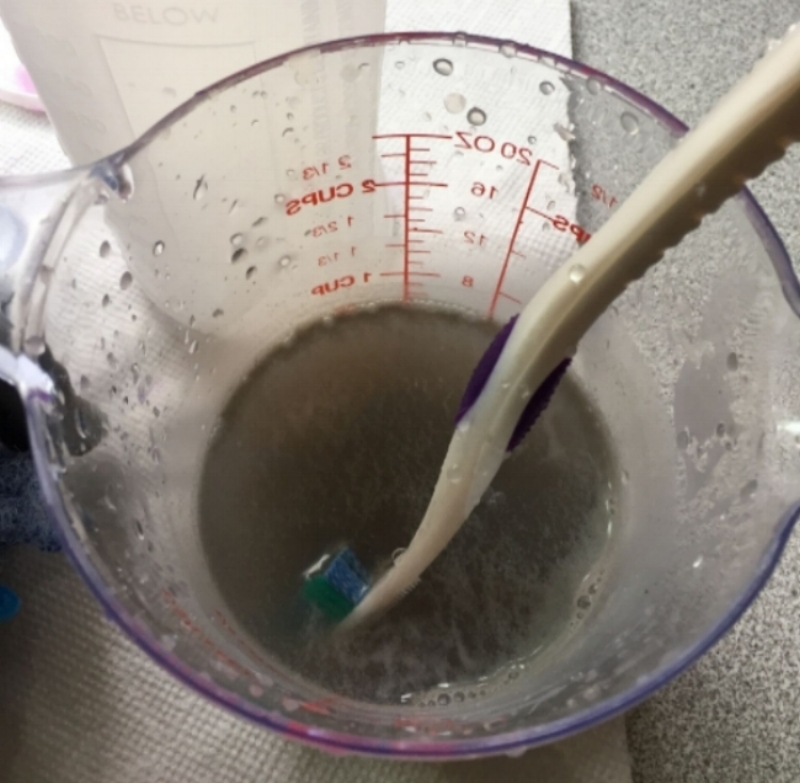
1 Use a large plastic measuring cup to mix the Quick 'n Brite paste with the hot water as directed, to melt the paste
2 Pour the mixture into the spray bottle
3 Wear rubber gloves to protect hands from soot
4 Spray the mixture onto the surfaces and let sit for 1 minute
5 Use a hand scrub brush for an 'all over' clean and a toothbrush to get in between the stones
6 Add fresh hot water to the measuring cup to clean off the brushes as you go
7 Use paper towels to get most of the water + soot off and use the white rag to blot dry
*This is a repetitive process and takes several trips to the sink for clean water refills

BEFORE - Fireplace in Kitchen - Photo Taken During Home Inspection

AFTER - Fireplace in Kitchen - Pellet Stove Insert Removed - Soot Removed
YUCK! Soot and Water Mix
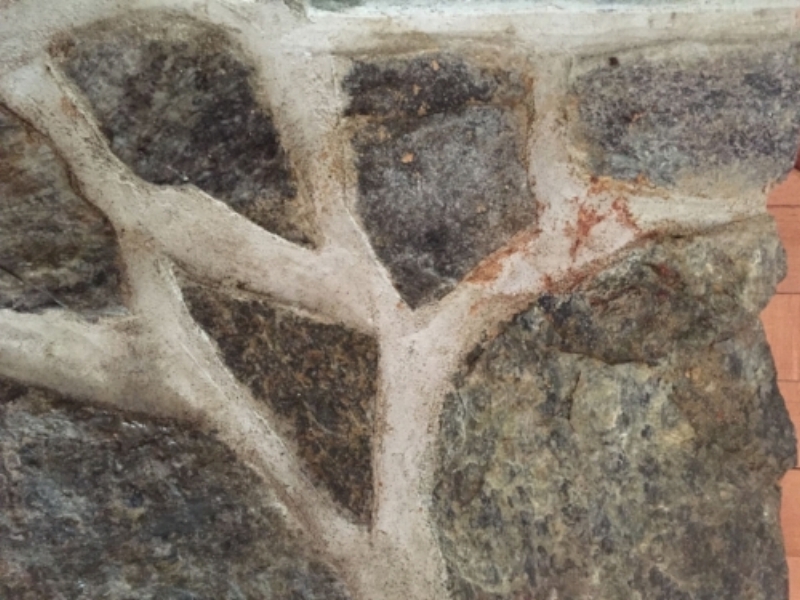
BEFORE - Kitchen Hearth - bottom right side

AFTER - Kitchen Hearth - bottom right side
BEFORE - Fireplace in Living Room with Pellet Insert

AFTER - Fireplace in Living Room - Pellet Stove Insert Removed - Soot Removed - Trim Painted
Coming Soon... More pictures as we remove the duct insert and stain the kitchen mantle to match the new flooring!
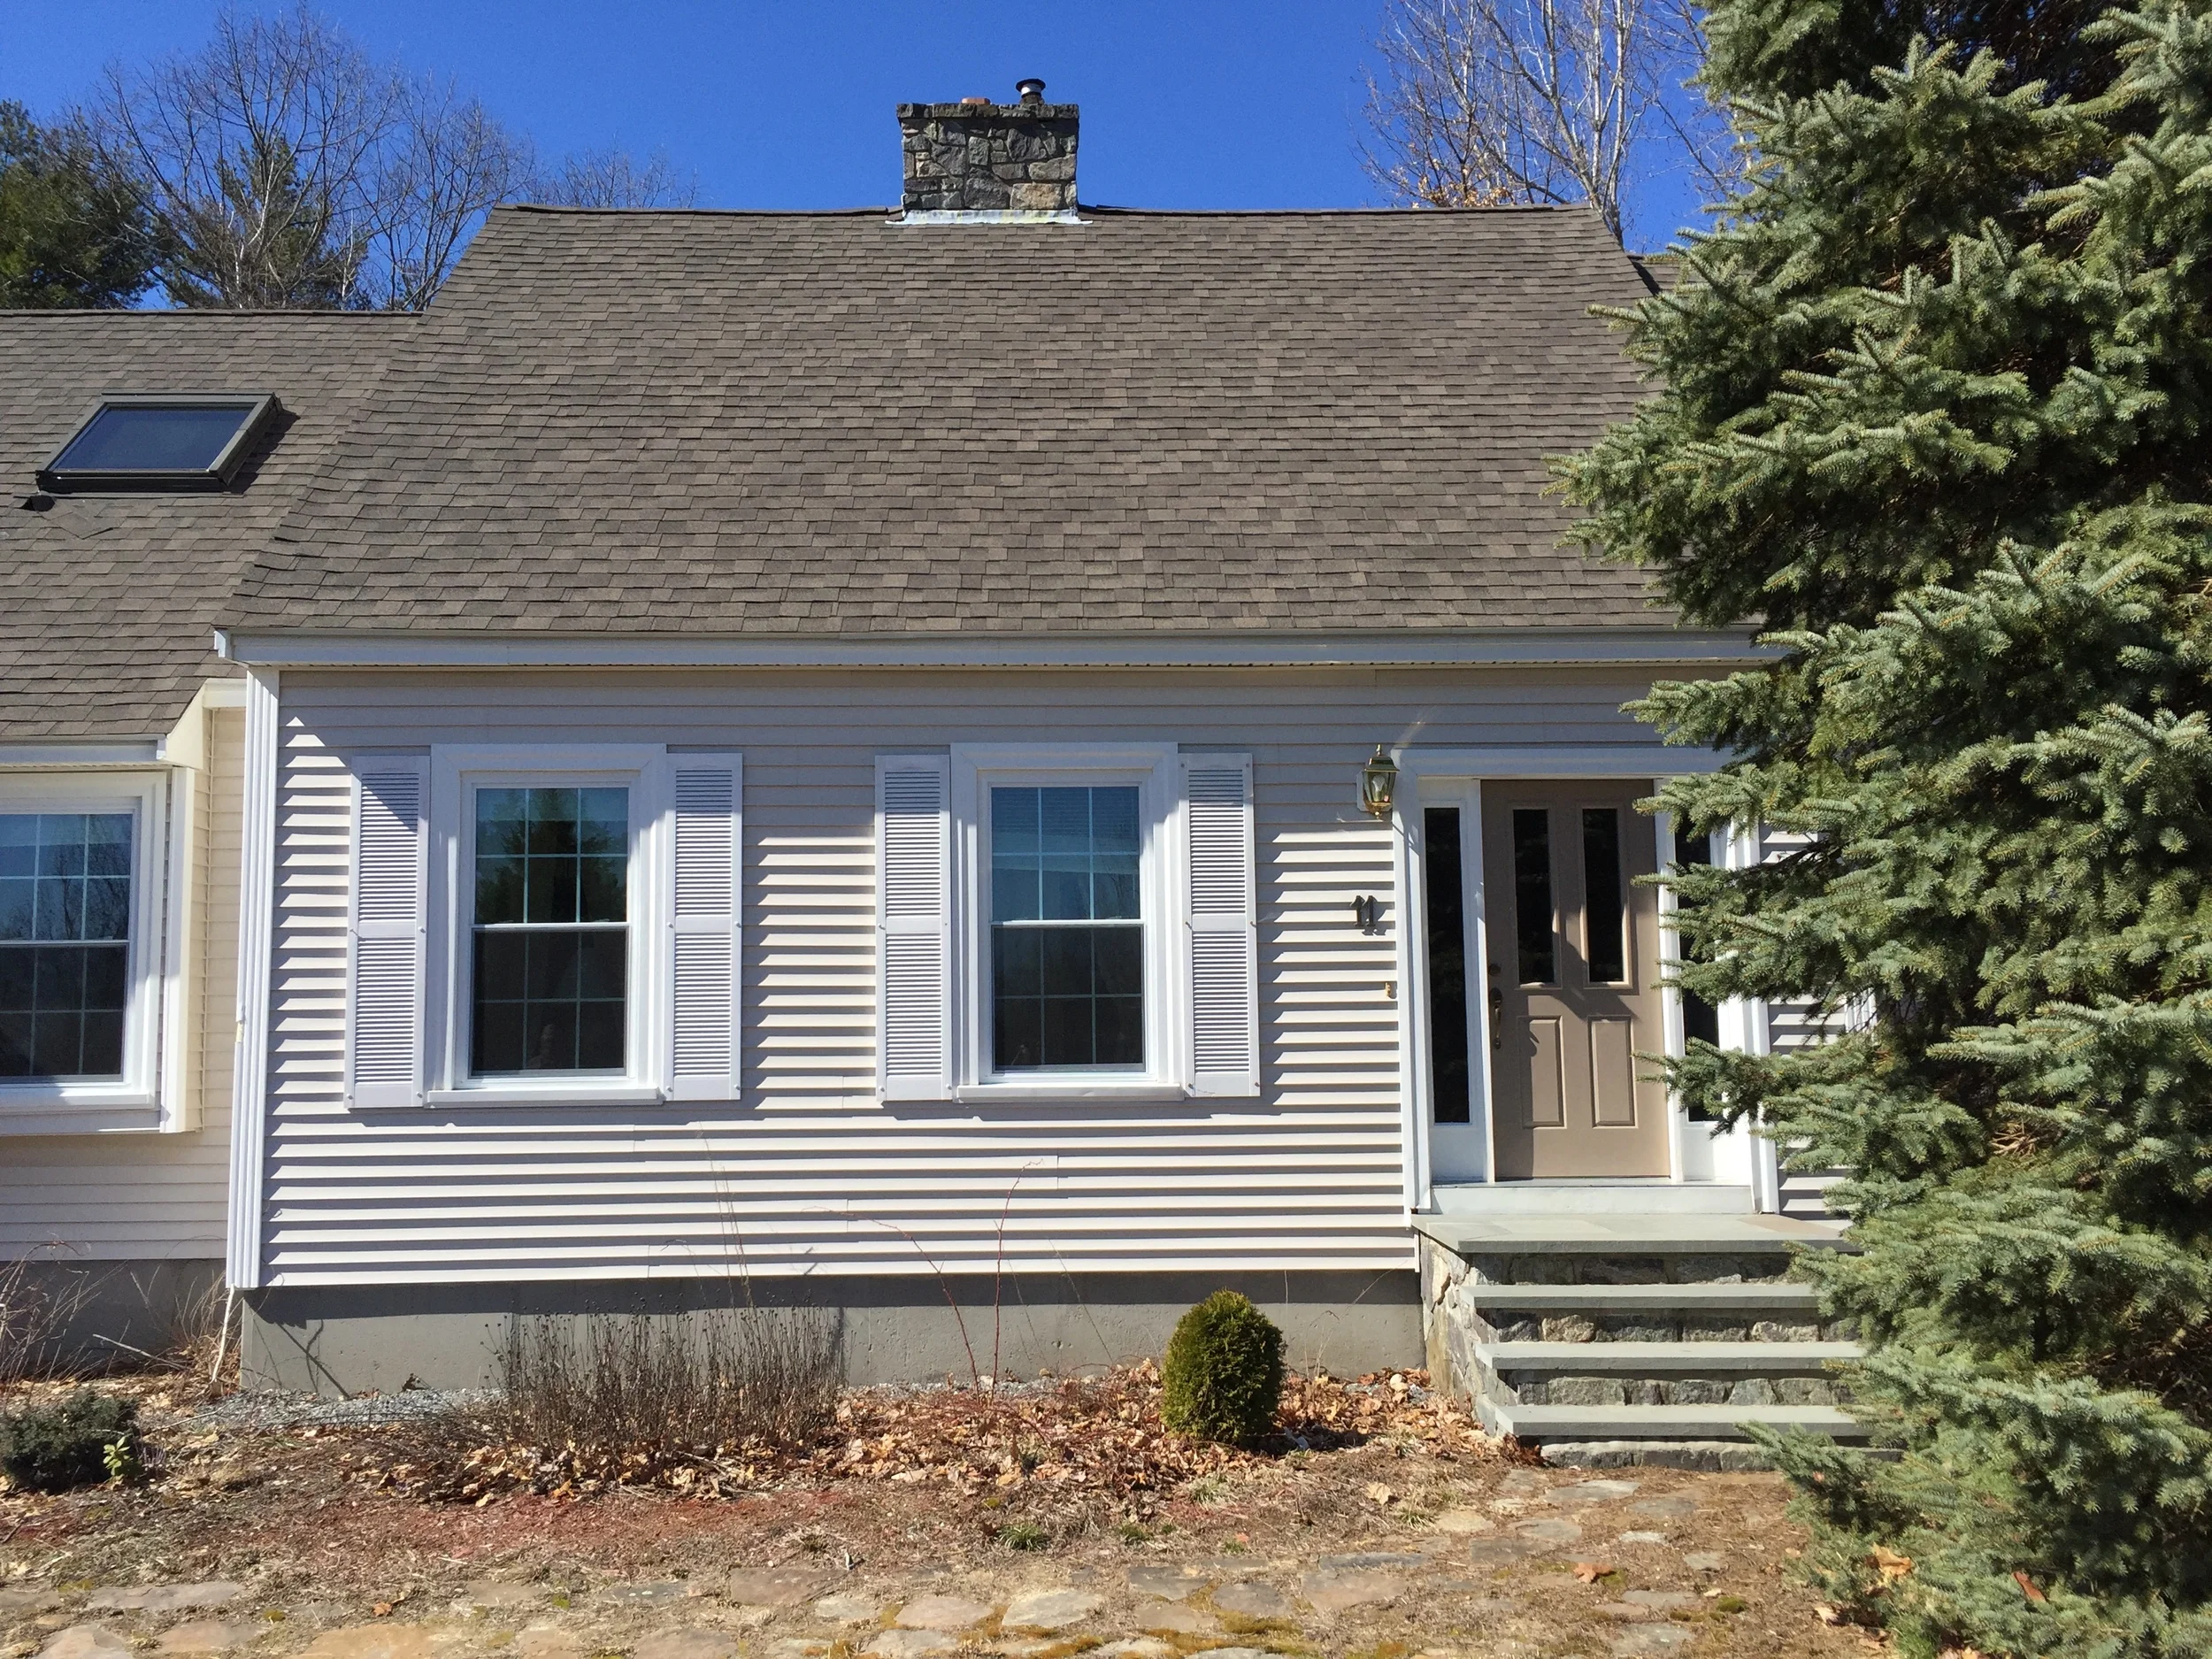
First thing’s first…A New Front Door.
When looking at homes, many people don’t generally envision what their “dream front door” looks like, I often did, and was beyond anxious and eager to research and find the perfect front door for our new home.
The previous front door had to be replaced mostly due to the sill (aka the piece of wood or stone that forms the bottom of a doorway and offers support when passing through a doorway) being completely rotted, and in addition, did not fit the overall style of our home. Generally, a front door is not something new home-owners tend to replace immediately; however it was uncovered during inspection so my word of advice would be to check this when looking at homes. There was bounce to the sill and to the floor when we first entered the house, like it was soggy.
Below you’ll see a before picture of the door (and house), as well as pictures showing the replacement of a few joists and plywood boards before the new door was installed (due to the discovery of carpenter ants living rent-free - oh the joys of owning a home!). Last but not least, you’ll see a picture showcasing our new door, sidelights & hardware…what do you think?
LINKS
Door - Jeld-wen Smooth-Pro Fiberglass All Panel Exterior Door - 2 Panel Square Top
Sidelight - Jeld-wen Smooth-Pro Fiberglass - Sidelight Full View - Clear (no decorative glass)
I custom-ordered the door and sidelight combo from Friend Lumber in Hudson, NH.
Exterior Handleset - Schlage F58CEN622 Century Single Cylinder Exterior Entrance Handleset from the F-Series in Matte Black
You will need to configure this with an interior handle
Interior Handle - Schlage F59-LAT Latitude Single Cylinder Interior Pack in Matte Black
BEFORE - existing door to be replaced
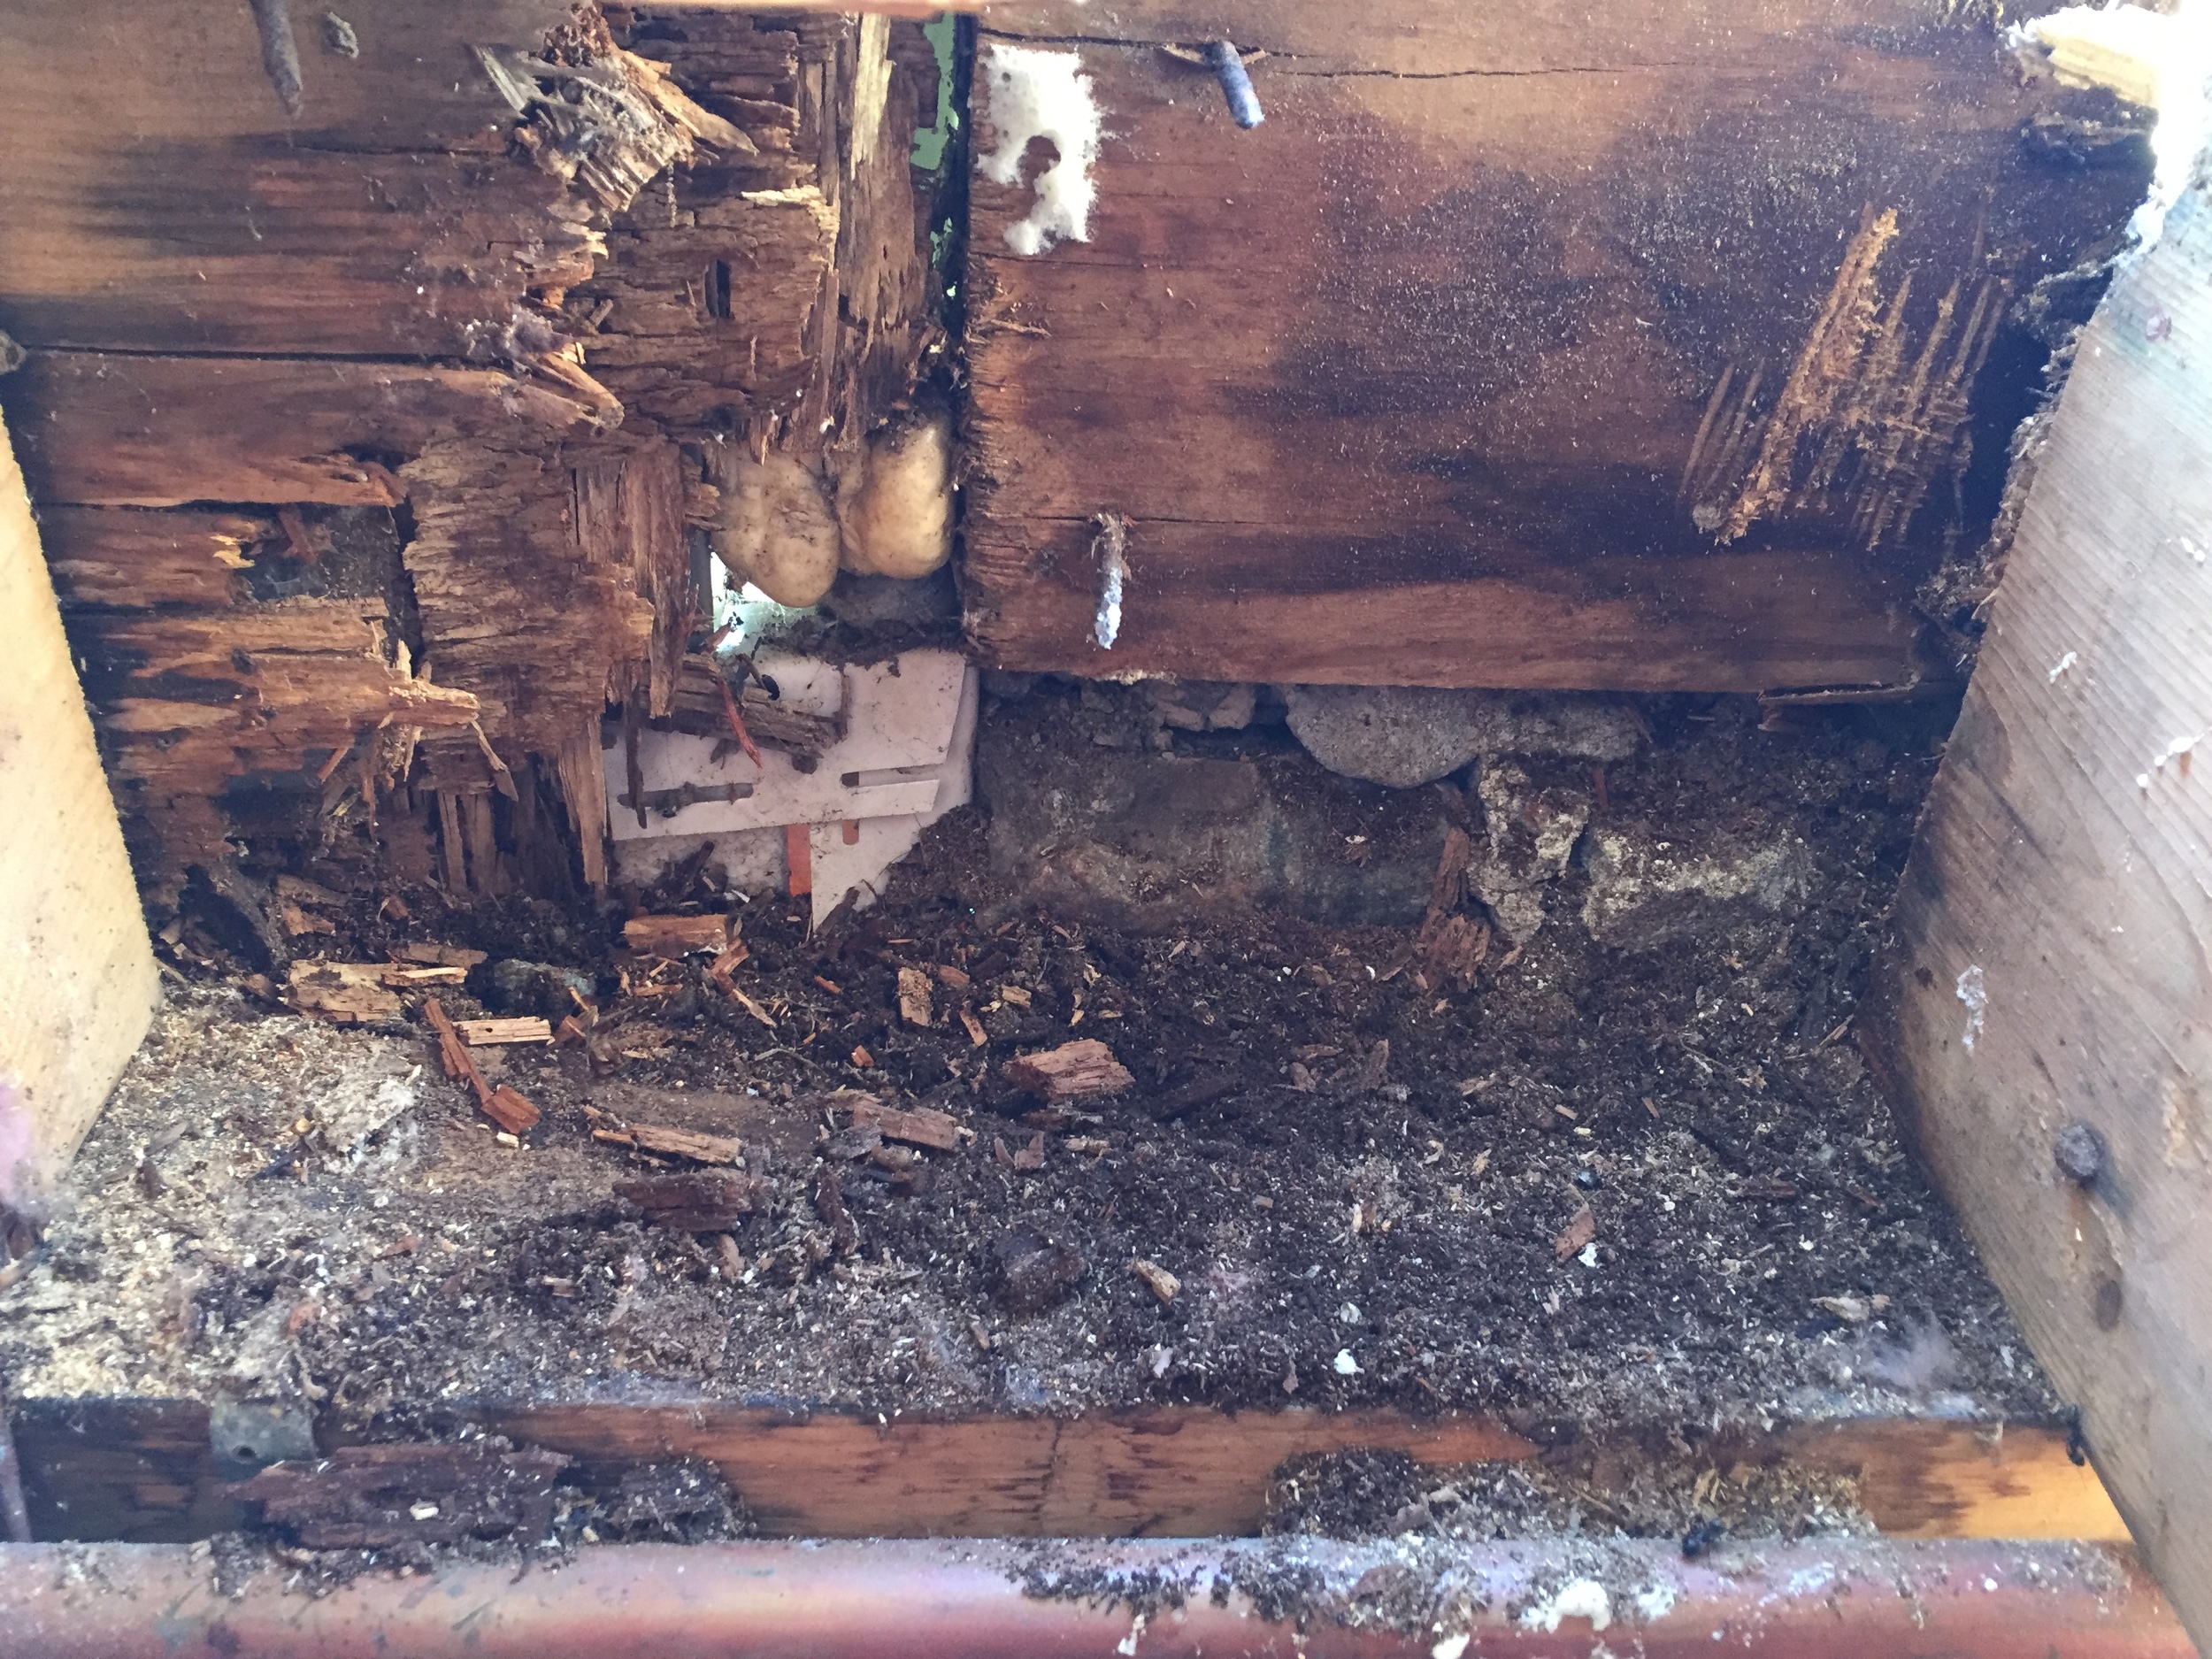
Joist Rot and Carpenter Ant damage

Joist Rot and Carpenter Ant damage

Joist Rot and Carpenter Ant damage

New plywood flooring and flashing tape to protect area by door opening

New plywood boards - exterior view under the siding

The new door is being installed!

AFTER - new door and sidelights installed!

EXTERIOR - New door hardware

INTERIOR - New door hardware
My Home Renovation
You are invited to join me on my exciting journey as I completely renovate my new home in charming Pelham, NH. I decided to start this blog to share my experiences (the good, the bad, and yes - even the ugly!) so homeowners who might also be embarking on this non-stop adventure themselves can learn tips & tricks, be inspired, and see first-hand experience into my personal world and vision of interior design.
My husband and I bought our first home in February, moving from city loft-living to a suburban cape-style home in the matter of only two weeks as our condo sold in only four days (due to my professional staging), and with the closing in six short weeks, we were off to the races in finding our new humble abode.
The vision my husband and I had was a classic home with character that we could utilize our expertise in design and renovation and combine our own finishes and style preferences. Due to the housing market not allowing for multiple options that met our needs, we quickly moved on a house with “good bones” in a quaint neighborhood that we would be able to make our home.
It’s an exciting time for me as I have always dreamt about designing a home based on the personal style of my husband and I, as I am fortunate to do everyday for clients, I am now able to fully explore my personal design style and allow creativity to get the best of me.
I will be posting pictures with detailed updates as the transition from “old” to “new” takes place across the interior, exterior, and yes…even landscaping changes! Please post any questions and/or comments you have along the way as I am eager to hear what you think!

THIS WAS TAKEN THE DAY WE MOVED IN! 4.29.16